Stephanie Kay Nutrition

Stephanie Kay Nutrition

Real Food for Real Life

  • recipes
    • all recipes
    • Breakfast
    • Lunch
    • Dinner
    • Soups & Stews
    • Salads
    • Sides
    • Snacks
  • nutrition
    • All Articles
    • Tips
    • FAQs
    • This vs. That
    • How To/Guides
    • Weight Loss
  • resources
    • 10 Days of Nutrition
    • 7-Day Meal Plan
    • Balanced Meal Guide
    • 5-Ingredient Cookbook
    • Lunch Box Cookbook
  • About
    • About Steph
    • Contact
  • recipes
    • all recipes
    • Breakfast
    • Lunch
    • Dinner
    • Soups & Stews
    • Salads
    • Sides
    • Snacks
  • nutrition
    • All Articles
    • Tips
    • FAQs
    • This vs. That
    • How To/Guides
    • Weight Loss
  • resources
    • 10 Days of Nutrition
    • 7-Day Meal Plan
    • Balanced Meal Guide
    • 5-Ingredient Cookbook
    • Lunch Box Cookbook
  • About
    • About Steph
    • Contact
  • Dinner
  • Breakfast
  • Meal Prep
  • Nutrition Tips
  • facebook
  • instagram
  • pinterest
  • youtube

Is Vegetable Oil Unhealthy?

Published on April 2, 2024 by Stephanie Kay

Vegetable oil has long been touted as a heart-healthy option, but recent research and discussion around vegetable oils, especially seed oils, have brought this into question. So, if you’re wondering if vegetable oils are a healthy or unhealthy choice, here is everything you need to know.

Clear plastic bottles of vegetable oil.

Table of contents

  • What is vegetable oil?
  • How are vegetable oils made?
  • List of Vegetable Oils and Seed Oils
  • Fatty Acid Composition of Vegetable Oils
  • Where are vegetable oils used?
  • The Health Concerns of Vegetable Oils
  • High in Omega-6 Fatty Acids
  • Trans Fats
  • Easily Damaged
  • Refined and Highly-Processed
  • Is olive oil a vegetable oil?
  • So, are all vegetable oils bad?
  • Best Alternatives to Vegetable Oil
  • How to Avoid Refined Vegetable Oils and Seed Oils

What is vegetable oil?

The term “vegetable oil” refers to any edible oil derived from plants. Any oil extracted from plant seeds, nuts, cereal grains, or fruit is considered a vegetable oil. Vegetable oils are generally mild, odorless, flavorless, and light-colored and are commonly used in cooking and food manufacturing (1).

Vegetable oil is not itself a type of oil, rather, it is a group of oils and the most popular vegetable oils include canola oil, corn oil, safflower oil, sunflower oil, and soybean oil. When a bottle of oil is labeled as “vegetable oil” it is either made of a single vegetable oil, typically soybeans, or a combination of vegetable oils. Vegetable oils also include a subset of oils known as “seed oils” which are derived from seeds.

Vegetable oils are sources of all fatty acids, including saturated, monounsaturated, and polyunsaturated fatty acids, however, their exact fatty acid composition varies based on the source plant and/or the processed techniques used in their production (2, 3).

How are vegetable oils made?

Vegetable oils are made by extracting oil from plants using either a chemical solvent or an oil mill.

Vegetable oils were essentially non-existent until the early 1900s when new industrial processes allowed them to be extracted. Most vegetable oils require extensive processing to extract their oils. While the exact processing methods will vary by oil, the stages of refined vegetable oil production involve degumming, neutralizing, bleaching, deodorizing, dewaxing, and fractioning (4, 5).

List of Vegetable Oils and Seed Oils

Here is a list of the most common edible vegetable oils:

  • Avocado oil
  • Canola oil
  • Coconut oil
  • Corn oil
  • Cottonseed oil
  • Grapeseed oil
  • Flax seed oil
  • Soybean oil
  • Safflower oil
  • Rice bran oil
  • Olive oil
  • Palm oil
  • Peanut oil
  • Sesame oil

Seed oils are a subset of vegetable oils that are derived from seeds and include (6):

  • Canola oil
  • Corn oil
  • Cottonseed oil
  • Grapeseed oil
  • Rice bran oil
  • Safflower oil
  • Soybean oil
  • Sunflower oil
Infographic with list of vegetable oils and seed oils.

Fatty Acid Composition of Vegetable Oils

Here is a breakdown of the saturated fatty acids (SFAs), monounsaturated fatty acids (MUFAs), and polyunsaturated fatty acids (PUFAs) in common vegetable oils and seed oils (7):

Type of OilSFAs MUFAsOmega-6 PUFAsOmega-3 PUFAs
Canola oil7%61%21%11%
Sunflower oil12%15%71%2%
Corn Oil13%28%57%2%
Olive oil15%74%9%2%
Soybean oil15%23%54%8%
Peanut oil19%47%33%1%
Palm oil51%38%10%1%
Coconut oil90%7%0%3%
Infographic on the fatty acid composition of vegetable oils.

Where are vegetable oils used?

Vegetable and seed oils are commonly used in the industrial food industry and are found in many ultra-processed foods. Refined vegetable oils are found in salad dressings, cereals, coffee creamers, cookies, crackers, granola bars, plant milk, popcorn, mayonnaise, and prepared meals, and are also used to make margarine, shortening, and fake butter or vegan spreads.

In addition to processed foods, vegetable oils, especially seed oils, are commonly used in restaurants, especially fast-food restaurants, as they are relatively inexpensive and highly versatile compared to other edible oils and animal fats. Moreover, many vegetable oils have a very high smoke point, which makes them great for deep frying.

In the past 100 years, vegetable oil consumption has dramatically increased in the Western diet at the expense of many traditional fats like butter and lard.

The Health Concerns of Vegetable Oils

While vegetable oils do have some potential health benefits, their drawbacks are concerning.

High in Omega-6 Fatty Acids

One of the main concerns with vegetable oils, specifically seed oils, is their high content of polyunsaturated fatty acids (PUFAs), namely omega-6 fatty acids.

Both omega-3 and omega-6 fatty acids are essential fatty acids that cannot be produced by the body and, therefore, must be consumed through the diet. These PUFAs have been shown to have numerous health benefits, however, the ratio in which they are consumed is important.

Studies of evolutionary diets have shown the optimal ratio of consumption of omega-6 to omega-3 fatty acids is somewhere in the range of 1:1 to 4:1 (8, 9). Unfortunately, due to the increased consumption of vegetable oils and the processed food products that contain them in the Western diet, this ratio has dramatically increased and has been seen as high as 20:1 in some cases (10). This increase has been correlated with increases in chronic inflammation and impaired gut health (11, 12).

Some studies have shown that a high intake of omega-6 fatty acids is associated with an increased risk of heart disease, however, other studies do not support this idea. In fact, a high consumption of linoleic acid, the most common omega-6 fat, has several health benefits (13).

Omega-6s are the PUFAs found in vegetable oils, and although they are essential to human health, in excess they may be harmful and inflammatory, however, further study is needed.

Trans Fats

Certain commercial vegetable oils contain trans fats, which are considered harmful to health.

While trans fats naturally occur in many animal foods, most of the trans fats in the Western diet come from partially hydrogenated oils (PHOs), which are formed through a manufacturing process that converts vegetable oil into solid fat at room temperature (14). A high intake of trans fats has been associated with many chronic diseases, including heart disease, obesity, cancer, and diabetes (15).

Trans fats have been banned in many countries, including the United States since 2015, however, in some places, it can be difficult to avoid them fully. Currently, the FDA still allows food manufacturers in the US to label their products “trans-fat-free” as long as there are fewer than 0.5 grams of these fats per serving (14).

Easily Damaged

Vegetable oils are easily prone to oxidation, which can cause the oils to go rancid.

Dietary fats differ in their chemical structure by the number of bonds they contain; saturated fats contain no double bonds, monounsaturated fats contain one double bond, and polyunsaturated fats contain two or more double bonds. differ by the number of double bonds their chemical structures contain.

Most vegetable oils are primarily composed of polyunsaturated fatty acids, and their high content of double bonds makes them more prone to oxidation (16). The double bonds in polyunsaturated fats in vegetable oil make them incredibly fragile and easily damaged by exposure to light, heat, and air.

Not only does the oxidation of vegetable oil damage the fat itself, but a high intake of polyunsaturated fatty acids in the diet and, therefore in your body, increases cell membranes sensitivity to oxidation. (17)

This susceptibility of vegetable oil to heat makes them a poor choice for cooking oils, as that is exactly what most households and restaurants use them for.

Refined and Highly-Processed

Most vegetable oils are highly refined and a form of ultra-processed food. The production of most vegetable oils is lengthy, technical, and requires many processing techniques. While food processing is not inherently harmful, many health-conscious consumers prefer to consume nutrient-dense whole foods, and it is generally advisable to prioritize unprocessed and minimally processed foods in the diet.

Moreover, certain vegetable oils use chemicals in the production process. Hexane is a chemical solvent used in the extraction of vegetable oils from seeds and grains. While it is removed in the refining process, traces of hexane residue may remain in the final product of these cooking oils.

That said, the hexane levels of vegetable oils and seed oils are nowhere near enough to cause toxicity, and hexane can be avoided by opting for expeller-pressed oil or cold-pressed oils, which are made without heat or chemicals (18).

Infographic with pros and cons of vegetable oils.

Is olive oil a vegetable oil?

Olive oil is a fruit oil and is, therefore, a vegetable oil. However, unlike vegetable oils from seeds, olive oil is far less processed than other vegetable oils, as it is simply made by pressing ripe olives into oil. Moreover, olive oil, as well as avocado oil, contains a different fatty acid profile, containing fewer omega-6 fatty acids than other vegetable oils, especially seed oils.

Moreover, olive oil has been well-studied and has a large body of evidence to support its health benefits. (19, 20)

So, are all vegetable oils bad?

Not all vegetable oils are unhealthier, however, vegetable oils from seeds that are ultra-processed and particularly high in omega-6 fatty acids should be limited. This includes canola oil, corn oil, cottonseed oil, grapeseed oil, rapeseed oil, rice bran oil, and soybean oil.

Before industrial processing, humans simply consumed naturally occurring animal fats in the form of such as butter, ghee, tallow, and lard, or minimally processed fats such as olive oil. Although many people are still concerned about saturated fat, they need not be, as saturation of these fats is their most beneficial part.

Best Alternatives to Vegetable Oil

The best alternatives to refined vegetable oils are animal fats and plant oils that have been minimally processed. Natural cooking fats such as butter, ghee, tallow, lard, or olive oil are great for cooking and dressing. When buying liquid oils such as extra-virgin olive oil or avocado oil, look for versions sold in a dark glass bottle as light can turn oils rancid, and ensure they are stored in a cool, dry place away from heat sources.

How to Avoid Refined Vegetable Oils and Seed Oils

Here are some simple tips to limit your consumption of refined vegetable oils.

  1. Don’t use them as cooking oil. To help reduce your consumption of refined vegetable oils and seed oils, when cooking at home, opt for higher quality cooking oils such as olive oil, and avocado oil, or use animal fats such as butter, ghee, or lard.
  2. Read the ingredient list. When purchasing prepared foods, read the ingredients list and try to avoid products that include refined vegetable oils and seed oils. While this may be difficult to do for all products, many brands offer alternative options made of olive oil or avocado oil as opposed to canola oil and soybean oil.
  3. Don’t stress too much. Given vegetable oils are commonly used in prepared foods and restaurants, there is no need to avoid them entirely, in fact, it is almost impossible.

In addition to solely focusing on limiting your consumption of omega-6 fatty acids, you can focus on consuming more omega-3 fatty acids in your diet to help balance out the ratio of essential fatty acids. Focus on consuming foods such as salmon, mackerel, sardines, flax seed, and walnuts, to help ensure you’re eating more omega-3 fats.

The Bottom Line

Vegetable oils are oils made from derived from plants and include a subset of oils known as seed oils which are derived from seeds. Certain forms of vegetable oils are refined and highly processed, are easily damaged by light, heat, and air, and contain high levels of omega-6 fatty acids, which may impact health negatively, however, more research is needed. It is best to limit the consumption of vegetable oils, namely seed oils, and prioritize sources of healthy fats such as animal fats and olive oil.

Carrot Cake Pancakes

Published on March 28, 2024 by Stephanie Kay

If you like carrot cake and enjoy pancakes, these carrot cake pancakes are the recipe for you! Filled with shredded carrots and spices, and finished with a cream cheese topping, these delicious pancakes are the perfect addition to a weekend breakfast or holiday brunch.

Stack of carrot cake pancakes on a plate with cream cheese topping, maple syrup, and chopped walnuts.

Whether you’re celebrating Easter, Christmas, a special occasion or holiday, or just enjoying a weekend brunch, these carrot cake pancakes with cream cheese syrup are the perfect way to celebrate. They are moist and fluffy, but they are easy to make and full of flavor, and a great way to use that bag of carrots sitting in your fridge.

Not to mention, these carrot cake pancakes keep well in the fridge and freezer so you can make a double or triple batch as a meal prep idea and enjoy them for breakfast tomorrow and days to come.

Stack of carrot cake pancakes on a grey plate with cream cheese toping and raisins on top and maple syrup being poured.

Why You’ll Love Them

  • Moist and Fluffy – The combination of shredded carrots and leavening agents ensures that these carrot cake pancakes have a cake-like texture.
  • Taste Like Dessert – Filled with carrot cake spices and topped with a yogurt cream cheese syrup topping, these pancakes are like having dessert for breakfast but are full of fiber.
  • Easy to Make – Ready in 30 minutes, these pancakes are very simple and quick to prepare.
  • Store Well – They keep well in the fridge and freezer so you can make these carrot cake pancakes ahead of time and enjoy them for days to come.
Ingredients for carrot cake pancakes; all-purpose flour, carrots, cinnamon, ginger, nutmeg, baking soda, lemon juice, salt, egg, milk, butter, brown sugar, chopped walnuts, cream cheese, yogurt, and maple syrup.

Ingredients + Substitutions

  • Flour – The recipe calls for all-purpose flour, but you can use whole wheat flour if preferred. Alternatively, you can use half all-purpose flour and half whole wheat flour.
  • Carrots – Because you can’t make carrot cake pancakes without carrots.
  • Milk – To thin the batter and add some protein. You can use dairy-free milk, such as almond milk, if needed.
  • Eggs – To ensure the pancakes are moist and fluffy while adding some protein and healthy fats. To make the pancakes vegan or egg-free, you can use swap each egg for a “flax egg”.
  • Vanilla Extract – To add flavor.
  • Spices – A mixture of cinnamon, ginger, and nutmeg to add carrot cake flavors.
  • Walnuts – To add some crunch and healthy fats, although they are optional.
  • Leavening Agents – A combination of baking powder, baking soda, lemon juice, and salt to ensure the pancakes are moist and fluffy.
  • Cream Cheese – The most important ingredient for the topping.
  • Greek Yogurt – To add some protein to the cream cheese topping.
  • Butter – To add some healthy fats and cook the pancakes.
  • Maple Syrup – To sweeten the cream cheese topping and serve with the pancakes.
Egg, melted butter, milk, vanilla extract, and shredded carrots in a large white mixing bowl.
Wet ingredients in a large white mixing bowl.

Dietary Adaptions

To Make them Gluten-Free: Swap the all-purpose flour for 1-to-1 gluten-free flour or oat flour.

To Make them Dairy-Free: Swap the milk for almond milk, cream cheese for dairy-free cream cheese, yogurt for coconut yogurt, and butter for coconut oil.

To Make them Vegan: Swap the milk for almond milk, egg for a “flax egg”, cream cheese for dairy-free cream cheese, yogurt for coconut yogurt, and butter for coconut oil.

Wet ingredients with dry ingredients on top in a white mixing bowl.
Mixed pancake batter for carrot cake pancakes.

How to Make Carrot Cake Pancakes

  1. Mix the dry ingredients. In a medium bowl, add the flour, baking powder, baking soda, salt, cinnamon, ginger, and nutmeg and stir until well combined.
  2. Mix the wet ingredients. In a large bowl, add the egg, melted butter, milk, vanilla extract, lemon juice, and brown sugar and whisk until well combined. Add the shredded carrots and stir again until well incorporated.
  3. Mix the batter. Add the dry ingredients to the wet ingredients and gently mix until well combined, then add the chopped walnuts and fold into the batter until well incorporated.
  4. Cook the pancakes. Heat a griddle or large skillet on medium heat, coat with butter, add 1/3 cup of batter for each pancake, and cook until bubbling on top, then flip and cook for an additional 1-2 minutes until golden brown. Continue working in batches until all the pancake batter is used.
  5. Make the cream cheese topping. While the carrot cake pancakes are cooking, add the cream cheese, Greek yogurt, vanilla extract, maple syrup, and salt to a medium bowl and whisk until well incorporated.
  6. Serve and enjoy! Once cooked, serve warm with a dollop of the cream cheese mixture on top and a drizzle of maple syrup.

You can find the detailed instructions in the recipe card below.

Stack of carrot cake pancakes on a plate with a fork and cream cheese topping, raisins, and walnuts on top, and a coffee mug in the background.

Red’s Nutrition Tip

While these pancakes contain 8 grams of sugar per 2-pancake serving, it’s important to note that most of the sugar content is from the natural sugars in the wheat, milk, and carrots. There is very limited added sugar in the pancake recipe and the addition of maple syrup is completely optional and can be reduced if needed.

Tips for the Best Carrot Cake Pancakes

Grate carrots as finely as possible. For the best results, use the finest side of a box grater or the smallest shredding blade of a food processor. Adding finely grated carrots to your batter will ensure that your carrot cake pancakes are light and fluffy without big chunks of carrot.

Let the batter rest. Time permitting, let the carrot cake pancake batter rest for 10 minutes before cooking the pancakes. Resting the batter allows the flour to absorb the liquid which will result in fluffy carrot cake pancakes.

Don’t flip the pancakes too early. Be patient and wait until bubbles form on the top of the pancakes before flipping them. Resisting the urge to flip them too early and will ensure your pancakes are as fluffy as possible.

Watch the heat. While you want your skillet to be warm, you don’t want it to be too hot. If it’s too warm, the bottom of the pancakes will burn before the top bubbles, resulting in overcooked and burnt carrot cake pancakes.

Plate of carrot cake pancakes with maple syrup poured on top on a wooden cutting board with a side of milk and coffee.

What to Serve with Carrot Cake Pancakes

Don’t skip the cream cheese topping. Let’s get real, carrot cake is all about the cream cheese icing and the cream cheese syrup topping is what makes these pancakes pop. Plus, the addition of cream cheese helps to add a boost of protein too.

Top with chopped walnuts and shredded coconut. While divisive, walnuts and shredded coconut are often included in carrot cake, and they make a great topping to these carrot cake pancakes. Once cooked, dollop the pancakes with the cream cheese mixture, and add a sprinkle of chopped walnuts and shredded coconut for the ultimate flavor and texture.

Serve with additional protein. These pancakes are primarily a source of carbohydrates and fat, therefore, serving with a source of protein can help to ensure you are consuming a balanced meal. These carrot cake pancakes would pair well with a side of Greek yogurt, scrambled eggs, or breakfast sausages.

Stack of carrot cake pancakes with a bite on a fork with maple syrup in the background.

Storage + Reheating

To Refrigerate: Once cooked, transfer the carrot cake pancakes to a plate, allow them to cool completely, then place them in an airtight container and store them in the fridge for up to 7 days.

To Freeze: Layer cooled pancakes between sheets of waxed paper, this will help to prevent them from sticking once frozen, then transfer them to an airtight container or bag in the freezer for up to 3 months.

To Reheat: The pancakes can be reheated on a baking sheet in the oven at 350°F for 3-5 minutes or in the microwave for 30 seconds to 1 minute. Frozen pancakes can be reheated in the toaster oven or the oven at 350°F for 5-10 minutes, or in the microwave for 2-3 minutes.

More Pancakes Recipes:

  • Blueberry Yogurt Pancakes
  • Lemon Ricotta Pancakes
  • Apple Cinnamon Pancakes
  • Banana Oatmeal Pancakes
  • Chocolate Protein Pancakes
  • Oatmeal Applesauce Pancakes

And, if you want more carrot cake-inspired recipes, be sure to check out my carrot cake baked oatmeal, carrot cake overnight oats, and carrot cake breakfast cookies for more delicious breakfast recipes.

Fresh Basil Pesto

Published on March 26, 2024 by Stephanie Kay

Learn how to make homemade fresh basil pesto with this quick and easy 6-ingredient recipe. Ready in 5 minutes, this basil pesto recipe is the perfect addition to pasta, salads, pizza, and more!

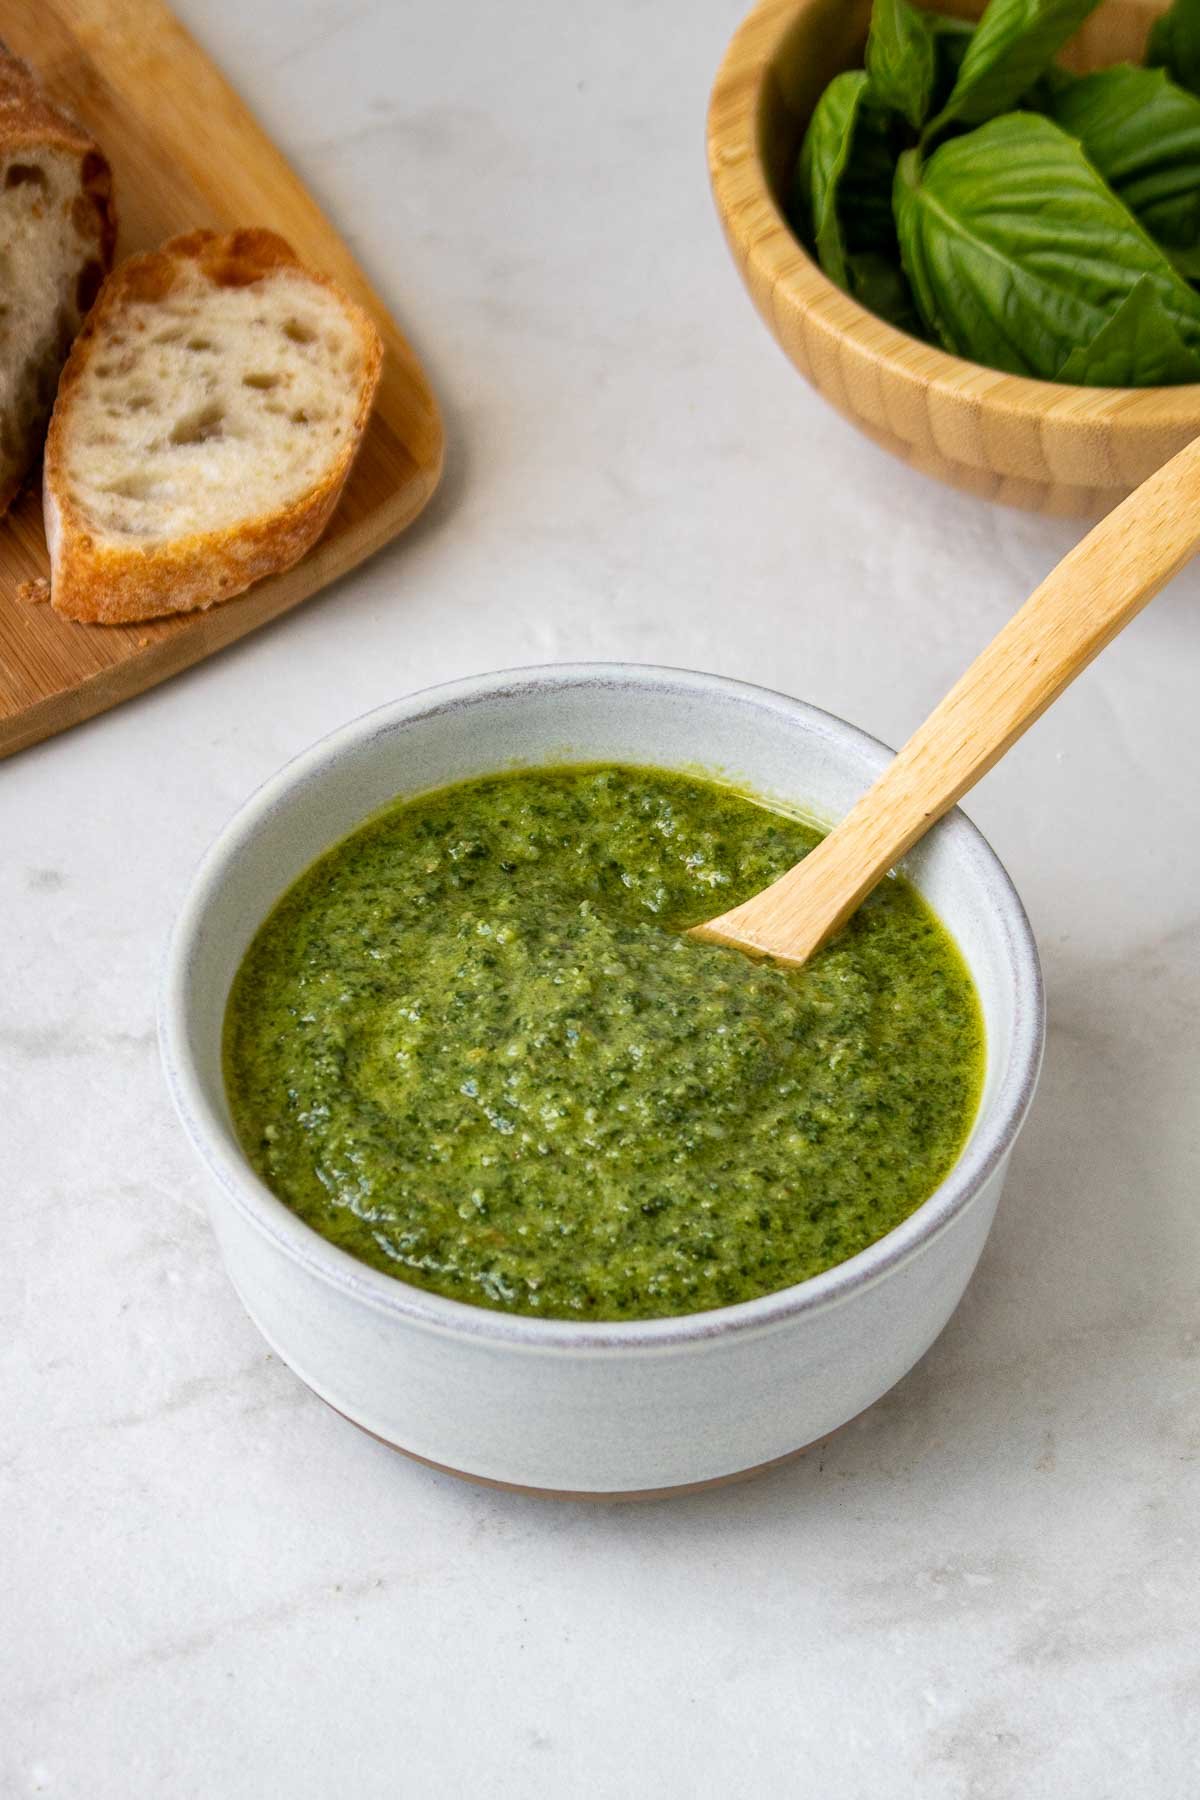
Small bowl of fresh basil pesto with a wooden spoon with a side of crusty bread and basil leaves.

If you’ve never made a classic basil pesto, you might be surprised at just how easy it is to make. Although it’s easy to find store-bought pesto in almost all major grocery stores, making homemade pesto is far cheaper and more flavorful.

In a few minutes, you can whip up a jar of homemade basil pesto that you can use in pasta, on pizza, in salad dressings, as a sauce, or in dips. Not to mention, it keeps well in the fridge and freezes well so you can make a massive batch and enjoy it for weeks to come.

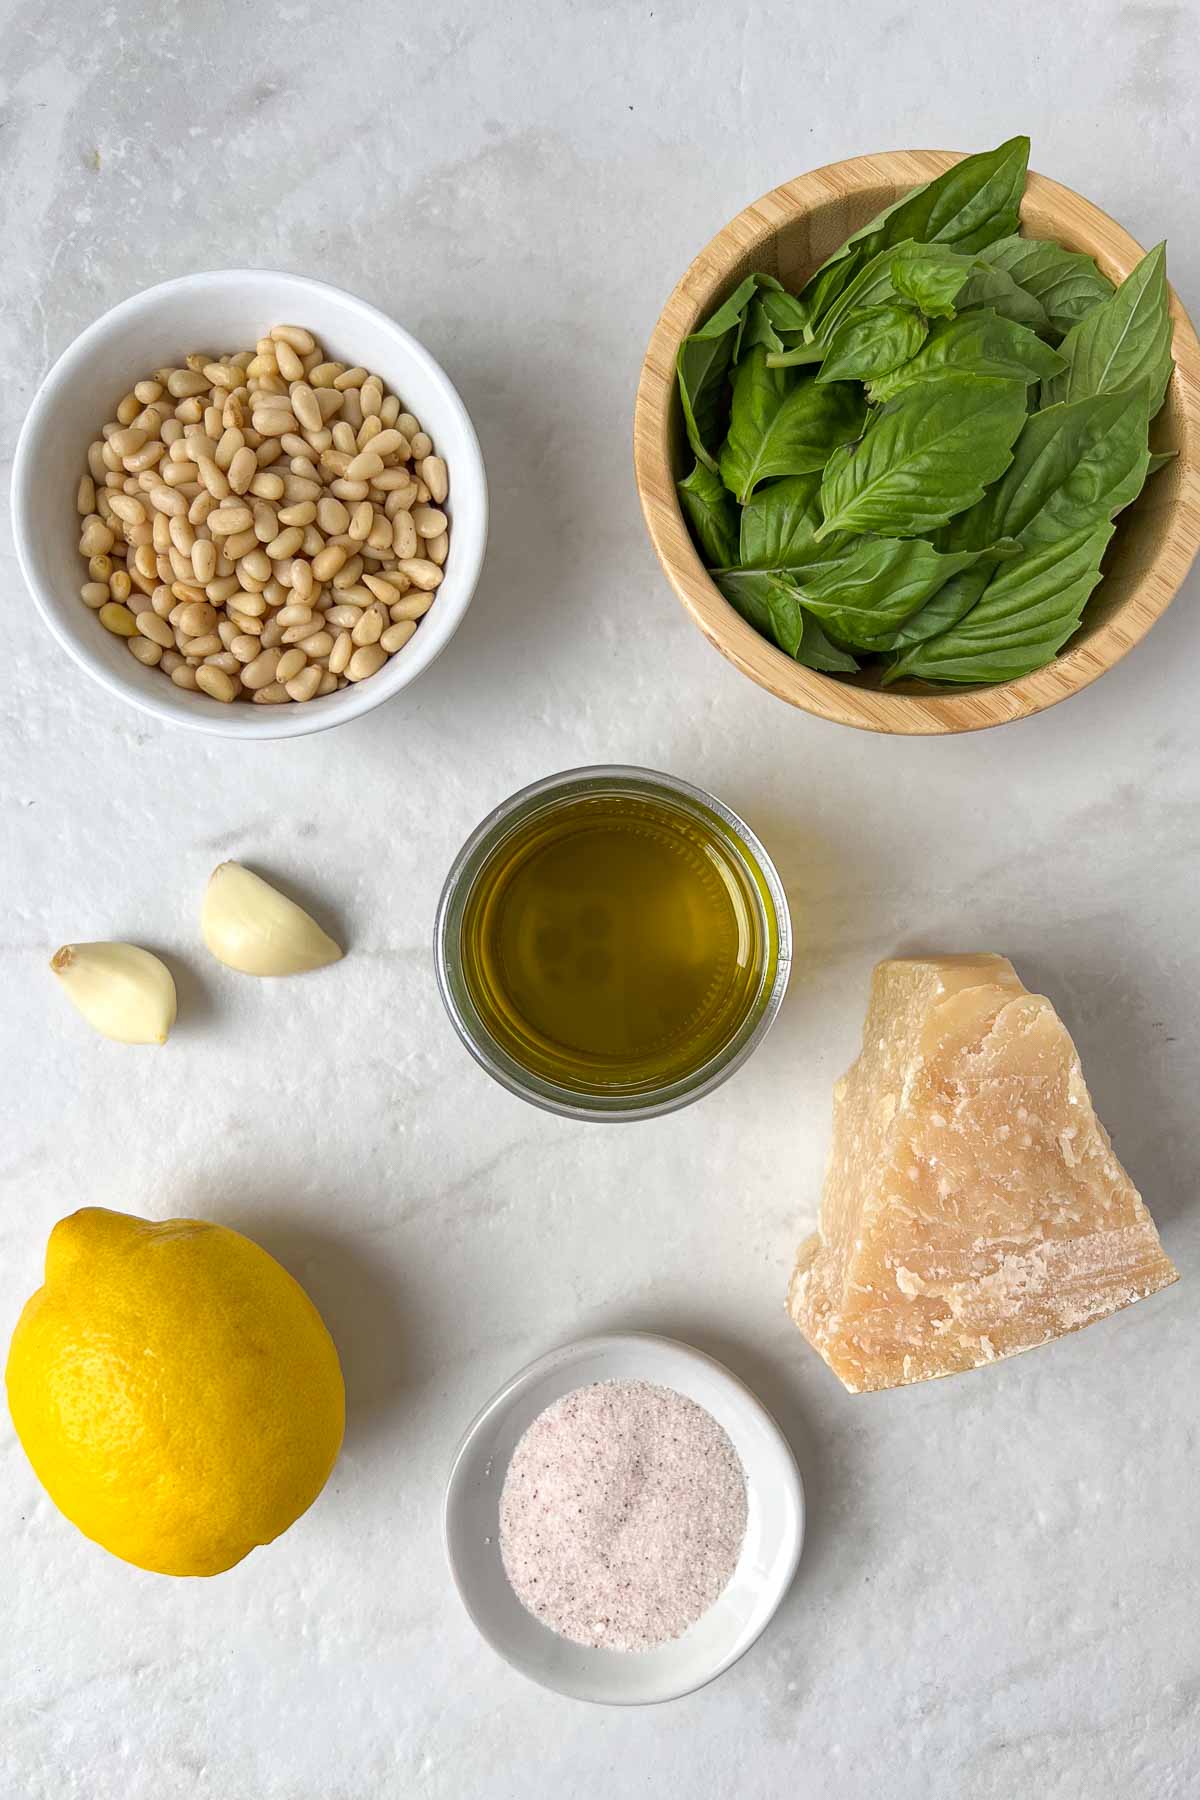
Ingredients for a homemade basil pesto recipe: basil leaves, pine nuts, garlic, parmesan cheese, lemon juice, olive oil, salt, and pepper.

Ingredients + Substitutions

  • Fresh Basil – You’ll need fresh basil leaves to make fresh basil pesto. If you don’t have basil, you could also use arugula, parsley, or spinach.
  • Pine Nuts – To add a bit of texture and flavor, you can use raw or toasted pine nuts. If you don’t have pine nuts, softer nuts such as walnuts or pistachios will also work well, as will sunflower seeds.
  • Garlic – To add flavor. White fresh garlic is recommended, you can use garlic powder if needed.
  • Olive Oil – To ensure the pesto is rich and creamy. I recommend using extra virgin olive oil, but any olive oil will work.
  • Lemon Juice – A bit of acid to balance the flavors.
  • Parmesan Cheese – To give the pesto its creamy texture. For the best results, I recommend using fresh parmesan cheese and grating it yourself, pre-grated parmesan cheese just doesn’t have the same flavor and often has added ingredients. I used Parmigiano-Reggiano but Grana Padano and pecorino Romano cheese will also work.
  • Salt and Pepper – To season the pesto. I recommend sea salt or kosher salt and freshly ground black pepper, but any salt and pepper will work.
Food processor with raw pine nuts and garlic cloves.
Food processor with blended pine nuts and garlic.

Dietary Adaptions

To Make it Gluten-Free: No adaptations are needed, this recipe is gluten-free.

To Make it Dairy-Free: Swap the parmesan cheese for nutritional yeast.

Food processor with basil leaves.
Food processed with blended pine nuts, garlic, and basil.

How to Make Homemade Basil Pesto

  1. Blend the pine nuts and garlic. In a food processor or blender, add the pine nuts and fresh garlic cloves and pulse until chunky.
  2. Add the basil. Add the fresh basil leaves, salt, and lemon juice to the food processor and pulse again until chunky.
  3. Pour in the olive oil. With the blade running, slowly drizzle the extra virgin olive oil into the food processor until well incorporated with the basil mixture.
  4. Add the parmesan cheese. Add the fresh parmesan cheese and blend again until the mixture is smooth and creamy.
  5. Taste and adjust as needed. Taste the basil pesto and adjust the seasoning with additional salt and pepper as needed. If you prefer a thinner pesto, you can add more olive oil and blend again until smooth.
  6. Serve and enjoy! The pesto can be used immediately or stored in the fridge for up to 2 weeks or in the freezer for up to 6 months.

You can find the detailed instructions in the recipe card below.

Food processor blended pine nuts, fresh garlic, basil, lemon juice, and extra-virgin olive oil.
Food processor with basil pesto and grated fresh parmesan cheese on top.

Ways to Use Homemade Pesto

  • Add it to pasta. Add fresh basil pesto to your favorite tomato pasta sauce, or vegetable lasagna recipe, or use it as a simple sauce for pasta on its own.
  • Use it as pizza sauce. Swap traditional pizza sauce for pesto sauce or drizzle a bit on top of your favorite pizza before serving.
  • Use it as a spread. Add pesto to sandwiches, wraps, and burgers to add flavor, healthy fats, and greens.
  • Add it to salad dressing. Thin pesto with a bit of fresh lemon juice or red wine vinegar to create a quick and easy dressing for a green salad or pasta salad.
  • Add it to vegetables. Toss steamed, grilled, or roasted vegetables in fresh pesto to add flavor.
  • Use it as a sauce. Use pesto as a flavorful sauce for grilled chicken, baked salmon, buddha bowls, or scrambled eggs.
  • Garnish a soup. Dollop or drizzle pesto onto a soup to add flavor and color.
  • Add it to yogurt. Stir a bit of basil pesto into Greek yogurt or skyr to make a healthy dip.
Small bowl of fresh basil pesto with a spoon with a cutting board of sliced bread and wooden bowl basil leaves on the side.

Storage

To Refrigerate: Place the basil pesto in a small jar or airtight container and store it in the fridge for up to 2 weeks.

To Freeze: Place the basil pesto in an airtight container or ice cube trays covered with a freezer bag and store it in the freezer for up to 6 months. Allow the frozen pesto to thaw completely before using.

Fresh Basil Recipes:

  • Chicken Pest Pasta
  • Baked Pesto Salmon
  • Pesto Grilled Shrimp
  • Pesto Chicken Quinoa Bowl
  • Ricotta Pesto Fried Eggs

Southwest Quinoa Salad

Published on March 21, 2024 by Stephanie Kay

Filled with black beans, corn, avocado, and veggies, and tossed in a zesty chili lime dressing, this southwest quinoa salad is a quick and easy recipe that works well as a light main course, colorful side dish, or easy meal prep idea.

I don’t know about you, but I love hearty bean and grain salads. Not only do they keep for days in the fridge, but they are so versatile as they can be enjoyed hot or cold, for lunch or dinner, on their own, or as part of a larger meal.

Since quinoa is a high-protein grain, it’s a great base for this southwest quinoa salad recipe as it helps to boost the protein content of the dish and provides some healthy fats and fiber at the same time. Paired with veggies and the chili lime dressing, this easy quinoa salad recipe is the perfect addition to a picnic, BBQ, potluck, or family dinner, and works equally well as a make-ahead meal for healthy weekday lunches.

Close up of southwestern quinoa salad in a white bowl with fresh cilantro on top.

Why You’ll Love It

  • Quick and Easy to Make – Ready in 30, this southwest quinoa salad recipe is super quick to prepare.
  • Full of Flavor – The zesty chili lime dressing ensures this salad is full of flavor.
  • High in Fiber – The combination of quinoa, black beans, veggies, and avocado ensures this healthy quinoa salad has over 7 grams of fiber per serving.
  • Great for Meal Prep – This southwestern quinoa salad keeps well in the fridge for several days making it a great make-ahead meal.
Ingredients for southwest quinoa salad recipe: quinoa, black beans, corn, red bell pepper, red onion, cilantro, avocado, olive oil, limes, garlic, chili powder, and cumin.

Ingredients + Substitutions

  • Quinoa – To add some plant-based protein to the salad. You can use white quinoa, red quinoa, or tri-color quinoa blend.
  • Black Beans – To add some more plant-based protein and fiber to this southwestern quinoa salad. I used canned black beans, but you can cook dry black beans if preferred. If you don’t like black beans, kidney beans, pinto beans, or chickpeas will also work.
  • Corn – The recipe calls for frozen corn, however, you can use cooked fresh corn or canned corn if needed.
  • Red Bell Pepper – To add some veggies and color to the salad. The recipe calls for a red bell pepper, however, yellow or orange bell peppers will also work.
  • Red Onion – To add more color and flavor. If you’re not a fan of red onions, green onions will also work well.
  • Avocado – To add some healthy fats and creaminess to the salad.
  • Cilantro – To add some freshness and brightness. If you don’t like cilantro, you can swap it for parsley or omit it completely.
  • Olive Oil – To make the dressing, avocado oil will also work well.
  • Lime Juice – To balance the dressing.
  • Garlic – To flavor the dressing.
  • Honey – To add a touch of sweetness to the dressing. If you don’t like honey, you can use maple syrup instead or omit it completely.
  • Spices – A mixture of ground cumin, chili powder, salt, and pepper to season the dressing.

Dietary Adaptions

To Make it Gluten-Free: This recipe is gluten-free, no adaptations are needed.

To Make it Dairy-Free: This recipe is dairy-free, no adaptations are needed.

Large salad bowl with cooked quinoa.
Large salad bowl with cooked quinoa with black beans, corn, bell pepper, red onion, and cilantro on top.

How to Make Southwestern Quinoa Salad

  1. Cook the quinoa. Add the uncooked quinoa to a pot of boiling water, season with a pinch of salt, and cook for 15 minutes until tender. Strain the cooked quinoa in a fine mesh colander and then run under cold water until cooled.
  2. Chop the veggies. While the quinoa is cooking, chop the bell pepper, red onion, and avocado, thaw the corn, and strain and rinse the black beans.
  3. Make the dressing. In a small bowl or jar, add the dressing ingredients: olive oil, lime juice, honey, garlic, cumin, chili powder, salt, and black pepper, and whisk to combine.
  4. Mix the salad. In a large bowl, add the quinoa, black beans, corn, bell pepper, red onion, avocado, and cilantro, toss to combine, cover with dressing, and toss again until everything is well coated.
  5. Serve and enjoy. The southwest quinoa salad can be served immediately or stored in the fridge for several days.

You can find the detailed instructions in the recipe card below.

Quinoa, black beans, corn, bell pepper, red onion, and cilantro mixed in a large bowl.
Quinoa, black beans, corn, bell pepper, red onion, and cilantro mixed in a white bowl with cubed avocado on top.

Red’s Nutrition Tip

Quinoa is a good source of plant-based protein; however, it is considered an incomplete protein source as it does not contain all essential amino acids in the appropriate ratios. Fortunately, pairing it with black beans creates a complete protein and increases the fiber content of the salad at the same time.

Chili lime dressing in a small mason jar.

Variations and Tips for the Best Quinoa Salad

  • Cook the quinoa in broth. To add extra flavor to a quinoa salad, cook the quinoa in chicken broth or vegetable broth instead of water. To ensure the salad is gluten-free, use certified gluten-free broth.
  • Season it well. Quinoa has a rather bland and neutral taste, so don’t skimp on the salt and pepper when seasoning the salad. You can add additional cumin, chili powder, and spices to this southwest quinoa salad if you want to make it extra tasty.
  • Make extra dressing. This zesty lime dressing is so tasty you’ll want to make extra. Plus, additional dressing can be used to brighten the salad when eating leftovers.
  • Add more fresh veggies. You can increase the vegetable content of this salad by adding extra bell pepper, red onion, and corn, or add additional fresh vegetables such as cherry tomatoes, cucumber, or arugula.
  • Add shredded chicken. To increase the protein content of this southwest quinoa salad, add some leftover chicken to the mix.
  • Add the avocado when serving. If making this salad a day or several days ahead of time, don’t add the avocado until you are ready to serve. This will ensure your avocado remains green and creamy and doesn’t brown in the fridge.
  • Serve it warm. While this recipe is designed to be a cold quinoa salad, you can serve it warm too! Instead of cooling the quinoa after cooking, add it to the bowl warm, then sauté the bell peppers and onion, warm the beans, and grill the sweet corn before adding them to the bowl, then top everything with fresh cilantro, avocado, and the dressing and serve the salad warm.
  • Serve it with tortilla chips. While this is designed to be served as a salad, it works well as a chunky dip too! You can serve it with a big bowl of tortilla chips as a snack or appetizer.
Southwest quinoa salad in a white bowl with a gold serving spoon with avocado on top.

Serving Suggestions

This southwest quinoa salad can be enjoyed on its own as a healthy vegan meal and is also a great addition to a BBQ, potluck, or party as it can easily feed a crowd. While it works well with anything off the grill, I think it pairs particularly well with a flavorful grilled chicken recipe such as:

  • Grilled Cilantro Lime Chicken
  • Honey Mustard Chicken Thighs
  • Lemon Garlic Chicken Thighs
  • Lemon Pepper Chicken Thighs
  • Honey Lime Chicken Skewers
Close up of southwestern quinoa salad in a white bowl.

Storage

To Refrigerate: Once dressed, this southwest quinoa salad can be stored in an airtight container in the fridge for up to 4 days. Season with additional salt and black pepper to taste before serving.

To Meal Prep: If making this quinoa salad ahead of time, prepare the salad (without the avocado) and dressing separately and store them in airtight containers. When you are ready to eat, add the avocado and dressing to the salad.

More Easy Quinoa Salad Recipes:

  • Quinoa Chickpea Salad
  • Lentil and Quinoa Salad
  • Quinoa Edamame Salad
  • Mediterranean Quinoa Bowl

12 Most Calorie-Dense Foods

Published on March 19, 2024 by Stephanie Kay

Whether you’re looking to gain weight, lose weight, or just learn a little bit more about nutrition, understanding calorie density and foods that are the most energy-dense can be a key to your success. So here is a list of the most calorie-dense foods.

Olive oil, salmon, almonds, cashews, avocados and walnuts on a white background.

What are calorie-dense foods?

Calorie-dense foods are foods that have a high-calorie content relative to their weight or volume.

The term “calorie density”, sometimes referred to as “energy density”, describes the number of calories in a food relative to its weight and is typically described per 100 grams. The calorie density of a food is determined by its macronutrient composition; fats provide 9 calories per gram, protein provides 4 calories per gram, and carbohydrates protein 4 calories per gram. Furthermore, the weight of food is also impacted by fiber content, which provides 2 calories per gram, and water content, which provides 0 calories per gram.

Therefore, the more fat, less fiber, and less water a food contains the more calories it will contain, and the less fat, more fiber, and more water a food contains the fewer calories it will contain.

Are calorie-dense foods unhealthy?

It is important to note that calorie-dense whole foods are not unhealthy. Calories are essential to life, as they are the body’s primary sources of energy, and cannot be avoided entirely.

While is it important to monitor the amount of calorie-dense ultra-processed foods in the diet, as they typically have a low nutrient density and are often referred to as “empty calories”, many calorie-dense whole foods are also very nutrient-dense foods and can most certainly be included in a healthy diet. Many foods with a high-calorie density are also rich in micronutrients such as vitamins, minerals, and phytonutrients.

Calorie density is simply a nutrition concept that you can use to support your personal health goals and dietary needs. Generally speaking, if your goal is weight loss, it is best to limit the portion size of calorie-dense foods, however, if your goal is to bulk or gain weight, consuming calorie-dense foods can help to support healthy weight gain.

Infographic of the most calorie dense foods: oil, butter, nuts, nut butter, seeds, cheese, dried fruit, sweeteners, red meat, fatty fish, avocado, and eggs.

Top High-Calorie Foods

Here is a list of the top 12 most energy-dense foods:

1. Oil

Cooking oils, such as olive oil, avocado oil, and coconut oil, are some of the most calorie-dense foods available. Since they are only sources of fat and do not contain protein or carbohydrates, gram per gram, their calorie density is higher than any other food. Coconut oil contains 895 calories, olive oil contains 884 calories, and avocado oil contains 884 calories per 100-gram serving (1, 2, 3).

The suggested portion size for oil is 1 tablespoon or one thumb-tip-sized serving.

2. Butter

Like oil, butter is solely a source of fat and does not contain any protein or carbohydrates, and is, therefore, very calorie dense. Butter alternatives such as ghee, margarine, shortening, and vegan buttery spreads are also very high in calories. Butter contains 717 calories per 100-gram serving (4).

The suggested portion size for butter is 1 tablespoon or one thumb-tip-sized serving.

3. Nuts

Nuts are often touted as a healthy snack, and they are, but it’s also important to understand that they are very calorie-dense. While nuts do contain some protein and carbohydrates, primarily in the form of fiber, they are primary sources of fat, which makes them high-calorie foods. Pecans contain 750 calories, macadamia nuts contain 712 calories, and almonds contain 626 calories per 100-gram serving (5, 6, 7).

The suggested portion size for nuts is 1/4 cup or one cupped handful-sized serving.

4. Nut Butter

Along with nuts, nut butters have a high-calorie density. Nut butters are made by grinding nuts into a smooth spread, which is primarily a source of fat. Although some brands will add additional sugar and oil, even 100% natural nut butters are calorie dense. Almond butter contains 645 calories, peanut butter contains 632 calories, and cashew butter contains 587 calories per 100-gram serving (8, 9, 10).

The suggested portion size for nut butter is 2 tablespoons or one thumb-sized serving.

5. Seeds

While seeds do contain moderate levels of protein and some carbohydrates, seeds are primarily sources of fat, making them very energy-dense foods. Although some nuts are high in dietary fiber, particularly chia seeds and flax seeds, all seeds have a high-calorie content per gram compared to other foods. Sunflower seeds contain 609 calories, pumpkin seeds contain 555 calories, hemp seeds contain 553 calories, and chia seeds 486 calories per 100-gram serving (11, 12, 13, 14).

The suggested portion size for seeds is 2 tablespoons or one thumb-sized serving.

6. Cheese

Cheese contains protein, carbohydrates, and fat, but its high-fat content relative to other foods makes it one of the most calorie-dense foods. Hard cheeses are higher in calories than soft cheeses, as cheeses with more moisture have a lower calorie density. Cheddar cheese contains 403 calories, parmesan cheese contains 392 calories, and mozzarella cheese contains 296 calories per 100-gram serving (15, 16, 17).

The suggested portion size for cheese is 1 ounce or one thumb-sized serving.

7. Dried Fruit

Although dried fruit is a good source of dietary fiber, its lack of water increases its concentration of carbohydrates and sugar, making it much more calorie-dense than fresh fruit. Banana chips contain 519 calories, raisins contain 296 calories, dates contain 277 calories, and dried apricots contain 241 calories per 100-gram serving (18, 19, 20, 21).

The suggested portion size for dried fruit is 1/4 cup or one cupped handful-sized serving.

8. Sugars

Unlike calorie-dense whole foods, sweeteners and sugars have a high-calorie density and low nutrient density, which is why they are often referred to as “empty” calories. While some forms of sugar, such as honey and maple syrup, do contain some micronutrients their nutrient-to-calorie ratio per serving is low. White sugar contains 401 calories, brown sugar contains 380 calories, honey contains 304 calories, and maple syrup contains 270 calories per 100-gram serving (22, 23, 24, 25).

The suggested portion size for sugar is 1 tablespoon or one thumb-tip-sized serving.

9. Red Meat

Meat is a great source of protein and there are many lean cuts available, however, fatty cuts of meat can be very calorie dense. This is particularly true for red meat, such as beef, veal, lamb, and pork, which tends to be higher in fat than poultry, such as chicken and turkey. While you can find lean cuts of red meat, such as tenderloin, sirloin steak, and lean ground beef, which are high-protein, low-calorie foods, fattier cuts such as ribs, ribeye steak, and porterhouse steak are very energy-dense foods. A ribeye steak contains 248 calories, a T-bone steak contains 212 calories, and a porterhouse steak contains 145 calories per 100-gram serving (26, 27, 28).

The suggested portion size for red meat is 3 ounces or one palm-sized serving.

10. Fatty Fish

Fish is a good source of protein and fatty fish is a wonderful source of healthy fatsf, however, this also makes it a calorie-dense food. However, as with all whole foods on this list, it’s important to remember that nutrient density often comes along with calorie density and does not make a food an unhealthy choice. Mackerel contains 205 calories, eel contains 184 calories, herring contains 158 calories, and salmon contains 142 calories per 100-gram serving (29, 30, 31, 32).

The suggested portion size for fatty fish is 3 ounces or one palm-sized serving.

11. Avocados

Avocados are a wonderful source of healthy fats and fiber, however, their low water content compared to other fruits makes them one of the top high-calorie foods. Avocados contain 160 calories per 100-gram serving (33).

The suggested portion size for avocado is 1/3 of an avocado or one cupped handful-sized serving.

12. Eggs

Eggs are one of the most nutrient-dense foods on the planet, as they are a wonderful source of protein, fats, vitamins, minerals, antioxidants, and dietary cholesterol. However, the high content of healthy fats in eggs does make them both energy-dense and nutrient-dense. Eggs contain 143 calories per 100-gram serving (34).

The suggested portion size for eggs is 2 eggs or one palm-sized serving.

Do calorie-dense foods fill you up?

Calorie-dense foods can be very filling foods, however, not all calorie-dense foods are filling. Satiety is greatly impacted by protein and fiber, so building balanced meals with foods that are rich in protein and fiber, can help to fill you up. Calorie-dense foods that are also nutrient-dense, particularly in protein and fiber, such as meat, fish, eggs, avocado, nuts, and seeds, can help to increase feelings of fullness. On the contrary, calorie-dense foods that are not nutrient-dense, such as oil, alcohol, chips, donuts, and cookies, will not keep you full.

Should you eat calorie-dense foods for weight gain?

Eating calorie-dense whole foods is a good way to support healthy weight gain. Reaching for nutrient-dense and calorie-dense foods, such as red meat, eggs, and full-fat dairy products, can help to increase calorie intake while maintaining a high nutrient intake and supporting healthy weight gain.

Should you avoid calorie-dense foods for weight loss?

Calorie-dense foods do not need to be avoided for weight loss, but you should pay attention to the portion size you consume. While butter, cheese, and red meat can and should be included in a healthy diet with a goal of weight loss, practicing portion control can help control your calorie intake and ensure you are in a calorie deficit to support your weight loss goals.

The Bottom Line

Calorie-dense foods are foods that have a high-calorie content relative to their weight or volume, however, not all calorie-dense foods are unhealthy foods. Many calorie-dense foods are also nutrient-dense, such as olive oil, nuts, seeds, red meat, fatty fish, avocados, and eggs, and can be included in a healthy diet. Whether your goal is weight loss or healthy weight gain, it is best to be mindful of your portion size of high-calorie foods.

No-Boil Pasta Bake

Published on March 14, 2024 by Stephanie Kay

Made with minimal ingredients, this quick and easy no-boil pasta bake turns pantry staples into a delicious dinner that makes great leftovers too.

No boil pasta bake in a white baking dish with a wooden serving spoon and chopped basil and parmesan on top.

If you’re looking for a one-pan meal with minimal prep and minimal clean-up, look no further than this no-boil pasta bake! This dump-and-bake recipe is perfect for busy weeknights when you need to get something on the dinner table in a pinch without boiling pasta or cleaning multiple pots and pans.

This no-boil pasta casserole can be enjoyed on its own as a healthy vegetarian meal or paired with grilled chicken, steak, or fish and a green salad to create a simple crowd-pleasing feast that will make the whole family happy.

Serving of no boil pasta bake in a bowl with a fork with parmesan and basil on top.

Why You’ll Love It

  • Made in One Dish – Made in a single casserole dish, this recipe ensures prep and clean-up are minimal.
  • Minimal Ingredients – This no-boil pasta bake is made with only 10 ingredients.
  • Vegetarian – This recipe is filled with almost 20 grams of vegetarian protein for everyone to enjoy.
  • Stores Well – This baked pasta is a great make-ahead meal as it keeps well in the fridge and freezer.
Ingredients for no boil pasta bake; pasta, marinara sauce, ricotta, mozzarella, spinach, Italian seasoning, onion powder, garlic powder, salt, and black pepper.

Ingredients + Substitutions

  • Pasta – I used fusilli pasta for my recipe, but you can use any short-cut pasta shape, such as ziti, penne, cavatappi, or farfalle.
  • Marinara Sauce – To make the pasta sauce. The recipe calls for a jar of plain marinara sauce, but you use any jar of your favorite store-bought pasta sauce.
  • Ricotta Cheese – To add a bit of protein and make the pasta bake creamy. If you don’t like ricotta cheese, cottage cheese, cream cheese, or heavy cream will also work.
  • Spinach – To add some greens. You can use fresh or frozen, see the notes section of the recipe card for details, or omit it completely if you prefer.
  • Mozzarella Cheese – For topping, shredded cheddar cheese would also work well.
  • Parmesan Cheese – For topping and to add a bit more protein.
  • Onion and Garlic – To add flavor and fragrance. The recipe calls for onion powder and garlic powder, but you can use fresh onion and garlic if needed. See the notes section of the recipe card for details.
  • Italian Seasoning – To add flavor to the sauce. If using a flavored pasta sauce, you can omit it.
  • Salt and Pepper – To season.
  • Fresh Basil – To serve, fresh parsley will also work.
White baking with with marinara sauce, ricotta, spinach, Italian seasoning, onion, garlic, salt, and black pepper.
Marinara sauce, ricotta, spinach, water, and herbs mixed in a baking dish.

Dietary Adaptions

To Make it Gluten-Free: Use gluten-free pasta.

To make it Dairy-Free: Swap the ricotta cheese for coconut milk and omit the mozzarella and parmesan topping.

To Increase the Protein Content: Add 1 pound of cooked ground beef, ground turkey, ground chicken, or sausage to the pasta mixture before baking.

Wet ingredients mixed with fusilli pasta on top.
Fusilli pasta mixed into the wet ingredients ready for the oven.

How to Make a No-Boil Pasta Bake

  1. Mix the pasta and sauce. In a large casserole dish, add marinara sauce, ricotta, water, Italian seasoning, garlic powder, onion powder, and salt, and stir to combine.
  2. Bake until al dente. Cover the dish tightly with aluminum foil, transfer it to an oven at 400°F, and bake for 40-45 minutes until the pasta is tender.
  3. Top with mozzarella. Remove the foil, add shredded mozzarella, and bake for 5-10 minutes until golden.
  4. Serve and enjoy! Once cooked, allow the pasta to bake to cool for 5 minutes, then serve with fresh basil on top.

You can find the detailed instructions in the recipe card below.

Baked pasta in baking dish.
Baked pasta in baking dish with melted mozzarella on top.

Red’s Nutrition Tip

Consider this recipe a friendly reminder that meals don’t need to be complicated or time-consuming to be healthy! There are plenty of minimally processed foods, such as marinara sauce, Italian seasoning, and chicken broth, that you can find in grocery stores that are nutrient-dense and can help to cut down on prep and cooking time.

No boil pasta bake in a white baking dish with a side of grated parmesan cheese and fresh basil.

Serving Suggestions

This dish is a good source of complex carbohydrates and fat, with moderate levels of protein and fiber. To make it a more balanced meal, you can serve it with an additional source of protein and vegetables, such as:

  • Chicken + Broccoli
  • Steak + Green Salad
  • Shrimp + Zucchini
  • Salmon + Green Beans
Baked no boil pasta bake in a white baking dish with fresh basil and red pepper flakes on top.

Storage + Reheating

To Refrigerate: Allow the pasta bake to cool completely, then cover the baking dish with aluminum foil or transfer it to an airtight container, and store leftovers in the fridge for up to 5 days.

To Freeze: To freeze whole, allow the pasta bake to cool completely then cover the baking dish with plastic wrap and aluminum foil, place it in a freezer-safe bag, and place it in the freezer. To freeze leftovers, transfer the leftovers to an airtight container and place them in the freezer for up to 3 months.

To Reheat: From the fridge, transfer the whole pasta bake, covered, in the oven at 350°F for 20-30 minutes until heated through and bubbling. Individual portions can be reheated in an oven-safe casserole dish at 350°F for 10-15 minutes or in a microwave-safe dish in the microwave for 2-3 minutes. If frozen, allow the pasta bake to thaw completely and then reheat at 350°F for 20-30 minutes or until heated through. To reheat from frozen, cover the baking dish with foil and warm it in the oven at 350°F for 40-50 minutes until heated through.

Serving of no boil pasta bake in a large bowl with a fork.

More Baked Pasta Recipes:

  • Stuffed Shells with Ground Beef
  • Vegetable and Ricotta Baked Orzo
  • Ground Turkey Pasta Bake

Collagen vs. Protein Powder: Which is Best for You?

Published on March 12, 2024 by Stephanie Kay

If you’re confused between collagen powders and protein powders, I can assure you that you are not alone. While they are both sources of protein, they are not the same and have different benefits. Here is everything you need to know about collagen vs. protein powder.

A scoop of collagen powder on a white counter with a glass of water and container.

Table of contents

  • What is collagen?
  • Types of Collagen Powder
  • What is the difference between collagen powder and protein powder?
  • Collagen vs. Whey Protein Powder Nutrition
  • Collagen vs. Whey Protein Powder Amino Acids Profile
  • Benefits of Collagen Protein Powder
  • Who should use protein powder?
  • Who should use collagen peptides powder?
  • So, which is better, collagen or protein?
  • How to Pick a Good Collagen Powder
  • How long does it take for collagen supplements to work?
  • Can you count collagen as protein?
  • Can I take collagen instead of protein powder?
  • Should I take collagen or protein powder for weight loss?

What is collagen?

Collagen is a type of protein, the most abundant protein in humans, comprising up to a third of total body mass. There are 16 types of collagen in the human body; however, nearly 80-90% of the collagen in the body is provided by types I-III. Type I collagen is a major component of skin, bones, tendons, and ligaments; type II collagen is a major component of joint cartilage; and type III collagen is a major component of muscles, blood vessels, and internal organs (1).

All proteins are made of amino acids, and collagen is made up of 3 amino acids: glycine, proline, and hydroxyproline. These amino acids bind together to make collagen fibrils and bundle together to make collagen fibers to provide the connective tissue for the structural components of the body, including ligaments, tendons, cartilage, and skin. There are many food sources of collagen; however, it can also be found in supplement form in powders, liquids, and gummies.

Types of Collagen Powder

There are two primary types of collagen powder available in the marketplace: bovine collagen and marine collagen. Bovine collagen is sourced from cows’ skin and connective tissue and primarily provides type I and type III collagen, while marine collagen is sourced from the skin, bones, and scales of fish and primarily provides type I and type II collagen.

What is the difference between collagen powder and protein powder?

Collagen powder is a supplemental form of collagen made up of collagen peptides, while protein powder is a supplemental form of protein providing all essential amino acids.

Protein powder is considered a “complete” protein, as it contains all essential amino acids, while collagen powder has a low indispensable-to-dispensable amino acid ratio and is considered an “incomplete” protein, as it lacks the essential amino acid tryptophan (2). However, collagen powder has much higher levels of glycine, proline, and hydroxyproline, which makes it functionally unique among other proteins.

Protein powder is well known and studied for its ability to support total daily protein intake and increase muscle protein synthesis, while collagen powder has been shown to potentially increase the synthesis of connective tissues of skin and joints.

Infographic of nutrition comparison of collagen powder vs. protein powder.

Collagen vs. Whey Protein Powder Nutrition

Here is a nutrition comparison of the calories, protein, fat, and carbohydrates in collagen versus whey protein powder per 1-scoop serving (3, 4).

Nutrition Collagen Powder
(per 14-gram scoop)
Whey Protein Powder
(per 28-gram scoop)
Calories50 calories110 calories
Protein12 grams25 grams
Fat0 grams0.5 grams
Carbohydrates0 grams1 gram

Collagen vs. Whey Protein Powder Amino Acids Profile

Here is a comparison of the essential amino acids of collagen versus whey protein powder per 11-gram serving (5).

Essential Amino AcidBovine Collagen Supplement
(per 11 grams)
Whey Protein Concentrate
(per 11 grams)
Cysteine10 mg231 mg
Histidine80 mg187 mg
Isoleucine149 mg693 mg
Leucine310 mg1,115 mg
Lysine396 mg1,203 mg
Threonine187 mg759 mg
Tyrosine58 mg352 mg
Tryptophan2 mg198 mg
Valine209 mg638 mg
Infographic with the benefits of collagen peptides.

Benefits of Collagen Protein Powder

Studies have shown that collagen powders may offer several health benefits, including (6, 7, 8, 9, 10, 11, 12):

  • Improving skin elasticity and hydration
  • Strengthening ligaments and tendons
  • Mitigating osteoarthritis and osteoporosis
  • Reducing activity joint pain

As we age, collagen production naturally declines; therefore, taking a collagen supplement can help to maintain higher levels of collagen in the body and mitigate the adverse side effects of reduced production. Whether someone should take collagen powder or protein powder depends on the individual, their dietary protein intake, and their health goals.

Who should use protein powder?

Individuals who struggle to meet their protein intake. If you struggle to eat protein, it is best to use a protein powder as it will provide all the essential amino acids and help you meet your optimal daily protein intake.

Individuals looking to build muscle. If your goal is to build muscle, it is best to use protein powder as it contains higher levels of the branched-chain amino acids: leucine, isoleucine, and valine, required for muscle protein synthesis (5). Consuming adequate protein with resistance training is the most effective way to build muscle mass.

Individuals with weight loss goals. If your goal is weight loss, it is best to use protein powder as it can help to ensure you are consuming adequate protein, increase satiety signals, and support the development and maintenance of lean muscle mass, which is beneficial for weight loss and weight maintenance.

Individuals who are vegetarian or vegan. If you are following a vegetarian or vegan diet, protein powder is more likely the best option as it will help to ensure you are consuming adequate protein and the optimal balance of essential amino acids, which are often lacking in plant-based diets.

Who should use collagen peptides powder?

Individuals who meet their daily protein needs. If you consume adequate protein and regularly meet your daily protein needs, collagen powder can be used as a source of additional protein and amino acids with benefits beyond basic health needs.

Individuals looking to improve skin health. If your goal is to improve skin health, and you already meet your daily protein needs, collagen powder is a good option as it has been shown to improve skin elasticity and hydration. As we age, collagen production naturally declines, and supplemental collagen has been shown to reduce the appearance of fine lines and wrinkles.

Individuals looking to support joint health. If your goal is to reduce joint pain, and you already meet your daily protein needs, collagen is a good option as it has been shown to reduce activity-related joint pain.

So, which is better, collagen or protein?

Both collagen powder and protein powder are sources of protein, but the best option to take primarily depends on your dietary protein intake and your health goals. If you are looking to increase your protein intake, build muscle, or lose weight, protein powder is likely the best option for you. If you already consume adequate dietary protein and want to improve the health of your skin, hair, and/or nails, collagen powder is likely the best option for you.

That said, it’s important to note that you can take both protein powder and collagen powder; you don’t need to choose. Consuming protein powder along with collagen powder can help to ensure you are reaching your daily protein intake while benefiting from the functional properties of collagen protein at the same time.

Infographic with tips on how to choose a good collagen powder.

How to Pick a Good Collagen Powder

  1. Opt for hydrolyzed collagen. Hydrolysis is a process used in the production of collagen powders to break down the amino acids into smaller units to increase bioavailability and make them more digestible (13). While all collagen powders are hydrolyzed, there are different levels of hydrolyzation, and “fully” hydrolyzed collagen powders are the most ideal choice. To ensure your collagen is hydrolyzed, look for the term “collagen peptides” in the ingredient list.
  2. Ensure it contains at least 8 grams of protein per serving. The effective dosing of collagen ranges between 8 and 15 grams per day; increased plasma glycine and proline levels have been reached with 8 grams per day; improved arthritis and osteoporosis have been seen with 12 grams per day; and lean mass and strength gains have been seen with 15 grams per day (9, 14, 15, 16).
  3. Ensure there are limited added ingredients. Collagen powder comes in a variety of options, from plain to vanilla and isolated to blends. Much like protein powders, brands can add flavors, vitamins, and minerals to collagen powders to create a custom blend. While none of the items are inherently harmful, and opting for a flavored version can help to make it more palatable, I recommend reading the label and choosing a collagen powder made only of collagen peptides to ensure you are using the highest quality product possible.
  4. Look for third-party certification. Unfortunately, collagen powder and collagen supplements are not regulated by the FDA; therefore, it is best to opt for collagen supplements that have been third-party tested. It is the best way to ensure you are purchasing a product that contains all the ingredients in the amounts listed on the label. For the highest standards, choose a collagen powder with the NSF Certified for Sport or Informed-Sport certification logo.

How long does it take for collagen supplements to work?

There is no specific time frame for which you can expect to see benefits from collagen supplementation. Collagen production is a slow process, and the effects of supplements are influenced by the individual, their diet, and lifestyle. Most studies of collagen supplements show some benefits in 8-12 weeks, suggesting 2-3 months could be a rough time frame.

Can you count collagen as protein?

Yes, collagen contributes to your daily protein intake. While it is not considered a complete protein, as it does not contain all nine essential amino acids in the optimal ratios, it does count towards your protein goal for the day.

Can I take collagen instead of protein powder?

While collagen powder does contribute to daily protein intake, it does not provide the same benefits as protein powder. The limited essential amino acid profile of collagen will likely not support weight loss or building muscle mass as protein powder does.

Should I take collagen or protein powder for weight loss?

Protein powder is more beneficial than collagen for weight loss. While both collagen and protein powder contribute to daily protein intake, protein powder is more beneficial for supporting muscle protein synthesis, which is highly beneficial for weight loss and a key contributor to weight maintenance.

The Bottom Line

While both collagen powder and protein powder are sources of protein, collagen powder is an incomplete source of protein or protein. Collagen powders are made of hydrolyzed collagen, known as collagen peptides, and have been shown to improve skin elasticity, strengthen ligaments and tendons, and reduce joint pain. Protein powders are ideal for increasing overall protein intake and supporting muscle growth; however, collagen powders are best for improving skin health. When picking a collagen powder, it is best to opt for one with at least 8 grams of protein per serving that is third-party tested. Although the current findings for collagen powder are promising, the supporting evidence for the benefits of collagen powders is limited, and further study is required.

Slow Cooker Beef Curry

Published on March 7, 2024 by Stephanie Kay

With only 15 minutes of prep time, this slow-cooker beef curry is perfect for nights when you want a delicious meal but don’t have time to cook. Serve it with rice and veggies for a healthy and balanced dinner the whole family will love!

Slow cooker beef curry in a white bowl with white rice cilantro and red onion on top with a side of naan bread.

I don’t know about you, but I love a good slow-cooker recipe. While I don’t make them often, every time I do, I am reminded of how wonderful they are. With minimal ingredients, minimal effort, and a bit of time, you can create a hearty, healthy, and heart-warming meal that is perfect for a cold day.

This slow-cooker beef curry recipe is full of flavor, high in protein, and very easy to make. The combination of tomatoes, curry powder, and coconut milk creates a curry sauce that is the perfect pair to beef and the perfect topping for a plate of rice. Not to mention, this recipe makes a lot, so you’ll have plenty of leftovers you can freeze for another day.

Slow cooker filled with beef curry.

Why You’ll Love It

  • Easy to Prepare – With less than 15 minutes of prep time you can create a delicious beef curry without much effort.
  • Made in One Pot – This slow-cooker beef curry ensures clean-up is minimal.
  • High in Protein – With 27 grams of protein per serving, this beef slow curry is a high-protein meal you can enjoy for lunch or dinner.
  • Great for Meal Prep – This curry keeps well in the fridge and freezer making it a great make-ahead meal.
Ingredients for slow-cooker beef curry; chuck roast beef, onion, garlic, ginger, curry powder, red pepper flakes, diced tomatoes, tomato paste, coconut milk, salt, and black pepper.

Ingredients + Substitutions

  • Beef – The better quality beef you use the better your beef curry will be. The best cuts for slow-cooker beef curry are lean cuts with a high concentration of collagen-rich connective tissues, which keeps the meat moist and tender. I recommend using chuck roast, however, a round roast, brisket, stewing steak, or braising steak will also work well.
  • Curry Powder – The recipe calls for curry powder, however, you can use curry paste or a mixture of spices if preferred; a combination of coriander, turmeric, cumin, mustard powder, paprika, cardamom, and chili flakes would work well. If using curry paste, I recommend using an Indian-style curry paste, such as madras or tikka masala curry paste.
  • Onion, Garlic, and Ginger – To flavor the curry. I used fresh onion, garlic, and ginger in my recipe, but you can use powdered versions if preferred, see the notes section of the recipe card for details.
  • Red Pepper Flakes – To add some heat. If you prefer a spicier curry, you can add more.
  • Tomatoes – A mixture of canned diced tomatoes and tomato paste to add veggies and thicken the curry sauce.
  • Coconut Milk – To add some healthy fats and ensure the curry sauce is rich and creamy. If you’re not a fan of canned coconut milk you can use heavy cream or half-and-half instead.
  • Olive Oil – To brown the beef.
  • Salt and Pepper – To season the beef curry.

Prefer a chicken curry? Simply swap the beef for 2 pounds of cubed, boneless chicken and prepare the curry as instructed.

Cubes of raw beef in a cast-iron skillet with olive oil.
Browned beef cubes in a cast-iron skillet.

Dietary Adaptions

To Make it Gluten-Free: No adaptations are needed, this recipe is dairy-free.

To Make it Dairy-Free: No adaptations are needed, this recipe is gluten-free.

Slow cooker with browned beef, onion, garlic, ginger, curry powder, red pepper flakes, and salt.
Slow cooker with browned beef with spices.

How to Make Slow Cooker Beef Curry

  1. Season the beef. Cube the beef into bite-size pieces, then season it generously with salt.
  2. Sear the beef. In a large frying pan (or the oven-safe insert of your slow cooker), warm the olive oil, then add the seasoned beef to the pan, working in batches if needed, and cook for 1-2 minutes per side until browned.
  3. Add the ingredients to a slow cooker. Once the beef is lightly browned, transfer it to the slow cooker, add the diced onion, minced garlic, minced ginger, curry powder, salt, and red pepper flakes, and stir until the beef is well coated in spices. Add the diced tomatoes, tomato paste, and coconut milk, and stir again to combine.
  4. Slow cook for hours. Turn on the slow cooker, cover it with a lid, and cook the curry on high for 5-6 hours or on low for 8-10 hours.
  5. Serve and enjoy! Once cooked, the slow-cooker beef curry can be served immediately with rice, cilantro, and a dollop of yogurt on top.

You can find the detailed instructions in the recipe card below.

Beef coated in spices, onion, garlic, and ginger topped with coconut milk and diced tomatoes in a slow cooker.
Beef curry ingredients in a slow cooker.

Red’s Nutrition Tip

While beef has a reputation for being an “unhealthy” choice, it is actually a wonderful source of protein and healthy fats. It is also incredibly rich in micronutrients, specifically vitamin B12, zinc, selenium, iron, niacin, and vitamin B6.

Slow cooker beef curry in a crockpot topped with cilantro and red onion.

Serving Suggestions

This slow-cooker beef curry is a great source of protein and fat, so pairing it with a source of complex carbohydrates and fiber can help to make a more balanced meal.

  • White Rice + Broccoli
  • Brown Rice + Carrots
  • Potatoes + Cucumber Salad
  • Naan + Green Salad

To add extra vegetables, you can also add some fresh spinach to the warm curry and stir until wilted and well combined. I also recommend topping the beef curry with some plain yogurt, fresh cilantro, and/or sliced chilies for additional flavor.

Close up of a bowl of Indian beef curry on basmati rice with cilantro and red onion.

Storage + Reheating

To Refrigerate: Allow the beef curry to cool completely, transfer to an airtight container, and store in the refrigerator for 3-4 days.

To Freeze: Once cooled, the leftover slow-cooker beef curry can be stored in an airtight container in the freezer for up to 3 months.

To Reheat: Reheat the beef curry in a pot on the stovetop on medium heat for 5 minutes or until warm, or in the microwave for 1-2 minutes. If using frozen leftovers, allow the beef curry to thaw completely before reheating.

Two bowls of slow cooked beef beef curry with white rice with a side of fresh cilantro and naan bread.

More Slow Cooker Beef Recipes:

  • Mexican Shredded Beef Tacos
  • Slow Cooker Pot Roast
  • Slow Cooker Shredded Beef
  • Slow Cooker Lasagna Soup
  • Slow Cooker Beef and Barley Soup

Spicy Salmon Roll Bowls

Published on March 5, 2024 by Stephanie Kay

If you want spicy salmon rolls but don’t want the hassle of rolling sushi, try these spicy salmon roll bowls! These deconstructed sushi roll bowls are full of texture and flavor and are high in protein too.

Spicy salmon roll bowl with spicy mayo, sesame seeds, green onions, and furikake on top with chopsticks.

I don’t know about you, but I love sushi and spicy salmon rolls are one of my favorite things to order. I love the combination of sticky rice, salmon, and spicy mayo, and could easily eat several rolls if given the option. Unfortunately, I’m not so great at making sushi at home, so this spicy salmon roll bowl is a great alternative.

While they may seem intimidating to make, these little bowls are super easy to prepare. As long as you can bake salmon, boil rice, and slice veggies, you can easily make this salmon sushi bowl recipe at home without much effort.

Two spicy salmon roll bowls in grey bowls with chopsticks and a side of cucumber, spicy mayo, and furikake.

Why You’ll Love It

  • Quick and Easy – Ready in 30 minutes, these bowls are perfect for a busy weeknight dinner.
  • High in Protein – Each spicy salmon roll bowl contains over 30 grams of protein.
  • Full of Flavor – The combination of marinated salmon, rice, and spicy sauce ensures that these bowls are full of flavor and texture.
  • Versatile – Once you get the basics down you can mix and match the vegetables and toppings of the bowls as desired.
Ingredients for spicy salmon roll bowls; salmon fillet, sushi rice, soy sauce, mayonnaise, sriracha, avocado, cucumber, and green onion.

Ingredients + Substitutions

  • Salmon – To add protein. The recipe calls for salmon fillets, but you can use any cut of salmon you like or use canned salmon if preferred, see the notes section of the recipe card for details. Since the salmon is cooked, sushi-grade salmon is not required.
  • Sushi Rice – To build the base of the sushi bowls. You can use sushi rice or white rice of your choice, brown rice and cauliflower rice also work well.
  • Cucumber – To add some veggies. You can use English, garden, or Persian cucumbers.
  • Avocado – To add some healthy fats.
  • Soy Sauce – To season the salmon. You can use regular or low-sodium soy sauce.
  • Sesame Oil – To flavor the salmon marinade.
  • Rice Vinegar – To season the sushi rice.
  • Mayonnaise – To make the spicy mayonnaise sauce. You can use store-bought or homemade mayo.
  • Sriracha – To make the sauce spicy. If you can find sriracha, you can use any hot sauce you enjoy.
  • Sesame Seeds – For some extra crunch. You can use black or white, raw or toasted sesame seeds.
  • Green Onions – For a fresh topping.
White bowl with cubed salmon.
White bowl with cubed salmon covered in marinade of soy sauce and sesame oil.

Dietary Adaptions

To Make them Gluten-Free: Swap the soy sauce for tamari or coconut aminos.

To Make them Dairy-Free: No adaptations are needed, this recipe is dairy-free.

To Make them Low-Carb: Swap the sushi rice for cauliflower rice.

Sheet pan with parchment paper and marinated salmon bites on top.
Sheet pan with parchment paper and cooked salmon bites.

How to Make a Spicy Salmon Roll Bowls

  1. Marinade the salmon. In a large bowl, add the soy sauce and sesame oil, whisk to combine, then add salmon pieces and gently toss until evenly coated.
  2. Cook the rice. Combine the rice and water in a pot, bring to a boil, then reduce to a simmer and cook for 20 minutes until all the water is absorbed and the rice is light and fluffy.
  3. Cook the salmon. Transfer the marinated salmon to a large baking sheet with parchment paper and transfer to an oven at 450°F to bake for 8-10 minutes.
  4. Make the spicy mayo. In a small bowl, add the mayonnaise and sriracha and whisk until well combined.
  5. Assemble the bowls. Once the rice and salmon are cooked, assemble the bowls with a layer of rice, cooked salmon, sliced cucumber, sliced avocado, spicy mayo, sesame seeds, and green onion.
  6. Serve and enjoy! The bowls can be served immediately and any leftover salmon, rice, and spicy mayonnaise can be stored in the fridge for up to 3 to 4 days.

You can find the detailed instructions in the recipe card below.

Cooked sushi rice, spicy mayonnaise, furikake, sliced cucumber, sliced green onion, and avocado.

Red’s Nutrition Tip

The recipe calls for white rice since sushi is traditionally made with white rice. While you can use brown rice, white rice provides a better texture and flavor for these salmon sushi bowls. Moreover, the nutritional values of white rice and brown rice are much more similar than people think.

Where can I find sushi rice?

Sushi rice can be found in Asian supermarkets and most major grocery stores. If you can’t find sushi rice, short-grain white rice will work best as an alternative, although any rice will work in this spicy salmon roll bowl.

Can you make the salmon in an air-fryer?

Yes! Spray the air-fryer basket with oil, place the marinated salmon pieces in the basket, and cook at 400°F for 6 to 8 minutes, shaking halfway until the salmon is cooked through in the center and lightly browned.

Spicy sushi bowls with sushi rice, cucumber, avocado, and green onion.

Tips + Serving Suggestions

Marinade the salmon. To ensure maximum flavor, prep the salmon ahead of time and allow it to marinade in the fridge for up to 24 hours.

Make the sushi rice ahead of time. Cook the rice the night before for quick and easy-to-assemble lunches and dinners.

Use a rice cooker. For the best results, cook the sushi rice in a rice cooker. While you can certainly cook it in a pot on the stovetop, cooking rice in a rice cooker is foolproof and ensures that you have perfectly fluffy and sticky rice every time.

Use different rice. While sushi rice is recommended, you can also make these spicy salmon sushi bowls with long-grain white rice, brown rice, or cauliflower rice.

Add more veggies. In addition to cucumbers and avocado, you can increase the fiber content of the meal by adding more vegetables such as shredded cabbage, shredded carrots, and sliced bell peppers.

Mix up the toppings. For extra crunch and flavor, you can top the bowls with furikake, pickled seaweed, nori sheets, wasabi, lime juice, or your favorite sushi toppings.

If you like this recipe, I would also recommend checking out my California roll bowls for another deconstructed sushi bowl recipe.

Close up of a spicy sushi bowl in a grey bowl with spicy mayo, sesame seeds, and green onions sprinkled on top.

Storage + Reheating

To Refrigerate: Store the components (salmon, rice, and spicy mayo) in separate airtight containers in the fridge for 3 to 4 days.

To Freeze: The salmon and rice can be stored in an airtight container and frozen for up to 3 months, however, the spicy mayo cannot be frozen.

To Reheat: While the bowls can be enjoyed cold if you prefer to eat them warm it is best to leave the components unassembled so that the salmon and rice can be reheated on their own before serving. Transfer the salmon and rice to a microwave-safe bowl and reheat for 1-2 minutes until warm and then top with cold cucumber, avocado, and spicy mayo to serve.

More Salmon Bowl Recipes:

  • Spicy Salmon Poke Bowl
  • Salmon Quinoa Bowls
  • Salmon Meal Prep Bowl
  • Maple-Glazed Salmon Bowls

Banana Bread Baked Oatmeal

Published on February 29, 2024 by Stephanie Kay

Made with whole grains and ripe bananas, this banana bread baked oatmeal is a delicious and nutritious way to start the day. Whip it up on the weekend and enjoy it for breakfast all week long.

White baking dish with slices of banana bread baked oatmeal and a golden serving spoon.

If you’re looking for a healthy breakfast meal prep idea, look no further than this banana bread baked oatmeal recipe. This simple recipe combines the flavors of banana bread with the convenience of baked oatmeal to create a make-ahead meal the whole family will love.

You can enjoy this banana bread baked oatmeal on its own, hot or cold, for a quick on-the-go breakfast on busy weekday mornings or enjoy it as part of a hearty weekend brunch served with yogurt, eggs, and fresh fruit.

Slice of banana bread baked oatmeal on a white plate with slices of banana, walnuts, and a drizzle of peanut butter on top.

Why You’ll Love It

  • Easy to Make – Made with pantry staples and ready in less than 1 hour, this banana bread baked oatmeal is quick and easy to prepare.
  • Feeds a Crowd – This recipe makes 6 servings and can easily be doubled or tripled to feed more.
  • Full of Fiber – Made with whole grains, this banana baked oatmeal has 6 grams of fiber per serving and is a filling way to start the day.
  • Stores Well – This banana bread baked oatmeal keeps well in the fridge and freezer making a great make-ahead meal or meal prep idea.
Ingredients for banana bread baked oatmeal; rolled oats, ripe bananas, brown sugar, egg, baking powder, salt, cinnamon, walnuts, and milk.

Ingredients + Substitutions

  • Rolled Oats – To create the base of this banana baked oatmeal. You can use old-fashioned oats rolled oats or quick oats. Steel-cut oats and instant oats are not recommended.
  • Bananas – Some ripe bananas to add the banana bread flavor to the baked oatmeal.
  • Milk – To bake the oats and add some protein.
  • Brown Sugar – To sweeten the oats. You can use pure maple syrup if preferred.
  • Egg – To bind the oats. To make the recipe vegan or egg-free, you can swap the egg for one “flax egg”, see the notes section of the recipe card for details.
  • Vanilla Extract – To add flavor and fragrance.
  • Leavening Agents – A combination of baking powder and salt to ensure the banana bread baked oatmeal is light and fluffy.
  • Walnuts – While optional, they add some crunch and healthy fats. If you don’t like walnuts, chocolate chips would be a good alternative.
Mashed banana, brown sugar, vanilla extract, and egg in a white mixing bowl.
Wet ingredients in a white mixing bowl.

Dietary Adaptions

To Make it Gluten-Free: Use certified gluten-free oats.

To Make it Dairy-Free: Swap the milk for unsweetened almond milk or unsweetened vanilla almond milk and swap the butter for coconut oil.

To Make it Vegan: Swap the milk for unsweetened almond milk or unsweetened vanilla almond milk and swap the egg for a “flax egg”.

Wet ingredients with rolled oats, cinnamon, baking powder, salt, and walnuts in a white mixing bowl.
Batter for banana bread baked oatmeal in a white mixing bowl.

How to Make Banana Bread Baked Oatmeal

  1. Combine the wet ingredients. In a large bowl, add the mashed bananas, brown sugar, egg, milk, and vanilla extract, and whisk until well combined.
  2. Add the dry ingredients. Add the rolled oats, cinnamon, baking powder, and salt to the bowl and stir until well incorporated. Add the chopped walnuts and fold them into the batter.
  3. Bake until golden brown. Transfer the oatmeal mixture to a 9 x 9 baking dish and bake at 375°F for 35-40 minutes or until the center is set and the top and sides are golden brown.
  4. Serve and enjoy! Once baked, remove the banana baked oatmeal from the oven and allow it to cool for 5-10 minutes before serving it with toppings of your choice.

You can find the detailed instructions in the recipe card below.

Batter for banana baked oatmeal in a white baking dish.
Batter for banana baked oatmeal in a white baking dish with banana slices on top.

Red’s Nutrition Tip

If you are concerned about the sugar content in this banana bread baked oatmeal, there is no need. It’s important to understand that the majority of the sugar in this dish is from natural sugars present in the bananas, milk, and oats, and there is very little added sugar in this recipe, a mere 3/4 tablespoon per serving. While you can swap the maple syrup for brown sugar if preferred, it will provide the same amount of sugar and a similar nutritional value.

Banana bread baked oatmeal in a white baking dish with ripe bananas, walnuts, a plate and fork, serving spoon and tea towel on the side.

Serving Suggestions

This banana bread baked oatmeal is a great source of carbohydrates and fiber, therefore, pairing it with some protein and healthy fats can help to create a more balanced meal. This banana baked oatmeal would pair well with:

  • Yogurt
  • Greek yogurt
  • Skyr
  • Cottage cheese
  • Hard-boiled eggs
  • Peanut butter
  • Almond butter
  • Banana slices
  • Blueberries
Banana bread baked oatmeal sliced in a baking dish with a gold serving spoon on the side.

Can I use steel-cut oats?

Steel-cut oats are not recommended in this banana bread baked oatmeal recipe. Steel-cut oats require more liquid and take longer to cook than rolled oats, therefore, the ratios and timing in this recipe will not work.

Can I add protein powder?

Yes! You can increase the protein content of this banana bread baked oatmeal recipe by adding 1 scoop of plain or vanilla protein powder to the batter along with the wet ingredients.

Slice of baked banana bread oatmeal on a plate.

Storage + Reheating

To Refrigerate: Allow the banana baked oatmeal to cool completely and then cover with aluminum foil or plastic wrap or transfer it to an airtight container and store in the fridge for up to 5 days.

To Freeze: To freeze baked oatmeal whole, cool completely, then cover the baking dish with plastic wrap and/or aluminum foil and then place the entire baking dish in a freezer-safe bag. To freeze leftovers or individual portions, transfer the baked oatmeal to an airtight container and place it in the freezer. Baked oatmeal can be frozen for up to 3 months.

To Reheat: To reheat banana bread baked oatmeal whole, allow it to thaw completely, and then cover the baking dish with aluminum foil and warm it in the oven at 350°F for 10-15 minutes. To reheat individual portions of the baked oatmeal, place a thawed portion in an oven-proof baking dish in the oven for 5-10 minutes or in the microwave in a microwave-safe dish for 1-2 minutes.

Overhead shot of banana baked oatmeal on a white plate with drizzled peanut butter, cinnamon, and banana slices on top.

More Baked Oatmeal Recipes:

  • Apple Pie Baked Oatmeal
  • Carrot Cake Baked Oatmeal
  • Blueberry Baked Oatmeal
  • Morning Glory Baked Oatmeal
  • Banana Baked Oatmeal Cups
  • Almond Croissant Baked Oats

You can also check out my whole wheat banana bread, strawberry banana bread, banana oatmeal pancakes, and banana nut muffins for more banana filled recipes.

What are Antinutrients?

Published on February 27, 2024 by Stephanie Kay

If you’ve heard of the term antinutrients, you’ve likely heard they have the potential to be harmful to our health. But what are antinutrients? What foods contain them? How can you reduce them and are they actually harmful? Here is everything that you need to know about antinutrients.

Mason jars of chickpeas, beans, and lentils on a kitchen counter.

Table of contents

  • What are antinutrients?
  • Why do antinutrients exist?
  • Types of Antinutrients
  • Phytates (Phytic Acid)
  • Lectins
  • Oxalates
  • Tannins
  • Glucosinolates (Goitrogens)
  • Saponins
  • Foods with Antinutrients
  • Which foods have the most antinutrients?
  • Are antinutrients safe?
  • How to Reduce Antinutrients in Foods
  • Soaking
  • Sprouting
  • Fermenting
  • Boiling
  • Antinutrients FAQs
  • The Bottom Line

What are antinutrients?

Antinutrients are compounds naturally found in food that impair digestion and nutrient absorption. All foods contain nutrients, however, certain plants; including grains, seeds, nuts, and legumes, contain compounds that act as a form of natural defense mechanism. The presence of these compounds in plant foods can decrease their absorption of essential amino acids, vitamins, and minerals.

Why do antinutrients exist?

Antinutrients help to protect plants from infection or consumption by animals and insects. Unlike animals, which can run away, swim away, or fight their prey, plants cannot move and, therefore, use natural or synthetic compounds known as antinutrients, that can be harmful or deadly to various organisms, to protect themselves.

Infographic on types of antinutrients; phytates (phytic acid), lectins, oxalates, tannins, glucosinolates (goitrogens), and saponins.

Types of Antinutrients

The most well-known antinutrients in plant foods include:

Phytates (Phytic Acid)

Phytates, also known as phytic acid, are the most common antinutrients found in grains and legumes. Found in the hulls of nuts, seeds, and grains, it has a strong binding affinity for calcium, zinc, magnesium, iron, and copper, which can limit their nutrient absorption (1, 2).

Lectins

Lectins are found in all plant foods but are present in greater amounts in grains and legumes and can interfere with the absorption of calcium, iron, phosphorus, and zinc (3).

Oxalates

Oxalates and oxalic acid can bind to calcium, limit absorption in the body, and may increase the formation of kidney stones from calcium oxalate. Oxalate-rich foods include green leafy vegetables, such as spinach and Swiss chard, rhubarb, cereal grains, cocoa, nuts, and seeds (1, 4).

Tannins

Tannins are antioxidant polyphenols found in food and beverages, including coffee, tea, some fruits, and cocoa, and can impair digestive enzymes, protein digestibility, and iron absorption (5, 6).

Glucosinolates (Goitrogens)

Glucosinolates, also known as goitrogens, are found in cruciferous vegetables, including broccoli, Brussels sprouts, cabbage, and cauliflower, and are widely recognized for their interference with the uptake of iodine and flavonoids and their ability to chelate metals such as iron and zinc, thus reducing their absorption (5).

Saponins

Saponins are mainly found in legumes, have a bitter taste and soapy texture, and can impair the digestion of protein and uptake of vitamins and minerals in the gut (6).

Foods with Antinutrients

All plant-based foods contain antinutrients. Various antinutrients can be found in grains, legumes, roots, nuts, seeds, vegetables, and fruits (6, 7).

AntinutrientFoodsPotential Implication
Phytic AcidLegumes, cereal grains, pseudo-grains, nuts, seeds, nightshadesReduce mineral absorption
LectinsLegumes, grains, pseudo-grains, nuts, seeds, fruits, vegetablesInhibit nutrient absorption
OxalatesLegumes, cereal grains, nuts, tubers, green leafy vegetablesInhibit calcium absorption
TanninsLegumes, tubers, nightshades, fruits, cocoa, tea, coffeeImpair digestive enzymes and iron absorption
GlucosinolatesBrassica vegetables, pseudo-grains, tubersInhibit iodine absorption
SaponinsLegumes, pseudo-grains, nightshadesInhibit nutrient absorption
Infographic of foods with antinutrients; grains, beans, lentils, legumes, roots, nuts, seeds, vegetables, and fruits.

Which foods have the most antinutrients?

Antinutrients are found in their highest concentrations in grains, beans, lentils, and nuts; however, they can also be found in some leaves, roots, tubers, and fruits of certain plants. Some of the most consumed antinutrient-containing foods include soybeans, whole grains (including wheat), chickpeas, beans, lentils, nuts, seeds, spinach, kale, broccoli, peppers, eggplants, tomatoes, chocolate, and tea.

Are antinutrients safe?

Although most plant foods contain antinutrients, when properly prepared, they are safe to consume (7). In fact, some antinutrients have been shown to provide health benefits; for example, phytic acid has been found to lower cholesterol, slow digestion, and prevent sharp rises in blood sugar (8, 9).

Moreover, most antinutrients can be removed or deactivated by soaking, sprouting, or boiling before consumption, and some traditional methods of food preparation, such as fermenting, have been shown to increase nutritional value (10).

How to Reduce Antinutrients in Foods

Many traditional methods of food preparation are known to reduce antinutrients and increase the nutritional value of plant foods. The following processing methods can be used individually or in combination to reduce the impact of antinutrients.

Soaking

Soaking grains, beans, and legumes in water before preparation is a simple yet effective way to deactivate enzyme inhibitors (11). Many of the antinutrients are found in the skin and are water-soluble and, therefore, dissolve in water. For example, soaking whole grains in water overnight or in water with an acidic medium such as lemon juice or cider vinegar can help to neutralize phytic acid. Soaking is often used in combination with sprouting, fermenting, or boiling.

Sprouting

Sprouting, or germination, is one of the most effective ways to deactivate antinutrients in plant foods, specifically phytic acid and lectins. Given most antinutrients are part of the seed’s system of preservation – preventing sprouting until the conditions are perfect –  the process of sprouting grains, legumes, and seeds helps to reduce their level of phytic acid and tannins and increase their nutrient availability (6, 11).

Fermenting

Fermentation is a traditional method of food preservation and preparation that has been used across cultures. The process of fermentation helps to decrease the level of phytic acid and lectins while increasing beneficial bacteria and nutritional value at the same time (6, 11).

For instance, fermenting soy into tempeh or miso, cabbage into sauerkraut or kimchi, and whole grains into sourdough bread help to make the foods more easily digested and micronutrients more available. Moreover, fermented foods are sources of probiotic bacteria, which have been shown to promote a healthy balance of gut bacteria and have a wide range of health benefits.

Boiling

Cooking food at high heat has been shown to decrease levels of lectins, tannins, and protease inhibitors in plant foods (12). While boiling whole grains, boiling legumes, and boiling or steaming Brussels sprouts, cauliflower, and leafy greens have specifically been shown to significantly decrease their levels of oxalates and glucosinolates (11).

Infographic on methods of food preparation to reduce antinutrients in plant foods.

Antinutrients FAQs

Do grains have antinutrients?

Grains contain antinutrients in the form of lectins, oxalates, and phytic acid; however, these can be reduced or mitigated through proper preparation such as soaking, sprouting, fermenting, and boiling.

Do vegetables have antinutrients?

Antinutrients are found in vegetables. Antinutrients known as goitrogens are most abundant in cruciferous vegetables such as broccoli, Brussels sprouts, cabbage, and kale.

Do fruits have antinutrients?

While some fruits contain antinutrients, they are present at much lower levels than in other plant foods. The most common antinutrients in fruits are lectins and tannins.

Does meat contain antinutrients?

Unprocessed meat does not contain antinutrients. Unlike plant foods, animal foods do not contain antinutrients that impair nutrient absorption or bioavailability in the digestive tract.

Does milk have antinutrients?

While cow’s milk does not contain antinutrients, plant-based milks do. Given that non-dairy milks are made from plant foods, including soy, almonds, and oats, they contain antinutrients, such as phytic acids, which can interfere with normal nutrient absorption.

Is coffee high in antinutrients?

While coffee does contain antinutrients in the form of tannins and phytic acid, it is generally considered low in them and also contains beneficial compounds known as polyphenols.

The Bottom Line

Antinutrients are natural compounds found in plant foods, including whole grains, beans, lentils, nuts, seeds, and some vegetables, that can interfere with the absorption of other nutrients. Although antinutrients can make certain foods more difficult to digest and their nutrients less bioavailable, when properly prepared via soaking, sprouting, fermenting, and boiling, antinutrient-containing foods are generally not of concern and can be consumed in a healthy diet.

Teriyaki Turkey Meatballs

Published on February 22, 2024 by Stephanie Kay

Ready in 30 minutes, these healthy teriyaki turkey meatballs are a protein-packed recipe that is perfect for a busy weeknight dinner. Serve them with rice and veggies for a delicious and nutritious family-friendly meal.

If you’ve never made teriyaki sauce at home, you might be surprised to learn how quick and easy it is to make! With 5 simple ingredients, you can create a delicious homemade teriyaki sauce with the perfect balance of flavors that can be used in many ways.

The combination of salty and sweet teriyaki sauce and moist and tender turkey meatballs in this teriyaki turkey meatball recipe creates a meal that is as healthy as it is tasty. Not to mention, you can easily store leftover teriyaki meatballs in the fridge and freezer making them a great make-ahead meal.

Two plates of teriyaki turkey meatballs with rice and broccoli with chopsticks.

Why You’ll Love Them

  • Quick and Easy – This 30-minute recipe is a great way to get dinner on the table in a hurry.
  • Minimal Ingredients – These teriyaki turkey meatballs are made with 10 common kitchen ingredients.
  • High in Protein – With 18 grams of protein per 5 turkey meatballs, this delicious recipe is a great way to eat more protein.
  • Great for Meal Prep – These turkey teriyaki meatballs keep well in the fridge for up to 4 days making them great for make-ahead lunches.
Ingredients for teriyaki turkey meatballs; ground turkey, bread crumbs, egg, green onion, soy sauce, brown sugar, cornstarch, garlic powder, ground ginger, salt, and sesame seeds.

Ingredients + Substitutions

  • Ground Turkey – To make the meatballs, you can use lean or extra-lean ground turkey. You can also use ground chicken, ground pork, or ground beef if you want to mix it up.
  • Bread Crumbs – To ensure the turkey meatballs are moist and tender. You can use regular or panko bread crumbs.
  • Egg – To bind the teriyaki meatballs.
  • Green Onion – To flavor the meatballs and a little for topping.
  • Garlic and Ginger – A combination of garlic powder and ground ginger for the teriyaki sauce. You can use fresh garlic and fresh ginger if desired, see the notes section of the recipe card for details.
  • Soy Sauce – To make the teriyaki sauce. You can use regular or low-sodium soy sauce.
  • Brown Sugar – To sweeten the teriyaki sauce. You can use dark or light brown sugar, honey will also work.
  • Cornstarch – To thicken the teriyaki sauce.
White bowl with ground turkey, panko bread crumbs, egg, green onion, and salt.
Ground turkey mixture for teriyaki turkey meatballs.

Dietary Adaptions

To Make them Gluten-Free: Use gluten-free bread crumbs and swap the soy sauce for gluten-free soy sauce, tamari, or coconut aminos.

To Make them Dairy-Free: No adaptations are needed, this recipe is dairy-free.

Uncooked ground turkey teriyaki meatballs on a baking sheet.
Cooked ground turkey teriyaki meatballs on a baking sheet.

How to Make Teriyaki Turkey Meatballs

  1. Make the meatballs. In a large mixing bowl, add the ground turkey, green onion, bread crumbs, salt, and egg, and mix until well combined using your hands. Once mixed, roll the ground turkey mixture into 1-tablespoon balls.
  2. Bake the meatballs. Place the meatballs on a large baking sheet lined with parchment paper and then transfer the baking sheet to an oven at 350°F to make for 12-15 minutes.
  3. Make the teriyaki sauce. In a small bowl, add the water, soy sauce, brown sugar, ground ginger, garlic powder, and cornstarch, and whisk until well combined. Pour the mixture into a large non-stick pan and cook on medium heat, whisking constantly, until the sauce has thickened.
  4. Coat the turkey meatballs in teriyaki sauce. Transfer the cooked meatballs to the pan with the homemade teriyaki sauce and gently toss them until well coated in the sauce.
  5. Serve and enjoy! The meatballs can be served immediately with a sprinkle of sesame seeds and green onion on top.

You can find the detailed instructions for these teriyaki turkey meatballs in the recipe card below.

Uncooked teriyaki sauce mixture in a pan.
Cooked teriyaki sauce in a pan.

Red’s Nutrition Tip

If you’re concerned about the use of brown sugar in the homemade teriyaki sauce making the recipe “unhealthy”, there is no need. Not only is there a tiny amount of brown sugar per serving, less than 5 grams, but there is room for everything in a healthy diet. While the nutritional differences between forms of sugar are minimal, you can swap it for honey if preferred.

Teriyaki sauce with turkey meatballs in a pan.
Teriyaki sauce tossed in turkey meatballs in a pan with sesame seeds.

Serving Suggestions

These turkey teriyaki meatballs are a great source of protein, so pairing them with a source of complex carbohydrates and vegetables is the best way to ensure you are eating a balanced meal. For example, you could pair these meatballs with:

  • White Rice + Broccoli
  • Rice Noodles + Snap Peas
  • Brown Rice + Bell Peppers
  • Fried Rice + Green Beans
  • Cauliflower Rice + Stir-Fry Vegetables
Close up of teriyaki turkey meatballs with sesame seeds on top.

Storage + Reheating

To Refrigerate: Allow the teriyaki turkey meatballs to cool completely, then add them to an airtight container and store them in the refrigerator for up to 4 days. If desired, you can store the meatballs and teriyaki sauce combined or separately.

To Freeze: Once the teriyaki meatballs have cooled completely, add them to an airtight container and store them in the freezer for up to 3 months. If desired, you can store the meatballs and teriyaki sauce combined or separately.

To Reheat: Once thawed, place the turkey teriyaki meatballs in a saucepan, add a tablespoon of water, and reheat them on medium heat for 2-5 minutes or until warmed through, stirring them to loosen up the sauce and adding additional splashes of water as needed. The meatballs can also be reheated in the microwave for 1-2 minutes or until warm.

Turkey teriyaki meatballs with rice, broccoli, sesame seeds, and sliced green onion.

More Meatball and Ground Turkey Recipes:

  • Korean Ground Turkey Rice Bowls
  • Ground Turkey Meal Prep Bowls
  • Greek Turkey Meatballs with Orzo and Tzatziki Sauce
  • Turkey Taco Skillet
  • Coconut Curry Chicken Meatballs
  • Chicken Meatball Soup

Chicken Breast vs. Chicken Thigh: Which is Healthier?

Published on February 20, 2024 by Stephanie Kay

Chicken is one of the most popular cuts of meat and eating chicken for dinner is far more common than pork or beef in America. While it is available in a wide variety of cuts, including chicken legs, drumsticks, and whole birds, chicken breasts and chicken thighs tend to get all the love, but which one is healthiest?

Two chicken breasts on a wood cutting board next to 5 chicken thighs on a wood plate.

The Difference Between Chicken Breasts and Chicken Thighs

Chicken breasts are the meat from the pectoral muscle on the underside of the chicken, while chicken thighs are the meat cut from the upper section of the leg, between the breast and the drumstick.

Since chickens are generally earthbound with occasional spurts of flying, their breast muscles develop mostly fast-twitch muscle fibers, whereas their legs, which support and move them slowly through long days of grazing and foraging, develop more slow-twitch muscle fibers. The fast-twitch muscle fibers in breast meat are generally considered “white meat”, while the slow-twitch muscle fibers in thigh meat are considered “dark meat”.

Scientifically speaking, the difference between white meat and dark meat comes down to the amount of myoglobin; an oxygen-carrying protein (or hemoprotein) responsible for giving dark meat its reddish color (1). The more myoglobin a muscle contains the darker the meat and the more nutrients it contains.

Anatomy of chicken breast vs. thigh.

Chicken Breasts vs. Chicken Thighs Nutrition

Here is a nutrition comparison of a 100-gram serving of raw, boneless, skinless chicken breast and raw, boneless, skinless chicken thigh (2, 3).

Macronutrients per 100 GramsChicken BreastChicken Thigh
Calories106144
Protein22.5 grams18.6 grams
Fat1.93 grams7.92 grams
Carbohydrates0 grams0 grams
Fiber0 grams0 grams
Sugar0 grams0 grams

Calories

Chicken thighs contain roughly 30% more calories than chicken breast. A 100-gram serving of chicken breast contains 106 calories, while a 100-gram serving of chicken thigh contains 144 calories.

Protein

Chicken breasts contain roughly 18% more protein than chicken thighs. A 100-gram serving of chicken breast contains 22.5 grams of protein, while a 100-gram serving of chicken thigh contains 18.6 grams of protein.

Fat

Chicken thighs contain roughly 3 times more fat than chicken breasts, however, relative to other cuts of animal protein both are considered lean protein sources. A 100-gram serving of chicken breast contains 1.93 grams of fat, while a 100-gram serving of chicken thigh contains 7.92 grams of fat.

Carbohydrates

Neither chicken breasts nor chicken thighs are a source of carbohydrates as they both contain 0 grams of carbohydrates, 0 grams of sugar, and 0 grams of fiber per 100-gram serving.

Infographic of chicken breast vs chicken thigh nutrition comparison of calories, protein, fat, vitamin B12, iron, zinc, and choline.

Vitamins and Minerals

Both chicken breasts and chicken thighs are good sources of micronutrients, including vitamin B12, iron, zinc, potassium, and phosphorus. However, the increased myoglobin content of the dark meat of chicken thighs means it contains more vitamins and minerals than the white meat of chicken breasts.

A 100-gram serving of chicken breasts contains 0.21 mcg of vitamin B12, 0.37 mg of iron, and 0.68 mg of zinc, while a 100-gram serving of chicken thighs contains 0.61 mcg of vitamin B12, 0.81 mg of iron, and 1.58 mg of zinc. However, chicken breasts contain more choline than chicken thighs, respectively providing 82 mg and 54 mg per 100-gram serving (4).

Here is a vitamin and mineral comparison of a 100-gram serving of raw, boneless, skinless chicken breast and raw, boneless, skinless chicken thigh (5, 6):

Micronutrients per 100 GramsChicken BreastChicken Thigh
Vitamin B2 (Riboflavin)0.177 mg0.196 mg
Vitamin B3 (Niacin)9.6 mg5.56 mg
Vitamin B6 0.811 mg0.451 mg
Vitamin B120.21 mcg0.61 mcg
Iron0.37 mg0.81 mg
Zinc0.68 mg1.58 mg
Choline 82.1 mg53.6 mg
Phosphorus213 mg185 mg
Potassium334 mg242 mg

Cholesterol

Chicken is lower in cholesterol than other types of meat and neither chicken breasts nor chicken thighs are significant sources of cholesterol. A 100-gram serving of chicken breast contains 73 mg of cholesterol, while a 100-gram serving of chicken thigh contains 94 mg of cholesterol (5, 6). Moreover, it’s important to note that dietary cholesterol has little effect on blood cholesterol levels.

Other Factors to Consider

If you’re still debating between chicken breasts and chicken thighs, here are some other factors to consider.

Cost

While prices will vary by store, chicken thighs are generally cheaper than chicken breasts. Boneless, skinless chicken thighs typically cost a bit more than bone-in, skin-on chicken thighs, however, both options tend to be cheaper than all forms of chicken breasts. Although bone-in meats have a higher concentration of collagen, gelatin, glycine, and micronutrients than their boneless, white meat counterparts and you can keep the bones to make homemade chicken broth.

Flavor

The dark meat in chicken thighs tends to provide a more intense flavor than chicken breasts. In cooking, the flavor comes from fat and the increased fat content and connective tissue in thigh meat enhances their flavor. The increased intramuscular fat, also known as marbling, in chicken thighs also helps to keep the meat tender and juicy, while the lean nature of breast meat makes it more prone to drying out when cooked.

Versatility

From a cooking perspective, chicken thighs tend to be more versatile than chicken breasts. Chicken thighs can easily be baked, roasted, grilled, fried, stewed, or braised, however, since chicken breasts are the leanest part of the bird, they’re best in dishes where they’re cooked quickly, such as grilling or stir-frying. Moreover, the extra fat content in chicken thighs makes them more difficult to overcook than chicken breasts. If you cook chicken breast over 165°F your chicken will be dry, however, if you overcook chicken thighs, you’ll still have flavorful and succulent chicken.

FAQs

Here are some commonly asked questions about chicken thighs and chicken breasts.

Why are chicken thighs so much better than breasts?

Chicken thighs contain more connective tissue and fat than chicken breasts, which allows them to retain more of their juices when cooked and provides a more intense flavor.

Is it better to bake chicken breast or chicken thighs?

Broth chicken thighs and chicken breast can be used in baked chicken recipes; however, chicken thighs will take slightly longer to cook as their denser.

Which part of chicken has the most protein?

Chicken breast meat contains more protein than any other cut of chicken. Since breast meat is the leanest cut of chicken, it contains less fat and, therefore, more protein per serving.

Are chicken thighs good for weight loss?

Chicken thighs are good for weight loss, as they are high in protein and a good source of vitamins and minerals. Any cut of chicken can support a goal of weight loss if the individual is in a calorie deficit.

So, what is healthier chicken thighs or chicken breast?

Overall, both chicken thighs and chicken breasts are healthy choices. Per 100-gram serving, chicken breast contains slightly more protein and less fat, while chicken thighs contain a similar amount of protein, more flavor, and more micronutrients. If purchasing prepared or processed chicken products, it’s best to read the label and review the ingredients to ensure you are choosing a product made of whole foods with limited added sodium.

The Bottom Line

Both chicken breasts and chicken thighs are good sources of lean protein. The difference between the two meats is largely due to the type of muscle tissue and their myoglobin content. The white meat in chicken breasts contains more protein and less fat, while the dark meat in chicken thighs contains more vitamins and minerals. Put simply, the best choice is the one that people prefer to eat.

Chickpea Chicken Soup

Published on February 15, 2024 by Stephanie Kay

Made in one pot, this chickpea chicken soup is everything you want in a weeknight dinner. It’s high in protein and full of veggies while being quick and easy to make. Plus, it’s a great way to turn leftover chicken into a delicious and nutritious meal.

Bowls of chickpea chicken soup with a side of crusty bread, parsley, and lemon wedges.

I don’t know about you, but I love a hearty soup. In my opinion, the best soup is chunky, flavorful, and filling, and that’s exactly what this chickpea chicken soup is.

The combination of chicken, chickpeas, and veggies, ensures that this Mediterranean-inspired chicken and chickpea soup is a well-balanced meal complete with protein, carbohydrates, fats, and fiber. And the best part is, it keeps well in the fridge and freezer so you can make a double batch and enjoy this delicious soup for days and weeks to come.

Close up of a white bowl of chickpea chicken soup on a white plate with parsley on top and a spoon on the side.

Why You’ll Love It

  • Made in One Pot – This chickpea and chicken soup recipe is as quick to make as it is to clean up.
  • High Protein – With over 25 grams of protein per serving, this soup is a protein-packed meal.
  • Full of Fiber – The combination of chickpeas and vegetables ensures that this soup has 12 grams of fiber per serving.
  • Great for Meal Prep – This soup keeps well in the fridge and freezer making it a great make-ahead meal.
Ingredients for chickpea chicken soup: chickpeas, chicken breasts, onion, garlic, carrots, celery, red bell pepper, spinach, lemon, and spices.

Ingredients and Substitutions

  • Chicken – To add some protein. The recipe calls for raw chicken breasts, however, you can use cooked chicken thighs, leftover chicken, or rotisserie chicken if preferred, see the notes section of the recipe for details.
  • Chickpeas – To add some plant-based protein and fiber. The recipe calls for canned chickpeas, but you can use dried chickpeas if preferred, see the notes section of the recipe for details. If you’re not a fan of chickpeas white beans, such as cannellini beans, would also work well.
  • Onion and Garlic – To create the base of the soup, add flavor, and fragrance.
  • Carrots and Celery – To add some vegetables to the soup.
  • Bell Pepper – To add some more veggies, color, and texture.
  • Tomatoes – A mixture of diced canned tomatoes and tomato paste to thicken the soup. You can use fresh tomatoes if desired, see the notes section of the recipe card for details.
  • Spinach – To add some leafy greens. You can use kale or collard greens if preferred.
  • Herbs and Spices – A mixture of dried oregano, paprika, and red pepper flakes to add some Mediterranean seasoning to the soup, and some fresh parsley to serve.
  • Broth – You can use store-bought or homemade chicken broth. Chicken stock, vegetable broth, or water will also work.
  • Olive Oil – To add some healthy fats and cook the vegetables.
  • Lemon – To balance the flavors.
  • Salt and Pepper – To season the soup.
Onion, carrots, and celery in a large pot.
Vegetables with garlic and spices in a large pot.

Dietary Adaptions

To Make it Gluten-Free: Use certified gluten-free chicken broth.

To Make it Dairy-Free: No adaptations are needed, this recipe is dairy-free.

Vegetables, tomatoes, and chicken breasts submerged in broth in a large pot ready to cook.

How to Make Chickpea and Chicken Soup

  1. Sauté the vegetables. In a large pot on medium-high heat, warm the olive oil, then add onion, celery, and carrots and sauté for 3-4 minutes until tender. Add the diced bell pepper and garlic and cook for an additional minute.
  2. Add the spices. Sprinkle the paprika, oregano, red pepper flakes, and salt into the pot, and stir to coat the vegetable mixture.
  3. Add the tomatoes and broth. Pour in the tomatoes, add the tomato paste, pour in the broth, and stir to combine.
  4. Add the chicken breasts. Place the chicken breast into the pot, submerging them in the broth.
  5. Simmer the soup. Reduce the heat to low and cook the soup for 20-25 minutes until the chicken breasts are fully cooked through.
  6. Shred the chicken. Once the chicken is cooked, remove them from the pot, place them on a cutting board, and shred them into bite-sized pieces using two forks. Return the shredded chicken to the pot.
  7. Add the chickpeas and spinach. Pour in the strained chickpeas, chopped spinach, and lemon juice, stir to combine, and simmer for a final 5-10 minutes until the chickpeas are warm and the spinach is wilted.
  8. Serve and enjoy. Taste the soup, season with additional salt and pepper as needed, and serve immediately with a slice of lemon and fresh parsley.

You can find the detailed instructions in the recipe card below.

Chickpeas and shredded chicken in a pot of soup.
Cooked chickpea and chicken soup.

Red’s Nutrition Tip

While I used chicken breasts in this recipe, skinless chicken thighs would also work very well. Contrary to popular belief, the nutritional differences between chicken thighs and chicken breasts are minimal and chicken thighs are far more flavorful. See the notes section of the recipe card for details on how to make this substitution.

What to Serve with Chickpea Chicken Soup

This chickpea chicken soup is a balanced meal on its own, however, to make it a heartier meal or stretch the soup into more portions, it would pair well with crusty bread, crackers, cheese, and/or a big green salad.

Large pot of chickpea chicken soup with a wooden spoon.

Can you make it in a slow cooker?

Yes! To make this chickpea chicken soup in a slow cooker, add all of the ingredients to a slow cooker, except the chickpeas, spinach, and lemon juice, and cook on high for 3-4 hours or on low for 6-7 hours. Once cooked, remove the chicken from the slow cooker, place it on a cutting board, and shred it into bite-sized pieces using two forks. Return the shredded chicken to the slow cooker, along the with strained and rinsed chickpeas, chopped spinach, and lemon juice, give everything a good stir, and cook on high for a final 15-20 minutes until the chickpeas are warm and the spinach is wilted.

Bowl of chicken chickpea soup in a white bowl with a silver spoon, a side of crusty breads, parsley, and a tea towel.

Storage + Reheating

To Refrigerate: Allow the chickpea chicken soup to cool completely and then transfer to an airtight container in the fridge for up to 5 days.

To Freeze: Transfer the cooled chicken and chicken soup to an airtight container and freeze for up to 3 months. To make grab-and-go meals and reheating easier, you can freeze the soup in individual portion-sized containers.

To Reheat: To reheat from the fridge, place the soup in a pot on the stovetop on medium heat and warm for 5 minutes or until heated through. To reheat from frozen, thaw the soup overnight in the fridge and then place the soup in a pot on the stovetop on medium heat and warm for 5 minutes or until heated through. To reheat the soup in the microwave, place thawed soup in a microwave-safe bowl and warm for 1-2 minutes, with 30 additional 30-second increments as needed depending on the strength of your microwave.

Close up of chickpea chicken soup with a lemon wedge and chopped parsley on top.

More Chickpea and Chicken Soup Recipes:

  • Chicken and Rice Soup
  • Golden Lentil Chicken Soup
  • Mushroom Wild Rice Chicken Soup
  • Chicken Tortilla Soup
  • Turmeric Chicken Stew
  • Chicken Broccoli Cheddar Soup
  • Chicken Peanut Stew

12 Ways to Use Protein Powder

Published on February 13, 2024 by Stephanie Kay

Protein powder is a great supplement for individuals looking to increase their protein intake. Whether you’re trying to build muscle, lose weight, or just add more protein to your diet, here are some creative ways to use protein powder.

Plate with a stack of protein pancakes topped with banana slices and pecans and a jar of maple syrup in the background.

Table of contents

  • Health Benefits of Protein Powder
  • How much protein powder does a person need?
  • Best Ways to Use Protein Powder
  • 1. Drink it with water.
  • 2. Add it to a smoothie.
  • 3. Add it to yogurt.
  • 4. Add it to oatmeal.
  • 5. Add it overnight oats.
  • 6. Add it to pancake batter.
  • 7. Make homemade protein bars.
  • 8. Add it to baked goods.
  • 9. Add it to energy bites.
  • 10. Make protein pudding.
  • 11. Make protein nice cream.
  • 12. Add it to coffee.
  • The Bottom Line

Health Benefits of Protein Powder

Protein powder is a supplemental form of protein, which is an essential macronutrient, along with carbohydrates and fat. Protein powders are made by extracting protein from animal and plant sources, which range from cow’s milk, eggs, and beef to peas, soy, and rice, and processing them into a powder form.

Protein powders are beneficial as they can help to support adequate protein intake, are convenient to use, shelf-stable, versatile, and relatively inexpensive.

Of the various types of protein powder, whey protein powder is considered the best protein powder due to the fast absorption of amino acids, which helps to make them more quickly available for muscle protein synthesis (1, 2). Animal-based protein powders contain all essential amino acids compared to plant-based protein powders which either do not contain all essential amino acids or do not contain them in the right ratios. If using a plant-based protein powder, it is best to opt for a blend that contains a mix of plant-protein sources to create a complete source of protein.

Protein supplementation can be particularly helpful for individuals with high protein requirements, such as athletes or individuals with performance goals, individuals with body composition or weight loss goals, individuals with issues swallowing or chewing, and vegetarians or vegans who are on a limited diet.

How much protein powder does a person need?

The recommended dietary allowance (RDA) for protein is 0.8 grams per kilogram of body weight per day or 0.36 grams per pound of body weight per day. However, this is the minimum recommended intake required to prevent deficiency. Current evidence suggests that the general population looking to optimize health, without specific athletic or body composition goals, should consume a minimal range of 1.2 to 1.6 grams per kilogram of body weight per day or 0.54 to 0.7 grams per pound of body weight per day (3).

Exactly how much protein a person needs depends on their age, height, weight, activity level, and health goals. Individuals looking to gain muscle or maintain lean muscle mass, individuals with weight loss goals, athletes, and elderly individuals can benefit from a protein intake much greater than the recommended dietary allowance and protein supplementation can be very helpful to achieve this.

Infographic with 12 ways to use protein powder.

Best Ways to Use Protein Powder

Here are 12 creative ways you can use your favorite protein powder.

1. Drink it with water.

The simplest way to consume protein powder is to mix it with water. This option is great for individuals who are looking to increase their protein intake while maintaining a calorie deficit, or individuals who need a convenient post-workout snack they can leave in their gym bag. If you find the taste or texture of protein shakes with water off-putting, you can mix it with milk or almond milk instead.

2. Add it to a smoothie.

Adding protein powder to a smoothie is probably the most common and popular way to use protein powder. Combining protein powder with fruit, nut butter, and milk is a good way to make a balanced meal or snack. Whether you’re making it at home, buying it from your gym smoothie bar, or your favorite restaurant chain, there are so many ways to make a protein smoothie.

3. Add it to yogurt.

If you enjoy yogurt, stirring in a scoop of protein powder is a great way to boost its protein content. While certain styles of yogurt, such as Greek yogurt, are already high in protein, adding a vanilla or chocolate protein powder can boost its protein content and improve the flavor.

4. Add it to oatmeal.

If you’re finding your bowl of oatmeal a little bland, adding chocolate or vanilla protein powder can add flavor and boost the protein content at the same time. Oats are a great source of complex carbohydrates and fiber, so adding protein powder is a great way to increase the protein content of oatmeal, and adding a drizzle of almond butter can help to ensure your breakfast is a balanced meal with carbohydrates, protein, and healthy fats.

5. Add it overnight oats.

In addition to warm oatmeal, protein powder works very well in overnight oats. You can easily create high-protein overnight oats by mixing protein powder into your favorite overnight oats recipe and by prepping them in batches you can create high-protein on-the-go breakfasts for days to come.

6. Add it to pancake batter.

While it’s easy to find boxed protein pancake mixes in most major grocery stores, it’s also very easy to make them at home. Not only can you make 3-ingredient protein pancakes by combining bananas with eggs and protein powder, but you can also add a scoop of protein powder to your favorite traditional pancake recipe and enjoy them with maple syrup for a protein-packed morning meal.

7. Make homemade protein bars.

Although good protein bars are easy to find in grocery stores and healthy food stores, they are easy to make at home. By combining your favorite protein powder with a few pantry staples you can easily create healthy homemade protein bars with 20 grams of protein per serving.

8. Add it to baked goods.

Adding protein powder to baked goods is a simple way to boost the protein content of snacks and treats and can result in recipes that are lower in carbs and higher in protein. However, protein powder can affect the chemistry of baking, therefore, adjustments to the recipe often need to be made. Simply adding protein powder to muffins, loaves, cookies, and cakes can result in a very dry result, so additional fat and/or liquid is often required.

That said, you don’t need to add protein powder to every baked good. Sometimes it is important to treat yourself, enjoy the real thing, and get your protein intake elsewhere during the day.

9. Add it to energy bites.

Turn your favorite energy bite recipe into protein balls by adding a scoop of protein powder or two. Energy bites are typically made by blending dates or dried fruit with nuts or nut butter in a food processor before rolling it into balls to create an energy-dense snack that is filled with carbohydrates and healthy fats, but low in protein. By adding a scoop of protein powder to the mix you can boost the protein content and turn energy bites into protein balls.

10. Make protein pudding.

With a quick online search, you will notice that there are many ways to make protein pudding. Some recipes suggest adding a bit of protein powder to your favorite boxed pudding mix, while others suggest blending flavored protein powder with yogurt, skyr, or cottage cheese, and others suggest adding it to chia seed pudding or blending chocolate protein powder with avocado and chocolate chips for a sweet treat. Regardless of which option you choose, there are lots of ways to create a high-protein pudding.

11. Make protein nice cream.

Protein ice cream is often referred to as “nice cream” as it’s a high-protein alternative to conventional ice cream with a similar texture. By blending frozen bananas with protein powder and nut butter in a high-speed blender or food processor you can create a creamy frozen dessert, like this chocolate peanut butter nice cream, that can help you reach your protein goals. Not to mention, once you get the basic concept down, the flavor options are endless, and you can add any mix-ins and toppings you enjoy.

12. Add it to coffee.

While it might sound like an odd combination and will not be a popular option with coffee purists, protein powder can be added to your morning cup of joe. The best way to add protein powder to coffee is to blend it with an electric whisk or immersion blender to avoid clumping. Alternatively, you can mix protein powder with your milk or creamer before adding it to your coffee. If you prefer the traditional taste of coffee but want to add protein, use an unflavored protein powder or collagen powder instead.

The Bottom Line

Whether your goal is to build muscle, lose weight, or simply support your daily protein intake, there are many ways to use protein powder beyond protein shakes. You can mix protein powder into your favorite smoothie, morning oatmeal, and pancakes, turn your favorite baked good into a high-protein treat, make protein bars, or whip up a batch of protein pudding or protein ice cream to boost your protein intake.

  • Previous
  • 1
  • …
  • 17
  • 18
  • 19
  • 20
  • 21
  • …
  • 59
  • Next
Stephanie Kay Nutrition

Hey, I’m Stephanie

– AKA RED –

I’m a nutritionist on a mission to change the way you look at food and teach you how to make real food work for real life in a realistic way.

Get to Know Me

Want A 7-Day Meal Plan?

Download my free 7-day meal plan, complete with a grocery list, for a week’s worth of easy healthy recipes that make real food work for real life.

    • facebook
    • instagram
    • pinterest

    Shop My Cookbooks

    My eCookbooks are filled with quick and easy real food recipes to help make eating well a breeze so you can crush your goals.

    Learn More

    Recipes

    • Dinner
    • Breakfast
    • Meal Prep
    • Snacks

    Nutrition

    • FAQs
    • Tips
    • This vs. That
    • Weight Loss

    Connect

    • Instagram
    • Youtube
    • About
    • Cookbooks

    About Stephanie

    I’m a nutritionist on a mission to change the way you look at food and teach you how to make real food work for real life in a realistic way.

    Learn More

    Site Credits
    2023 © Stephanie Kay Nutrition | Privacy Policy
    To Top