Salads are a great way to add more fresh veggies to your diet; however, without a substantial amount of protein, they can easily leave you unsatisfied and hungry. Here list of ways you can add protein to a salad to make it a more well-balanced meal.

Table of contents
While most salads contain a source of fiber and complex carbohydrates from vegetables, and healthy fats from salad dressing, many salads contain very limited protein. Adding a source of animal or plant protein to a salad helps to create a balanced meal by ensuring it contains all three macronutrients.
Balanced meals are crucial for maintaining optimal health because they provide the body with the necessary nutrients, energy, and support for various bodily functions and overall well-being. Consuming well-balanced meals with protein, carbohydrates, fiber, and fats helps to increase satiety, enhance energy levels, balance blood sugar, and support athletic performance and body composition.
Although exactly how much protein you need varies based on the individual and their goals, adequate protein intake is essential for optimal health. Whether you prefer to incorporate plant-based proteins in your salad or add a high-protein, low-calorie food on top of your salad, here is a list of easy protein toppings for a nutritious salad.
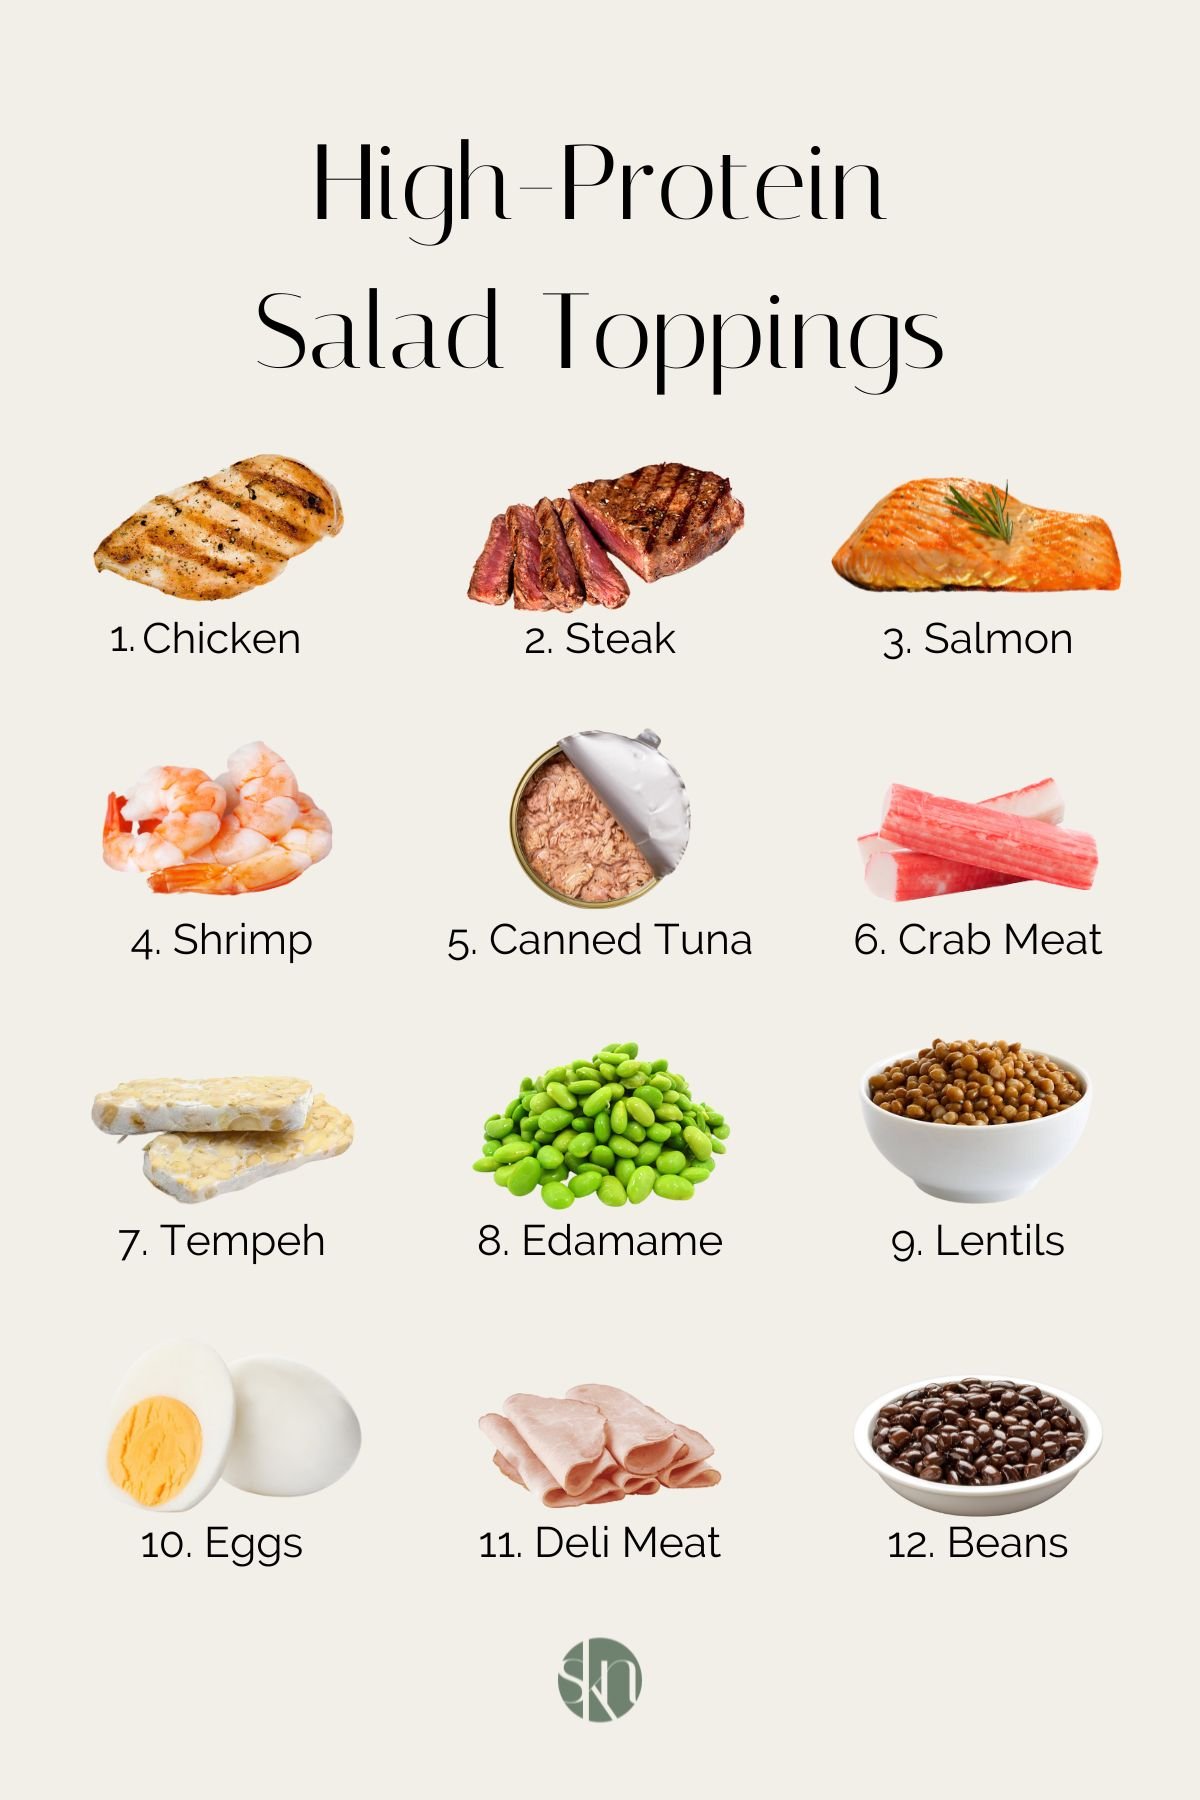
List of Proteins for Salad
Whether you choose to add one source, two sources, or a combination of a few, here are 18 easy and creative ways to add protein to a salad.
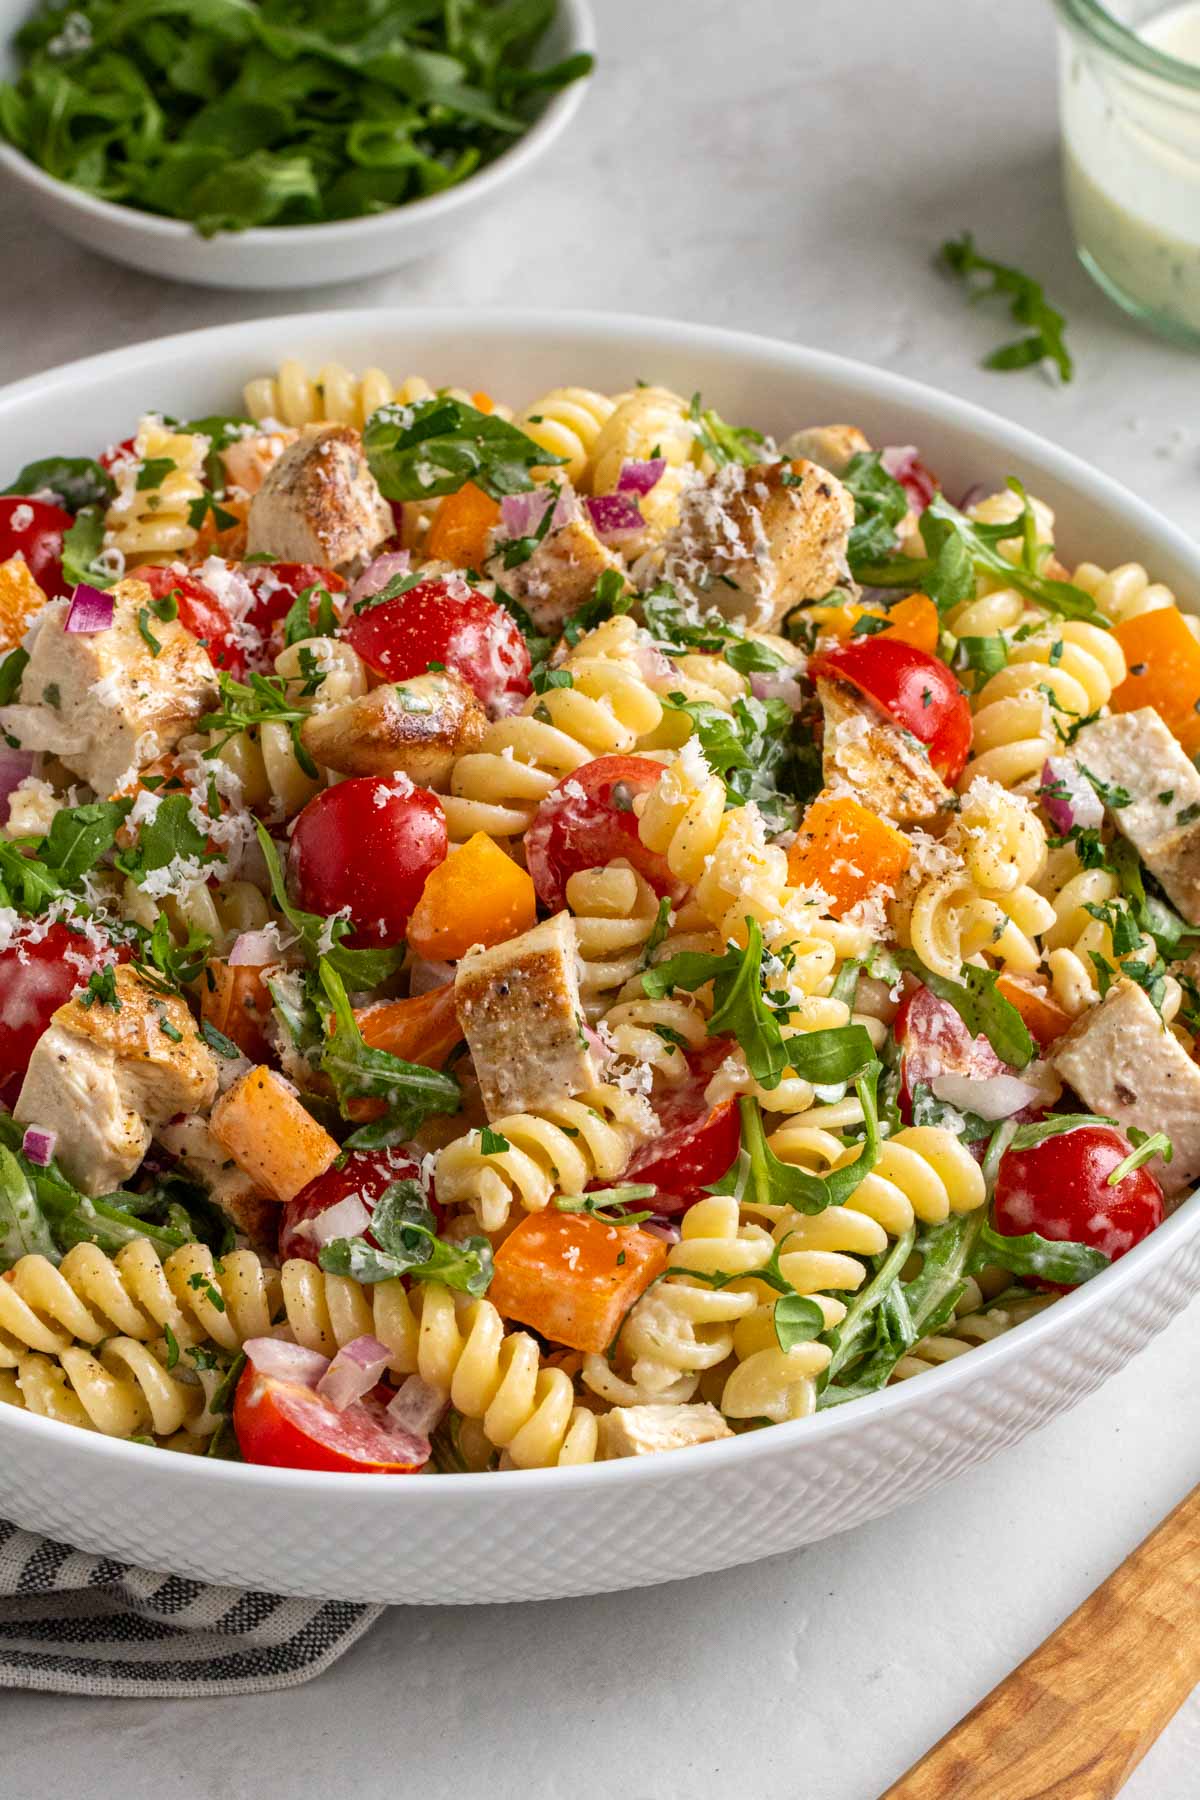
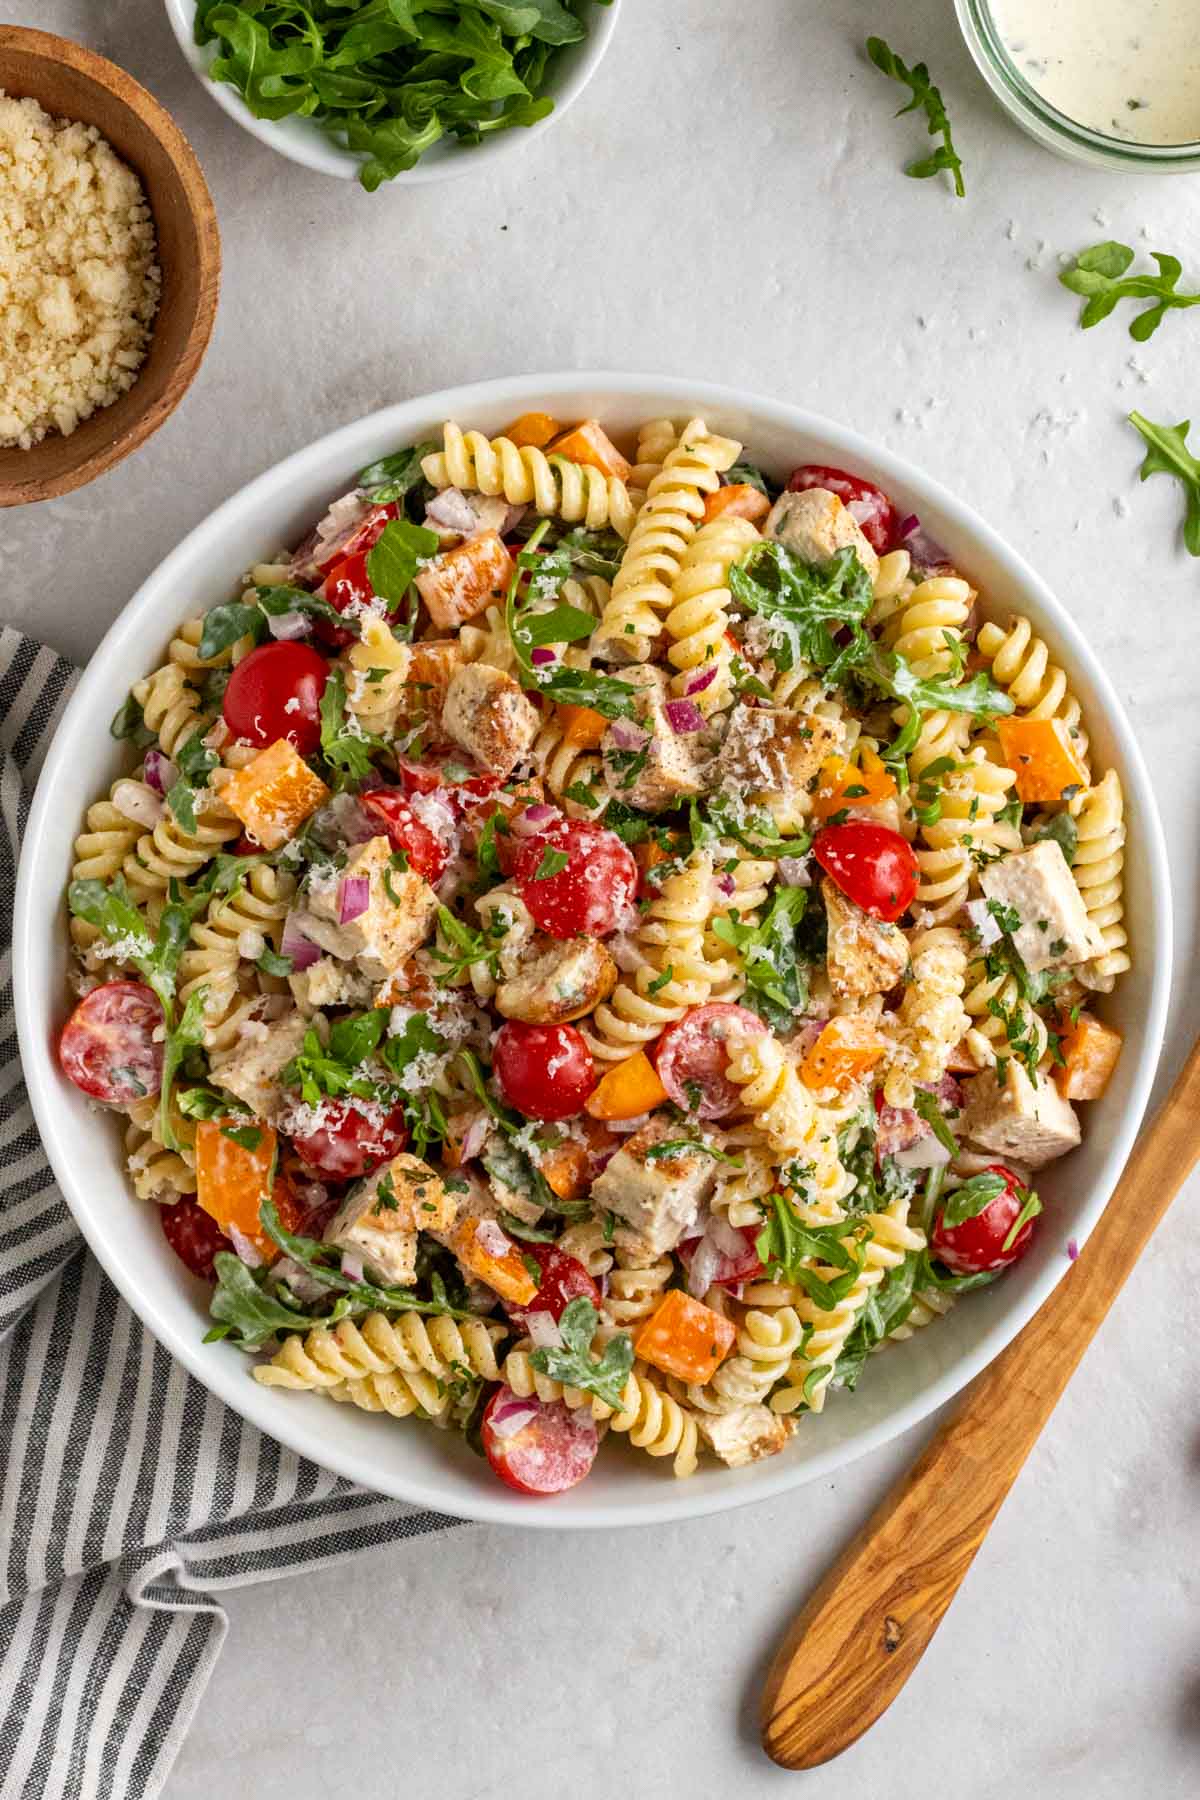
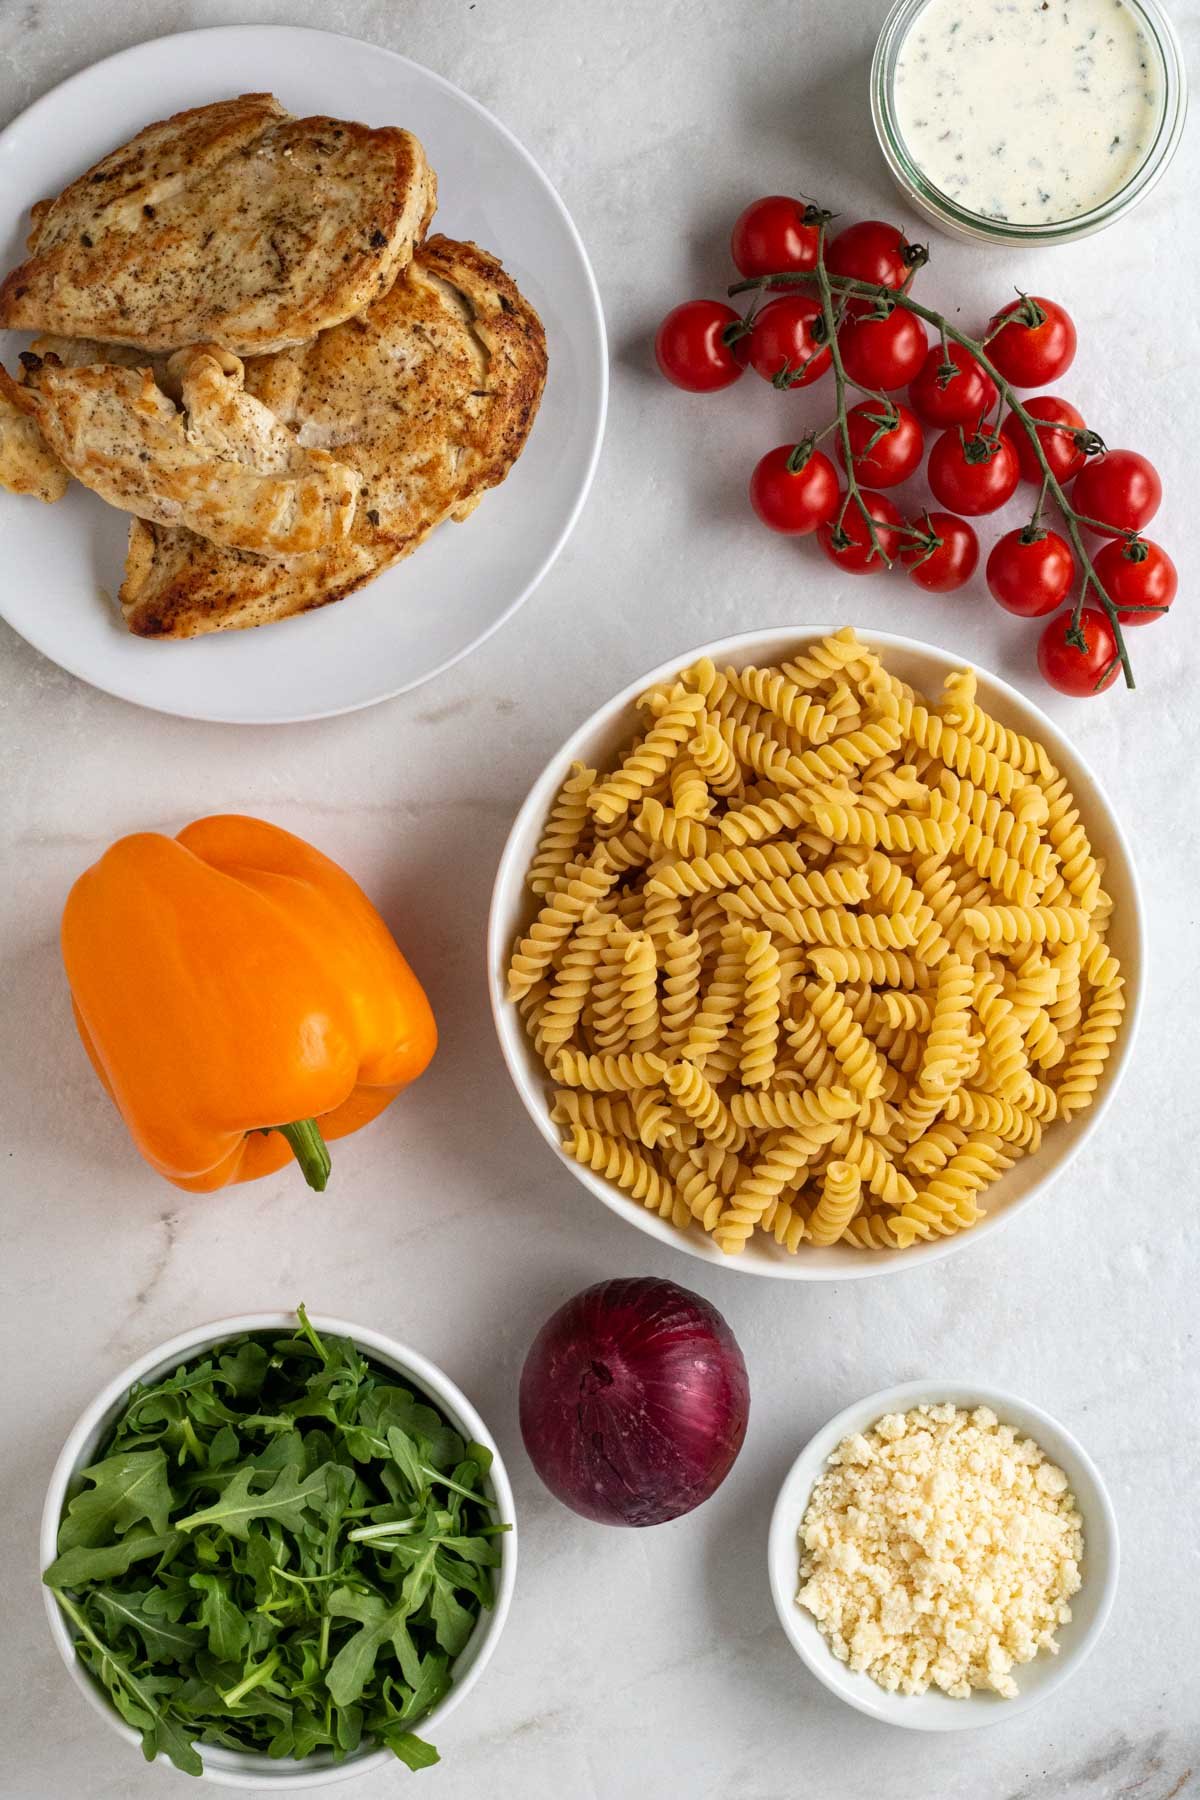
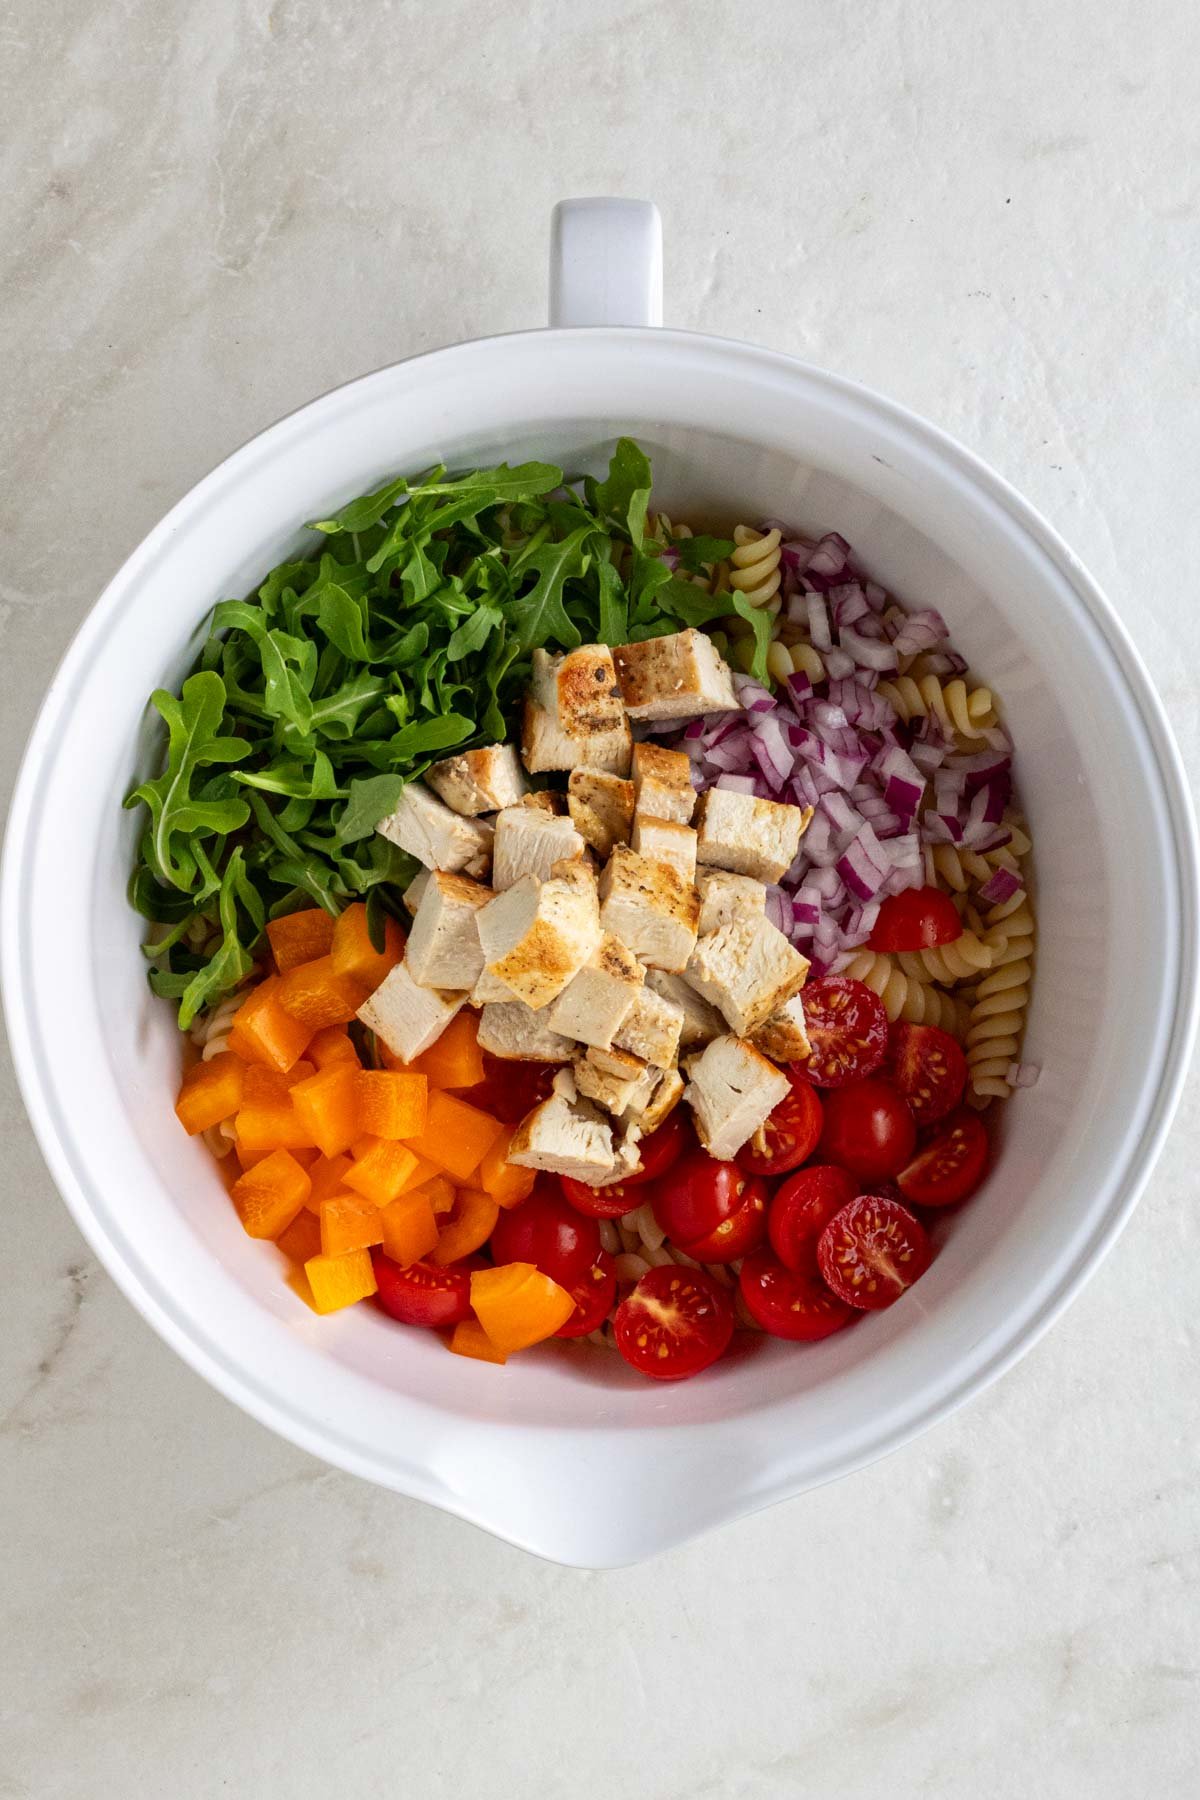
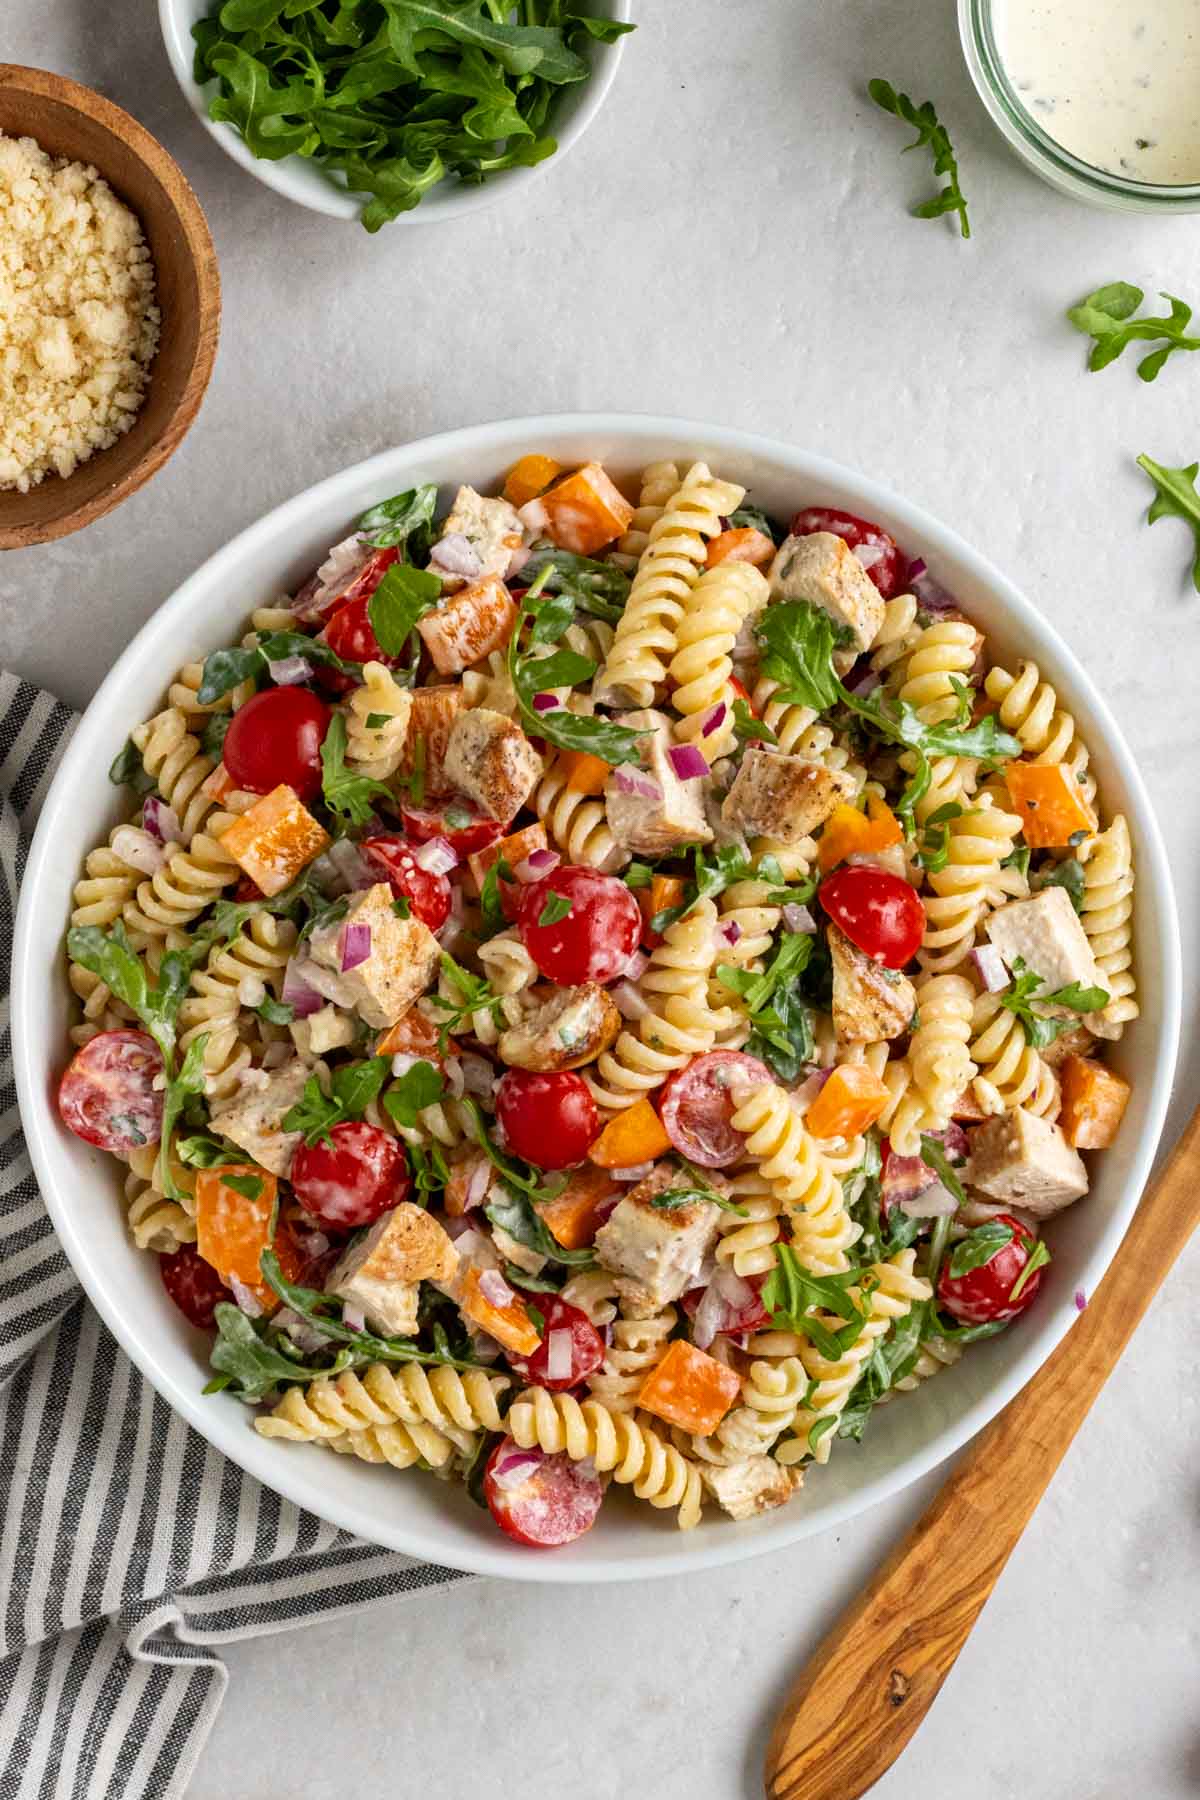
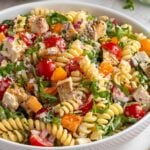
1. Chicken
Cooked chicken is arguably the most popular protein for salad. Be it grilled chicken breast, chicken thigh, or leftover rotisserie meat, chicken is a great source of lean protein that can quickly add a much-needed boost to any meal. Not to mention, it can be added hot or cold, making it a great use of leftovers or a simple meal prep strategy to ensure you have high-protein salads all week long.
Nutrition: A 3-ounce serving of cooked chicken breast provides 27.3 grams of protein (1).
2. Steak
Beef, along with other forms of red meat, is one of the most nutrient-dense sources of protein, containing all essential 9 amino acids, as well as iron, zinc, selenium, niacin, vitamin B12, vitamin B6, and fat-soluble vitamins A and E (2). In addition to a wide variety of vitamins and minerals, beef is a good source of omega-3 fatty acids, creatine, taurine, glutathione, CLA, and cholesterol (3). Although steak tends to be the most popular choice when it comes to salads, all cuts of red meat, be it ground beef or striploin, easily work as a high-protein topping to any salad.
Nutrition: A 3-ounce serving of grilled steak provides 23.2 grams of protein (2).
3. Salmon
Be it fresh, frozen, canned, or smoked, salmon is a rich source of protein and healthy fats, specifically heart-healthy omega-3 fatty acids. In fact, salmon is one of the best sources of the long-chain omega-3 fatty acids eicosapentaenoic acid (EPA) and docosahexaenoic acid (DHA); the essential fatty acids that cannot be manufactured by the body and, therefore, must be consumed in our diet. Omega-3 fatty acids have been shown to have major health benefits, including decreasing inflammation, lowering blood pressure, and improving the function of the cells that line your arteries (4, 5, 6). Whether it’s a smoked salmon salad or salmon Nicoise salad, salmon is a great protein for salad.
Nutrition: A 3-ounce serving of cooked salmon provides 21.6 grams of protein (7).
4. Shrimp
Shrimp is one of the most commonly consumed shellfish and for good reason; it has an impressive nutritional profile. Shrimp is a good source of complete protein and a rich source of micronutrients, including selenium, iron, and Vitamin B12, while being relatively low in calories (8). Shrimp comes in many different sizes and colors and can be easily found fresh, frozen, raw, or cooked in major grocery stores. Plus, it’s incredibly quick to cook, making it a great protein to add to a salad.
Nutrition: A 3-ounce serving of cooked shrimp provides 20.4 grams of protein (8).
5. Canned Tuna
Canned tuna, or any canned fish, is another lean source of protein that pairs well with any salad. Of most canned fish, canned tuna has a slightly more neutral taste and, therefore, works well on its own, tossed into a mixed salad with dressing, or a tuna salad mixture. If you are concerned about calorie content, be sure to opt for water-packed tuna as opposed to oil-packed tuna, which contains more fat and calories per serving.
Nutrition: A 3-ounce serving of canned tuna provides 20.1 grams of protein (9).
6. Crab Meat
Crab is a good source of lean protein that delivers all of the nutritional benefits of seafood without the fishy aftertaste. Cooked crab meat, or crabmeat, can be found fresh, frozen, or canned, and is commonly available in Dungeness and Alaskan King varieties. In addition to real crab meat, imitation crab meat, the stuff commonly found in seafood salad, crab cakes, and California sushi rolls, is easily found at major grocery stores. Also known as surimi, imitation crab meat known as is made from real seafood, most commonly pollock, and is also a good source of lean protein.
Nutrition: A 3-ounce serving of cooked crab meat provides 16.5 grams of protein (10).
7. Tempeh
Tempeh is made of pressed fermented soybeans and has a firm texture and slightly nutty taste. Tempeh is one of the best sources of vegetarian protein and is also a source of beneficial bacteria in the form of probiotics. Much like tofu, tempeh makes a wonderful protein-packed addition to any salad or bowl and can be prepared by grilling, steaming, roasting, or pan-frying.
Nutrition: A 3-ounce serving of cooked tempeh provides 16.2 grams of protein (11).
8. Edamame
Edamame are immature green soybeans and are a hearty and high-protein topping for a salad. They are one of the few sources of vegetarian protein that contain all essential amino acids and are also a great source of fiber. Shelled edamame beans can be added to a green salad or mixed with grains or lentils to make a filling, make-ahead salad.
Nutrition: A 3/4-cup serving of shelled edamame provides 13.8 grams of protein (12).
9. Lentils
Lentils are a good source of plant-based protein and fiber and come in a wide variety of types and colors. Although they can be used as a topping to a leafy green salad, lentils work particularly well in a make-ahead lentil salad as they can last for days dressed in the fridge. When adding lentils to a salad it’s best to cook them al dente to ensure they still have a little bite to them to avoid a mushy salad topping.
Nutrition: A 3/4-cup serving of cooked lentils provides 13.4 grams of protein (13).
10. Boiled Eggs
Whether they are soft-boiled or hard-boiled, eggs are an inexpensive and convenient source of protein that works well in green salads, bean salads, potato salad, and grain salads alike. All varieties of eggs are a good source of protein, a rich source of healthy fats, and provide over a dozen essential nutrients (14). While you can certainly cook eggs at home, hard-boiled eggs are also easily found at all major grocery stores, making them a great no-cook protein source.
Nutrition: A serving of 2 large, hard-boiled eggs provides 12.5 grams of protein (15).
11. Deli Meat
Deli meat often gets a bad rap; however, it is a delicious and convenient way to quickly add protein to a salad for a healthy lunch. Whether it’s turkey, chicken, ham, or beef, a few slices of deli meat can easily take the protein content of any salad from moderate to high, like a chopped Italian deli salad. When shopping for deli meat, be sure to read the label and opt for versions with limited additives, preservatives, and lower sodium content.
Nutrition: A 3-ounce serving of sliced turkey provides 11.5 grams of protein (16).
12. Beans
Be they black, white, or kidney, beans are a source of vegetarian protein and another great protein for salad. Whether you want to make them the base of the salad or a topping to one, beans add a much-needed boost of protein and fiber to any meal. Although cooking beans from scratch is a much more economical choice, canned beans are equally as nutritious as dry beans and can help to save you a lot of time in the kitchen.
Nutrition: A 3/4-cup serving of cooked black beans provides 11.4 grams of protein (17).
13. Chickpeas
Along with beans and lentils, chickpeas are a member of the legume family and a source of vegetarian protein and fiber. Albeit their overall protein content is low compared to their carbohydrate content, every bit of protein counts and helps to increase protein intake. Although often consumed cold in salads, chickpeas can easily be toasted or baked to create a crispy and crunchy protein topping for a salad.
Nutrition: A 3/4-cup serving of cooked chickpeas provides 10.9 grams of protein (18).
14. Cheese
Whether you choose to make it the star of the show, like in a grilled halloumi salad or burrata salad, or a condiment paired with other sources of protein, cheese is a great way to add protein to a salad. Gram per gram, Parmesan, Gruyere, and Swiss cheese are the highest protein cheeses. Although non-dairy cheese is a great alternative for individuals with allergies or following a plant-based diet, they do not provide the same amount of protein as traditional cow or goat milk cheese.
Nutrition: A 1-ounce serving of parmesan cheese provides 10.1 grams of protein (19).
15. Tofu
Made from condensed soybean curd, tofu is one of the most popular sources of vegetarian protein. Unlike some plant proteins, tofu contains all essential amino acids, although not in the same ratios as animal protein, and it is often considered a more optimal source of vegetarian protein (20). In addition to protein, tofu is also a source of carbohydrates and fat. Tofu is available in soft, firm, and extra-firm formats, and can easily be sliced and grilled, baked, or roasted, making it a great way to add protein to a salad.
Nutrition: A 3-ounce serving of extra-firm, cubed tofu provides 8.0 grams of protein (21).
16. Whole Grains
Compared to animal proteins, whole grains are not a substantial source of protein or a complete protein; however, they remain a good option for vegetarians or individuals following a plant-based diet. Of all whole grains, wheat berries, teff, and amaranth are the highest protein grains. Much like beans, lentils, and chickpeas, whole grains such as farro, brown rice, and quinoa work well as a topping or a base to add protein to a salad.
Nutrition: A 3/4-cup serving of cooked Kamut provides 8.0 grams of protein (22).
17. Nuts and Seeds
Although primarily sources of fat, nuts and seeds do contain moderate amounts of protein and can be used to add protein to a salad. Comparatively speaking, peanuts, almonds, and pistachios are the highest protein nuts, and hemp seeds, pumpkin seeds, and sunflower seeds are the highest protein seeds. To help mitigate excessive calorie intake, nuts and seeds are best paired with another source of protein, as they are rich sources of healthy fats and, when consumed in excess, can quickly increase calorie intake.
Nutrition: A 1-ounce serving of raw peanuts provides 6.7 grams of protein (23).
18. Bacon
Although vilified as a dietary evil, bacon is a good source of healthy fats and protein. This cured meat contains 50% monounsaturated fat, the same “healthy” fat found in olive oil, along with 40% saturated fat, 10% polyunsaturated fat, and a moderate amount of cholesterol (24). In fact, meta-analysis studies have not found any independent association between saturated fats and heart disease or reported a significant increase in heart disease mortality or total mortality (25). So, whether you’re only using pork bacon or turkey bacon, a couple of slices of bacon is a great way to add protein to a salad.
Nutrition: A 2-slice serving of cooked bacon provides 5.2 grams of protein (26).
Examples of High-Protein Salad Recipes
- Curried Chicken Salad
- Quinoa Edamame Salad
- Quinoa Chickpea Salad
- Arugula Feta Farro Salad
- Lentil and Quinoa Salad

The Bottom Line
Be it chicken, steak, salmon, eggs, tofu, beans, or lentils, there are plenty of ways to add protein to a salad. Including protein in a salad can help to create a well-balanced meal, and regular protein intake has been shown to support weight loss, increase muscle mass and strength, curb hunger, speed up recovery after exercise, and help individuals maintain a healthy weight.