Not only can undereating leave you fatigued with food cravings, but a lack of calories can lead to poor nutrition and a host of more serious health conditions. Here are the top signs you’re not eating enough.

Table of contents
- What defines undereating?
- Risks of Undereating
- Signs You’re Not Eating Enough
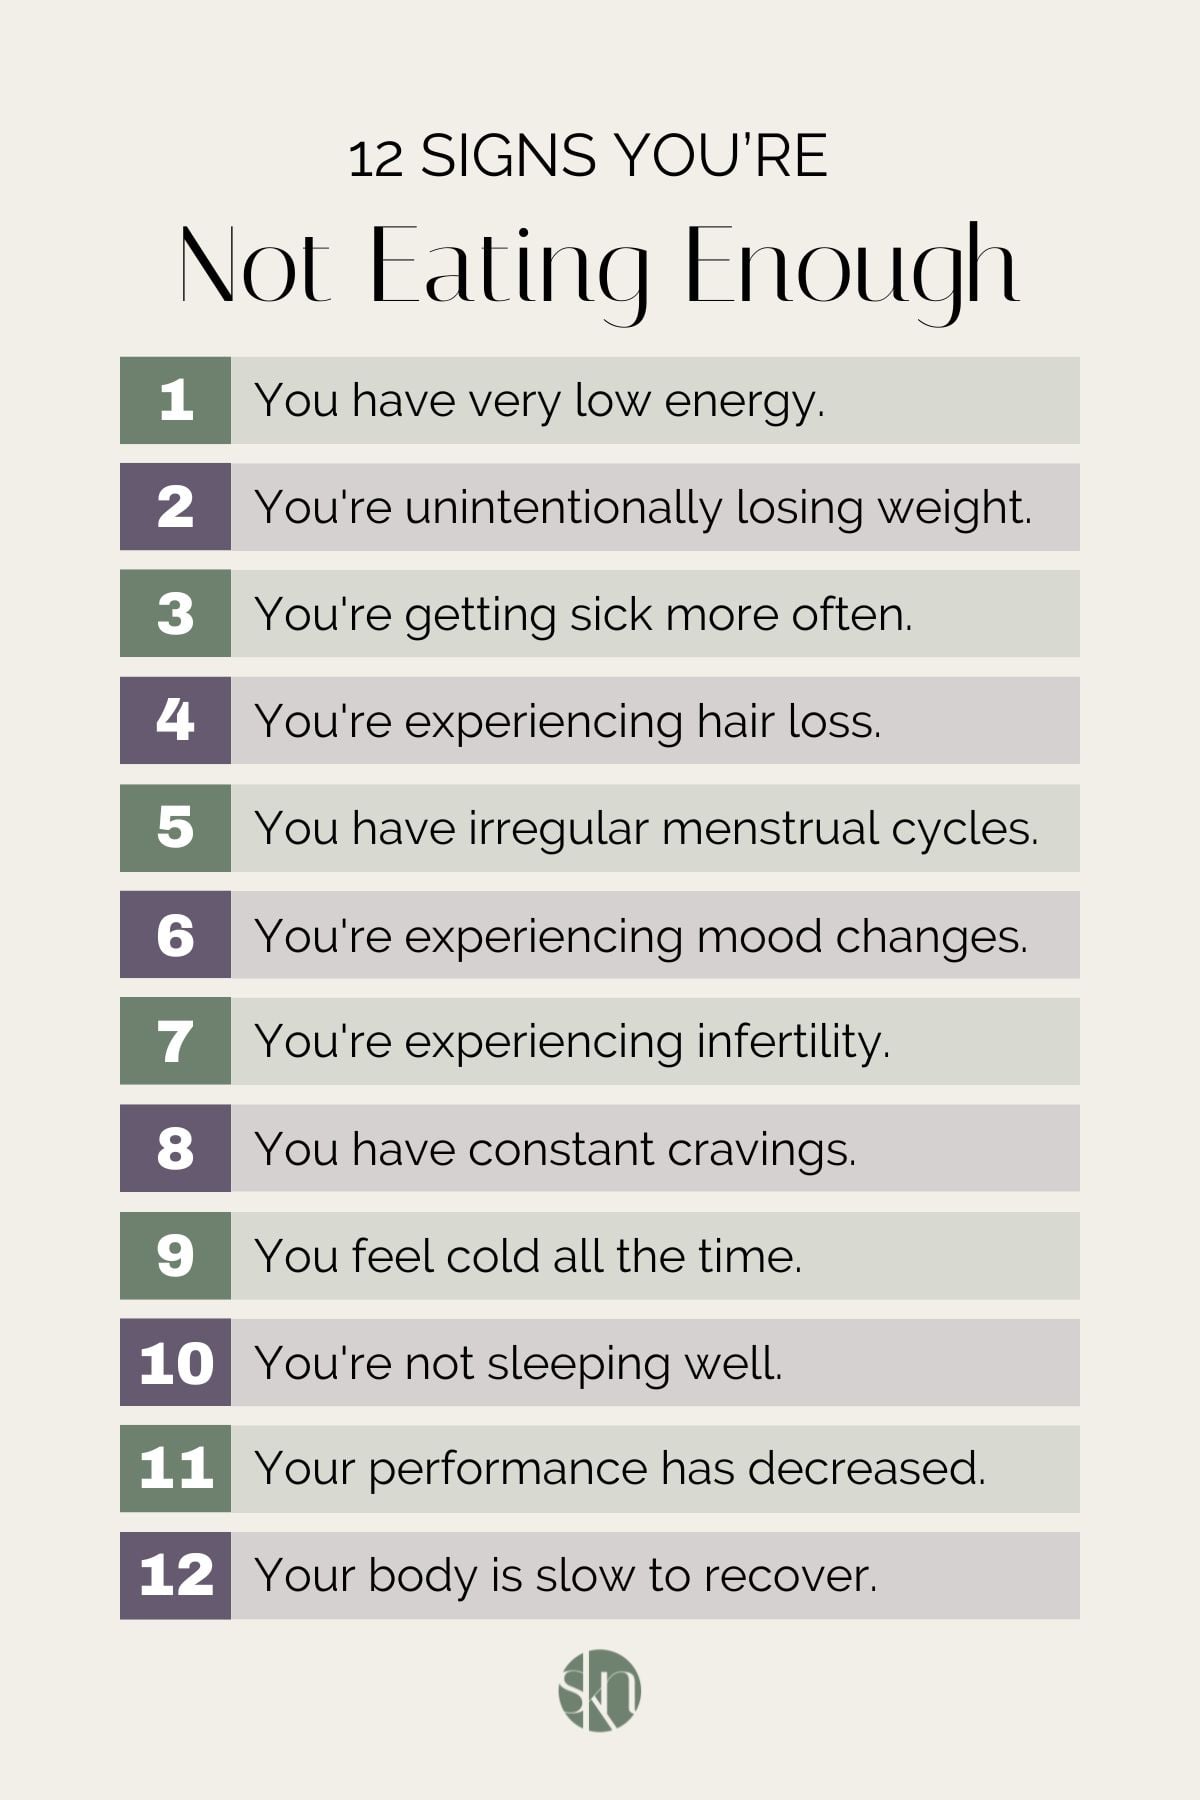
- 1. You have very low energy.
- 2. You’re unintentionally losing weight.
- 3. You’re getting sick more often.
- 4. You’re experiencing hair loss.
- 5. You have irregular menstrual cycles.
- 6. You’re experiencing mood changes.
- 9. You feel cold all the time.
- 10. You’re not sleeping well.
- 11. You’re performance has decreased.
- 12. Your body is slow to recover.
With overeating and obesity being so prevalent in North America, undereating is often overlooked; however, it has just as consequential, if not more, adverse health effects.
In the same way that it is possible to eat too much food, it’s possible to not eat enough food. Not only do we require enough calories (energy) to thrive, but we also require adequate nourishment from protein, carbohydrates, fats, vitamins, and minerals to function optimally.
What defines undereating?
Undereating is defined as insufficient food intake that may lead to weight loss or failure to thrive (1).
More specifically, it is consuming fewer calories than the body needs to maintain calorie balance for weight maintenance, which leads to an inadequate intake of macronutrients and micronutrients to support optimal health.
While short-term strategic undereating, commonly known as “dieting”, is required for weight loss and is safe for individuals of a healthy weight, unintentional or extreme undereating can have many unintended negative side effects and, in some cases, is cause for serious concern.
Risks of Undereating
The primary risk of undereating is becoming underweight, which is typically measured by body mass index (BMI). BMI is calculated by a mathematical formula using weight and height, and a person is considered underweight if they have a BMI of 18.5 or under (2).
Being underweight puts individuals at greater risk for (3):
- malnutrition
- osteoporosis and bone fractures
- chronic fatigue
- weakened immune system
- irregular menstrual cycles
- fertility issues
- growth and developmental issues, especially in children
While BMI does provide broad data for estimating body fat percentage at a population level, it does have limitations at the individual level, particularly with athletes, pregnant and breastfeeding women.
Signs You’re Not Eating Enough
Here are the top 12 signs you’re not eating enough food.
1. You have very low energy.
Fatigue is one of the first signs you’re not eating enough. While there are many reasons you might experience fatigue, constant, chronic fatigue might be a sign of undereating.
Given that the calories we consume from food are the body’s primary source of energy (glucose), not enough food, particularly from carbohydrates, can cause energy levels to remain low.
While exactly how many calories a person needs will vary widely by individual, based on age, sex, height, weight, activity level, and goals, however, on average, adult females require 2,000 calories per day and adult males require 2,500 calories per day (4).
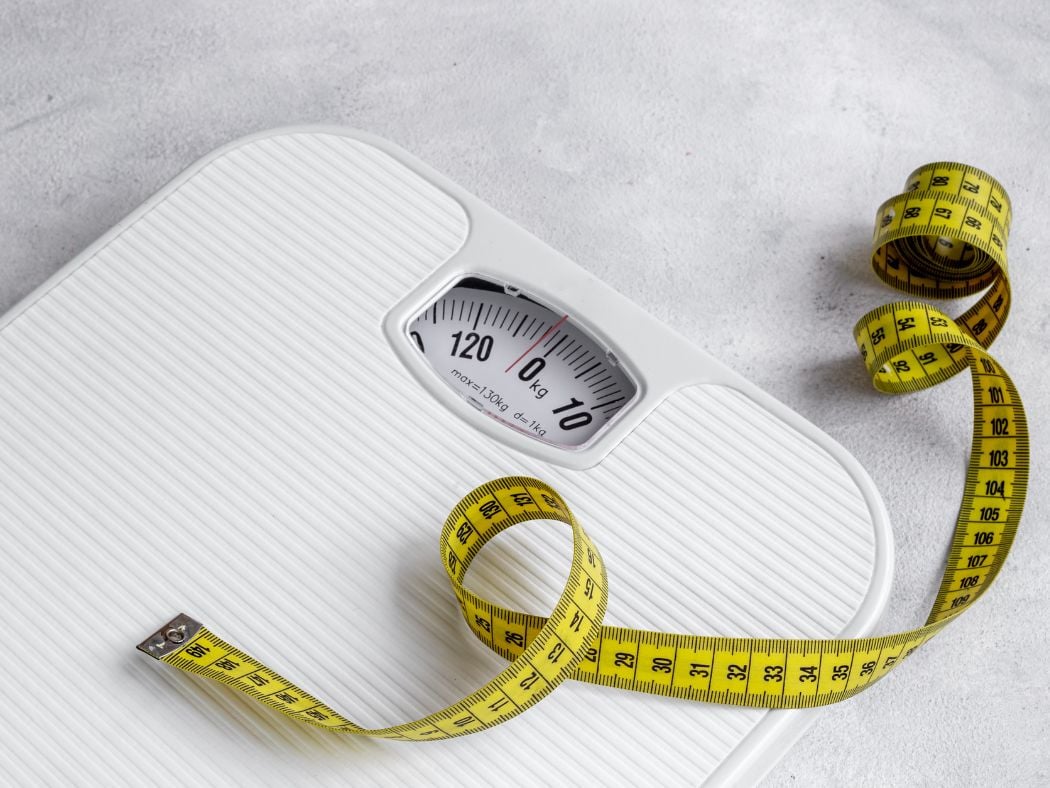
2. You’re unintentionally losing weight.
Significant, rapid, and unintentional weight loss is a key sign that you’re not eating enough. Weight loss occurs when your calorie intake does not meet your calorie expenditure and can result in weight loss from fat, muscle mass, and bone.
Although undereating is required for intentional weight loss through the creation of a calorie deficit, and is perfectly safe when done for short periods at a small to moderate level, dramatically reducing calorie intake for extended periods may lead to more serious health conditions.
Monitoring body weight using a scale, body measurements, clothes fitting, and/or photos are good ways to ensure you’re maintaining a healthy weight range.
3. You’re getting sick more often.
Experiencing frequent illness is another sign that you may not be eating enough. An adequate intake of micronutrients, particularly vitamin A, vitamin C, vitamin D, vitamin E, selenium, and zinc, is essential for maintaining a healthy and robust immune system that can fight off infections (5).
Consuming a balanced diet of whole foods that meets your daily calorie needs is the best way to ensure you’re consuming the nutrients required to keep your body healthy.
4. You’re experiencing hair loss.
While the effects of undereating vary from one person to the next, hair loss, dry skin, and brittle nails are all signs you may not be eating enough. An inadequate intake of calories that leads to a deficiency of vitamin A and D, biotin, and iron has been correlated with hair loss and hair thinning (6, 7).
5. You have irregular menstrual cycles.
Irregular menstrual cycles or amenorrhea (the absence of menstruation) may be an indication that you’re underweight and not eating enough (8). Although women can experience cycle changes and miss their periods for several reasons, they can also occur when you’re undereating and body fat is too low.
Not eating enough can cause hormonal changes and lead to hormonal imbalances that shift energy away from non-essential functions. Moreover, a low intake of healthy fats and essential fatty acids can disrupt hormonal balance, which can lead to changes in menstruation (9).
6. You’re experiencing mood changes.
Mood is badly affected by not eating enough. Not only can low blood sugar (hypoglycemia) cause irritability, anxiety, and even confusion, but significant undereating can cause more significant mental health issues, such as feelings of depression (10).
If you regularly find yourself “hangry” (becoming angry because you are feeling hungry) or experience frequent mood swings, you may be undereating or not eating adequately balanced meals.
7. You’re experiencing infertility.
Not eating enough, whether it is due to undereating or an eating disorder, can contribute to fertility issues. When the body doesn’t receive adequate nourishment, it will prioritize essential functions like breathing and heart function over non-essential functions.
Not eating enough can cause hormonal changes in women and men, which can lead to irregular menstrual cycles, ovulation problems, and reduced sperm quality (11).
8. You have constant cravings.
While cravings are completely normal, constant cravings or constantly thinking about food may be a sign you’re not eating enough. Undereating calories or overly restricting foods may cause the body to seek energy, which can come in the form of cravings (12).
Since the body’s primary energy source is glucose, a form of sugar, cravings for sugar and carbohydrates may be a good indication that you are undereating.
9. You feel cold all the time.
When your body doesn’t get enough calories, it will decrease its core temperature to conserve energy (13). The more you reduce calories, the more the body may experience metabolic adaptation, and the more it adjusts to the lower caloric intake or a colder environment by reducing heat production (14).
Moreover, the leaner you are and the less body fat you have, the more likely you are to feel cold since body fat and muscle mass help to insulate the body (15).
10. You’re not sleeping well.
Not eating enough can disrupt sleep patterns and lead to both difficulties falling asleep and poor sleep quality (16). A deficiency in calories can cause low blood sugar, which can cause you to wake up in the middle of the night, and nutrient deficiencies can disrupt sleep-wake hormones and lead to insomnia.
11. You’re performance has decreased.
A decline in athletic performance is another sign you may not be eating enough. Whether you’re running, lifting weights, or playing a sport, adequately fueling the body, especially pre-workout, is essential for hitting targets, accomplishing personal bests, and winning games.
While it’s important to consider other factors like sleep, stress, and hydration, if you’re experiencing a decrease in speed, strength, or endurance, it may be a sign you’re undereating calories or macros for your goals.
12. Your body is slow to recover.
Not eating enough can significantly impair recovery from exercise and injury. Carbohydrates and protein play an important role in muscle recovery, and undereating can cause a decreased consumption of them, especially if you’re not monitoring your macro intake.
If you’re experiencing prolonged muscle soreness, stiffness, or you need more time in between workouts, it may be a sign you’re not eating enough, especially post-workout.

The Bottom Line
Consuming fewer calories than your body needs can lead to malnutrition and, in turn, failure to thrive. The top signs you’re not eating enough are extreme fatigue, unintentional weight loss, weakened immune system, hair loss, irregular periods, mood swings, infertility, cravings, feeling cold, poor sleep, decreased athletic performance, and poor muscle recovery.