Stephanie Kay Nutrition

Stephanie Kay Nutrition

Real Food for Real Life

  • recipes
    • all recipes
    • Breakfast
    • Lunch
    • Dinner
    • Soups & Stews
    • Salads
    • Sides
    • Snacks
  • nutrition
    • All Articles
    • Tips
    • FAQs
    • This vs. That
    • How To/Guides
    • Weight Loss
  • resources
    • 10 Days of Nutrition
    • 7-Day Meal Plan
    • Balanced Meal Guide
    • 5-Ingredient Cookbook
    • Lunch Box Cookbook
  • About
    • About Steph
    • Contact
  • Dinner
  • Breakfast
  • Meal Prep
  • Nutrition Tips
  • facebook
  • instagram
  • pinterest
  • youtube

12 No-Cook Protein Sources

Published on August 3, 2021 by Stephanie Kay

Too hot to cook? Don’t feel like turning on the oven? No problem, you can enjoy these high-protein foods without cooking! These no-cook protein sources are a quick and easy way to increase your protein intake and create a well-balanced meal with minimal effort.

No-Cook Protein Sources

One of the keys to creating a balanced meal is ensuring that every meal contains a source of protein. Although, in theory, this is quite easy to do, when life gets busy or the temperature heats up, sometimes we just don’t have time or feel like roasting a whole chicken or cooking a pot beans. Fortunately, there are plenty of sources of protein that you can buy pre-cooked in the grocery store or pull out of the freezer, fridge, or pantry that require absolutely no cooking at all.

No-Cook Protein Ideas

Whether you are building a breakfast, lunch, dinner, or snack, here are 12 no-cook sources of protein that you can add to your next meal.

1. Deli Meat

Whether it’s turkey, chicken, or roast beef, deli meat and cold cuts are a great source of no-cook protein. Not only are there many different types to choose from but deli meat is an incredibly versatile source of protein that can easily be added to sandwiches, topped onto salad, or eaten on its own as a part of a simple snack-style meal. When shopping for deli meat, be sure to read the ingredients and look for less processed versions made of meat and seasonings, with a lower sodium and sugar content. A 3-ounce serving of turkey deli meat contains 19 grams of protein (1).

2. Cottage Cheese

Although all forms of cheese contain protein, cottage cheese has a particularly high protein content. Cottage cheese works well as a simple snack or side, can be topped fruit, top onto salads or toast, or mix into dips, smoothies, or baked goods such as pancakes. Not to mention, in addition to its protein content, it’s also a great source of micronutrients including calcium, phosphorus, selenium, vitamin B12, and riboflavin. A 1/2-cup serving of 2% cottage cheese contains 14 grams of protein (2).

3. Frozen Edamame

Edamame beans are the green, whole, immature soybeans, often referred to as soybeans vegetables. Much like other soy products, such as tofu and tempeh, edamame is a good source of vegetarian protein, as well as fiber. Edamame can be found in pods or shelled in the freezer section of all major grocery stores, similar to green peas. Since the edamame beans are already cooked and frozen, once thawed, they can be eaten on their own as a simple snack, added to stir-fry, or mixed into a salad for a quick and easy source of no-cook plant-based protein. A 1-cup serving of prepared edamame contains 18 grams of protein (3).

4. Canned Beans

From black to white to kidney, beans are a filling and high-fiber source of vegetarian protein and a versatile ingredient that you can eat at any meal of the day. Although beans are primarily a source of carbohydrate, with an average ratio of 3:1 carb to protein, compared to other sources of carbohydrate they have the highest concentration of protein content. Beans can easily be cooked into stews, soups, pasta, or casseroles, mixed into salads, or blended directly into sauces or dips. A 1-cup serving of cooked black beans contains 15 grams of protein (4).

5. Canned Tuna

Canned tuna is a pantry staple in many kitchens; it’s versatile, relatively inexpensive, and can last for long periods of time. In addition to being a good source of protein, tuna is an excellent source of healthy fats, most notably omega-3 fatty acids, and can be added to sandwiches, salads, pasta, or casseroles. Although tuna tends to be the most popular, all forms of canned fish and seafood, such as canned salmon, shellfish, and sardines, are incredibly nutrient-dense and convenient options. One can of water-packed tuna contains 27 grams of protein (5).

6. Hard-Boiled Eggs

If you’re making them at home, they will require a little cooking, however, you can also easily find packaged and pre-cooked boiled eggs in all major grocery stores. Whether you’re adding them to a salad, a slice of toast, or a lunch box, boiled eggs are a protein and micronutrient powerhouse complete with vitamins A, D, and E, zinc, calcium, and all of the B vitamins. A serving of 2 hard-boiled eggs contains 12 grams of protein (6).

7. Canned Chickpeas

Much like beans, chickpeas are a great source of vegetarian protein that can be used in salads, soups, stews, curries, or snacks. Also known as garbanzo beans, chickpeas are part of the legume family and, in addition to being a source of no-cook protein, are a good source of fiber and complex carbohydrates, while being moderate in calories. A 1-cup serving of cooked chickpeas contains 15 grams of protein (7).

8. Canned Lentils

Although they are quick and easy to cook, along with beans and chickpeas, lentils are a great source of no-cook protein that is easily found cooked and canned in all major grocery stores. From red to green to brown, lentils come in many different shapes, sizes, and colors and are an inexpensive and versatile ingredient in the kitchen. Lentils can be consumed hot cooked into soups, stews, chilis, and curries, eaten cold in a salad, or blended into a dip. A 1-cup serving of cooked lentils contains 18 grams of protein (8).

9. Smoked Salmon

Cured or smoked fish of any kind makes a wonderful addition to a salad, eggs, a sandwich, pasta dish, or snack-style lunch with crackers and cheese. Smoked salmon is made by salting the fish and then curing the flesh, with either hot or cold smoke, for one or several days to remove excess moisture from the fish. The process of smoking does not diminish the nutritional value of the salmon; it is simply a method of preservation. In addition to being high in protein, smoked salmon is an excellent source of omega-3 fatty acids and vitamin B12.  A 3-ounce serving of smoked salmon contains 15 grams of protein (9).

10. Greek Yogurt

All yogurt, but particularly Greek yogurt, is a good source of high-quality protein. Greek yogurt is made via the same process as regular yogurt, however, once fermented the yogurt is strained to remove excess liquid whey and lactose, reducing the natural carbohydrate content and increasing the protein content, leaving behind a thicker-textured yogurt. Greek yogurt can be eaten on its own, with granola and/or fruit, mixed into muffins or baked goods, or stirred into dressing and dips. On average, a 3/4-cup serving of Greek yogurt contains 16 grams of protein (10).

11. Jerky

Be it beef, buffalo, elk, turkey, or chicken, jerky is lean-trimmed meat that has been cut into strips and dried, cured, or smoked. The word jerky is actually derived from the Quechua word ch’arki, which means “dried, salted meat”, and the process of creating jerky is a traditional method of food preparation that was used across cultures to prevent spoilage. Generally speaking, jerky is a convenient and transportable source of no-cook protein that is high in protein and low in carbohydrates, however, not all brands are created equal, so it is best to read the ingredients to ensure that you are choosing an option made of meat, salt, and spices, with limited additives. A 3-ounce serving of beef jerky contains 27 grams of protein (11).

12. Protein Powder

While getting protein from whole foods is certainly more ideal, protein powders are a great alternative when you are in a pinch. Protein powders are dietary supplements that are concentrated sources of protein made from powdered animal or plant sources of protein, such as dairy, eggs, rice, or peas. Depending on the exact formula, protein powders are often fortified with vitamins, minerals, and/or enzymes to increase their nutritional value as they are sometimes used as a meal replacement or substitute. Protein powder can be used in many ways including on its own in water or milk, and added to smoothies, yogurt, oatmeal, or baked goods for a quick and easy boost of protein. On average, a 1-scoop serving of protein powder contains 26 grams of protein (12).

The Bottom Line

Adding protein to a meal does not need to be complicated with so many no-cook protein sources to choose from. Be it tuna, Greek yogurt, or a can of beans, there are plenty of different ways to add protein to breakfast, lunch, or dinner without any cooking at all.

Turkey Lettuce Wraps

Published on August 1, 2021 by Stephanie Kay

Made with fresh lettuce leaves topped with spiced ground turkey, a zesty lime sauce, crunchy vegetables, and a sprinkle of peanuts, these Thai turkey lettuce wraps are the perfect combination of simple, fresh, and fragrant. Inspired by a traditional Thai Larb Gai recipe, these lettuce wraps can be served on their own or with a side of sticky rice as a healthy and high-protein meal.

Thai Turkey Lettuce Wraps

Popular in Laos and rural sections of Northeastern Thailand, Larb Gai is a light chicken salad made with fresh mint and red onion, tossed in a dressing of ground rice, lime juice, and chilies. Although a traditional Larb Gai, also spelled Laab Gai, Lahb Gai, Laap Gai, is made with ground chicken, I opted to use ground turkey in this recipe as a simple twist, and because it’s what I had in the freezer, but feel free to use whichever you have on hand. Either option will create a flavor-packed dish that works equally well as an appetizer or a light main course.

More Healthy Turkey Recipes

  • Turkey Taco Skillet
  • Teriyaki Turkey Meatballs
  • White Bean Turkey Chili
  • Korean Ground Turkey Rice Bowls
  • Teriyaki Turkey Meal Prep Bowls
Print
Thai Turkey Lettuce Wraps

Turkey Lettuce Wraps

Author: Stephanie Kay

Inspired by a traditional Thai dish called Larb Gai, these turkey lettuce wraps are delicious hot or cold and work well as a fragrant appetizer or a light main course.

  • Author: Stephanie Kay
  • Prep Time: 10 minutes
  • Cook Time: 20 minutes
  • Total Time: 30 minutes
  • Yield: 4 servings
  • Category: Main
  • Method: Stovetop
  • Cuisine: Thai
Print Recipe
Pin Recipe

Ingredients

Turkey Mixture:

  • 1 pound ground turkey
  • 2 tablespoons white rice, dry
  • 2 tablespoons fish sauce
  • 1/2 tablespoon brown sugar
  • 2 limes, juiced
  • 2 tablespoons water
  • 2 tablespoons peanut or sesame oil
  • 2 cloves garlic, grated or minced
  • 1” ginger root, grated or minced
  • 1 Thai or birds eye chilli, seeded and minced
  • 1/4 cup red onion, minced
  • 1/4 cup mint, finely chopped
  • 1/4 cup cilantro, finely chopped

Lettuce Wraps:

  • 1 head bibb lettuce, leaves removed
  • 1 cup red cabbage, shredded or finely chopped
  • 1/2 cucumber, thinly sliced
  • 1/4 cup peanuts, roughly chopped
  • 1 lime, cut into wedges

Instructions

  1. Warm a small skillet to medium heat, add rice, and cook, stirring often, until rice is well toasted and dark brown, about 3 to 4 minutes. Once toasted, transfer the rice to a pestle and mortar or a coffee grinder and grind it into a fine meal.
  2. Once ground, in a small bowl, combine ground rice, fish sauce, brown sugar, water, and lime juice, and mix until well combined, it will form a thick paste. Set aside.
  3. Warm oil in a large skillet on medium-high heat, add garlic, ginger, and chilli, and cook for about 1 minute until fragrant.
  4. Add ground turkey to the skillet, increase the heat slightly, and continue to cook, breaking the turkey up into small pieces with a wooden spoon or spatula.
  5. When the turkey is almost completely cooked, add the rice mixture, stirring to coat the turkey, and cook for an additional 1-2 minutes until everything is combined.
  6. Once cooked, remove skillet from the heat, add red onion, mint, and cilantro to the turkey mixture and stir until well combined.
  7. To serve, spoon the turkey filling into lettuce leaves and top with cabbage, cucumber, peanuts, and a squeeze of lime.

Nutrition

  • Serving Size: 1 serving
  • Calories: 347 calories
  • Sugar: 6 grams
  • Fat: 21 grams
  • Carbohydrates: 17 grams
  • Fiber: 5 grams
  • Protein: 28 grams

Did you make this recipe?

Share a photo and tag us — we can’t wait to see what you’ve made!

Strawberry Smoothie Bowl

Published on July 29, 2021 by Stephanie Kay

If you love soft-serve ice cream, this little number is for you! Thick, creamy, and covered in the toppings of your choice, the natural sweetness of this strawberry smoothie bowl is a great way to satisfy a sweet tooth in a slightly healthier way.

Strawberry Banana Smoothie Bowl


I used plain yogurt in this recipe,  however, you can certainly swap it for Greek yogurt if that’s all you have on hand or you wanted to increase the protein content a bit. Regardless of what option you choose, whether you’re looking for a light breakfast on a warm summer day, a sweet snack, or a healthy dessert, this bowl is a sweet treat the whole family can enjoy.

More Smoothie Bowl Recipes:

  • Chocolate Almond Smoothie Bowl
  • Green Smoothie Bowl


Print

Strawberry Banana Smoothie Bowl

Strawberry Smoothie Bowl

Author: Stephanie Kay

Enjoy this rich and creamy strawberry banana smoothie bowl as a light breakfast or a healthy snack.

  • Author: Stephanie Kay
  • Prep Time: 5 minutes
  • Total Time: 5 minutes
  • Yield: 1 serving
  • Category: Breakfast, Snack
  • Method: Blender
Print Recipe
Pin Recipe

Ingredients

Smoothie Bowl:

  • 1 cup strawberries, frozen
  • 1 banana, sliced, frozen
  • 1/2 cup yogurt, plain
  • 2 tablespoons milk, plus more as needed

Toppings:

  • Chia seeds
  • Hemp seeds
  • Pumpkin Seeds
  • Berries, of your choice

Instructions

  1. Place the strawberries, sliced banana, and yogurt in a blender or food processor and blend on low, scraping down the sides as needed, adding milk in batches as needed, until a smooth consistency is reached. You’re looking for a soft-serve ice cream consistency, thick enough to eat with a spoon.
  2. Once blended, transfer the mixture to a bowl.
  3. Sprinkle with toppings of your choice and serve immediately.

Nutrition

  • Serving Size: 1 bowl
  • Calories: 224 calories
  • Sugar: 27 grams
  • Fat: 5 grams
  • Carbohydrates: 42 grams
  • Fiber: 6 grams
  • Protein: 7 grams

Did you make this recipe?

Share a photo and tag us — we can’t wait to see what you’ve made!

Avocado Tuna Salad

Published on July 27, 2021 by Stephanie Kay

Made with ripe avocado, red onion, cucumber, and celery, this avocado tuna salad is easy to make, high in protein, and filled with healthy fats. Once mixed, this tuna salad can be served on its own, added to a sandwich, or on a bed of leafy greens for a quick and healthy lunch.

Avocado Tuna Salad

This recipe is best made when you are ready to eat as the avocados may brown a little if left too long or made ahead of time. And, for the record, there is nothing unhealthy about the classic tuna salad made with mayonnaise, especially when you make homemade mayonnaise, this recipe is simply a fun twist on the classic dish.

More Healthy Tuna Salad Recipes:

  • Tuscan Tuna Salad
  • Mediterranean Tuna Pasta Salad
  • Tuna Salad Pita
Print
Avocado Tuna Salad

Avocado Tuna Salad

Author: Stephanie Kay

Bright, fresh, and full of flavor, this avocado tuna salad is a fun twist on a classic tuna salad recipe. This recipe can be served on its own, in a sandwich, or topped onto a bed of leafy green for a quick and easy lunch.

  • Author: Stephanie Kay
  • Prep Time: 10 minutes
  • Total Time: 10 minutes
  • Yield: 2 servings
  • Category: Salad
  • Method: By Hand
Print Recipe
Pin Recipe

Ingredients

  • 1 can tuna, drained
  • 1 avocado, ripe, peeled
  • 1/2 cup celery, diced
  • 1/2 cup cucumber, diced
  • 1/4 cup red onion, minced
  • 2 tablespoons parsley, finely chopped
  • 1 tablespoon olive oil
  • 1/2 lemon
  • Salt
  • Pepper

Instructions

  1. In a large bowl, add tuna, avocado, celery, cucumber, red onion, and parsley, and mix and mash with a fork to combine.
  2. Add the olive oil, juice from the lemon to taste (only add as much as needed), a pinch of salt, and black pepper, and mix again until well combined. Taste and adjust seasoning as needed.
  3. This avocado tuna salad can be served immediately on its own, in a sandwich, or topped onto a leafy green salad. Any additional salad can be stored in an airtight container in the fridge for one day.

Nutrition

  • Serving Size: 1 serving
  • Calories: 304 calories
  • Sugar: 2 grams
  • Fat: 20 grams
  • Carbohydrates: 11 grams
  • Fiber: 6 grams
  • Protein: 23 grams

Did you make this recipe?

Share a photo and tag us — we can’t wait to see what you’ve made!

Grilled Vegetable and Ricotta Sandwich

Published on July 22, 2021 by Stephanie Kay

This grilled vegetable and ricotta sandwich is the perfect way to use up leftover grilled vegetables from dinner. With some fresh herbs, a bit of garlic, and some lemon zest, you can quickly and easily create a delicious ricotta spread for your favorite fresh bread to create a healthy and high-protein lunch.

Ricotta Sandwich with Grilled Vegetables

Although this recipe calls for grilled vegetables, you could certainly use fresh vegetables if you prefer; a few slices of tomato, thin slices of cucumber and a handful of leafy greens would work particularly well. Not to mention, you can make this ricotta sandwich spread ahead of time and keep it in the fridge for up to one week so it’s ready for lunch whenever you need it.

More Healthy Lunch Ideas:

  • Grilled Goat Cheese Sandwich
  • Copycat Starbucks Protein Boxes
Print
Ricotta Sandwich with Grilled Vegetables

Grilled Vegetable and Ricotta Sandwich

Author: Stephanie Kay

This ricotta sandwich with grilled vegetables is a great way to use up leftover veggies and the herbed ricotta spread keeps well in the fridge for days to come, so you can enjoy delicious sandwiches all week long.

  • Author: Stephanie Kay
  • Prep Time: 10 minutes
  • Cook Time: 5 minutes
  • Total Time: 15 minutes
  • Yield: 4 sandwiches
  • Category: Main
  • Method: By Hand
  • Cuisine: Italian
Print Recipe
Pin Recipe

Ingredients

  • 1 cup ricotta cheese
  • 2 tablespoons fresh mixed herbs, basil, parsley or dill, roughly chopped
  • 1 clove garlic, grated
  • 1/2 teaspoon lemon zest (optional)
  • 2 tablespoons olive oil
  • 1 green zucchini, small, thinly sliced
  • 1 yellow zucchini, small, thinly sliced
  • 1 eggplant, small, thinly sliced
  • 1 red bell pepper, sliced
  • 1/4 cup pesto
  • 4 Italian sandwich rolls, halved, or 8 slices of bread
  • Salt
  • Pepper

Instructions

  1. In a bowl, combine the ricotta cheese, fresh herbs, lemon zest, and garlic, stir to combine, and season generously with salt and pepper to taste. Set aside.
  2. Heat a grill or grill pan to medium-high heat.
  3. Add the sliced zucchini, eggplant, and bell pepper to a bowl or plate, drizzle with olive oil and toss until all of the vegetables are well coated in oil.
  4. Once the grill is warm, add the vegetables to the grill and cook for 2-3 minutes per side until tender and grill marks appear. Remove from the heat and allow to cool slightly.
  5. To assemble the sandwiches, lay bread onto a cutting board. Spread the bottom with a 1/4 cup of ricotta cheese and the top with 1 tablespoon of pesto. Layer grilled vegetables on top of the ricotta spread and close sandwiches.
  6. These ricotta sandwiches can be served immediately or prepared ahead of time and stored in the fridge for up to 24 hours, any longer and the bread will get soggy. Any leftover herbed ricotta spread and grilled vegetables can be stored in the fridge for up to 5 days.

Nutrition

  • Serving Size: 1 sandwich
  • Calories: 489 calories
  • Sugar: 3 grams
  • Fat: 23 grams
  • Carbohydrates: 56 grams
  • Fiber: 6 grams
  • Protein: 17 grams

Did you make this recipe?

Share a photo and tag us — we can’t wait to see what you’ve made!

Honey Mustard Chicken Thighs

Published on July 18, 2021 by Stephanie Kay

Made with a simple marinade of honey, mustard, olive oil, and garlic, these honey mustard chicken thighs are tender, juicy, and full of flavor. Grill these chicken thighs up tonight for a quick and easy dinner or make them as a meal prep idea for healthy lunches all week long.

Easy Honey Mustard Chicken Thighs

This recipe calls for boneless, skinless chicken thighs, however, you could certainly use another cut of chicken or bone-in chicken thighs if you prefer. If you’re using bone-in chicken thighs, you’ll need to extend the grilling time to about 5-6 minutes per side, while chicken breasts will take roughly 6-8 minutes per side depending on thickness. If you’re cooking chicken with the skin on, be sure to add it to the grill skin side down for premium flavor and crispiness.

More Healthy Chicken Thighs Recipes:

  • Cilantro Lime Chicken Thighs
  • Lemon Pepper Chicken Thighs
  • Sticky Korean Chicken Thighs
Print
Easy Honey Mustard Chicken Thighs

Honey Mustard Chicken Thighs

Author: Stephanie Kay

Made with honey, mustard, olive oil, and garlic, these grilled honey mustard chicken thighs are tender, juicy, and full of flavour.

  • Author: Stephanie Kay
  • Prep Time: 10 minutes
  • Cook Time: 15 minutes
  • Total Time: 25 minutes
  • Yield: 4 servings
  • Category: Mains
  • Method: Grilled
Print Recipe
Pin Recipe

Ingredients

  • 1 lb. chicken thighs, skinless, boneless
  • 3 tablespoons honey
  • 3 tablespoons Dijon mustard
  • 1 tablespoon olive oil
  • 1 clove garlic, grated or minced
  • 1 pinch cayenne pepper (optional)
  • Salt
  • Pepper

Instructions

  1. Place the chicken thighs on a cutting board and season generously with salt and pepper on all sides.
  2. In a large bowl, combine the honey, mustard, olive oil, garlic, and cayenne pepper (optional) and whisk to combine. If you find the mixture too thick, simply add a splash of warm water and whisk again to loosen it up.
  3. Add the chicken thighs to the bowl and toss to coat in the honey mustard marinade. Allow to marinate, for at least 5-10 minutes, while you heat up the grill. You can also prepare the chicken thighs ahead of time and allow them to marinate, stored in the fridge, for up to 8 hours.
  4. Heat a grill to medium-high heat. Once warm, add the chicken thighs to the grill and cook for 4-5 minutes per side, turning once, until the chicken is cooked through or a thermometer reads 165°F.
  5. Once cooked, remove the chicken thighs from the grill and allow to rest for 5 minutes before serving to help to preserve the juices.
  6. Once rested, the chicken thighs can be eaten immediately or cooled and stored in an airtight container for up to 5 days.

Nutrition

  • Serving Size: 1 serving
  • Calories: 229 calories
  • Sugar: 13 grams
  • Fat: 8 grams
  • Carbohydrates: 14 grams
  • Protein: 25 grams

Did you make this recipe?

Share a photo and tag us — we can’t wait to see what you’ve made!

Everything Bagel Hummus

Published on July 14, 2021 by Stephanie Kay

If you’re a fan of everything bagels, you’re going to love this everything bagel hummus. Flavored with sesame seeds, poppy seeds, onion, garlic, and flaky salt, this hummus recipe is seasoned with everything but the bagel, packed into a rich and creamy dip.

Everything Bagel Hummus Recipe

For the best results, I highly recommend using dried minced garlic, dried minced onion, and flaky sea salt to make homemade everything bagel seasoning. Although garlic powder, onion powder, and regular sea salt will work as well, the crunchy and flaky nature of the dried minced garlic and onion and flaky sea salt gives this hummus the right balance of texture and flavor, just like an everything bagel.

More Healthy Hummus Recipes:

  • Homemade Hummus: Three Ways
  • Hummus Buddha Bowl
  • Mediterranean Grain Bowl
Print
Everything Bagel Hummus Recipe

Everything Bagel Hummus

Author: Stephanie Kay

Made with garlic, onion, sesame seeds and poppy seeds, this rich and creamy hummus recipe is filled with all of the flavours of an everything bagel!

  • Author: Stephanie Kay
  • Prep Time: 15 minutes
  • Cook Time: 20 minutes
  • Total Time: 35 minutes
  • Yield: 12 servings
  • Category: Snack
  • Method: Blender
Print Recipe
Pin Recipe

Ingredients

  • 15oz can chickpeas, drained and rinsed
  • 1/4 cup tahini, well-stirred
  • 1/4 cup lemon juice
  • 2 tablespoons olive oil
  • 1 garlic clove, peeled and smashed
  • 2 teaspoons sesame seeds
  • 1 teaspoon poppy seeds
  • 1 teaspoon dried minced onion
  • 1 teaspoon dried minced garlic
  • 1/2 teaspoon salt, plus more to taste

Instructions

  1. In a small saucepan, add the chickpeas, cover with water by several inches, and bring to a boil. Once boiling, reduce the heat to a simmer and cook the chickpeas for 20 minutes or until their skins are falling off and they’re quite soft. Once cooked, in a fine mesh colander, drain the chickpeas and then run them under cold water for about 30 seconds or until completely cooled and set aside. Although this step is optional, it helps to create an extra smooth and creamy hummus.
  2. In a food processor, add the tahini and lemon juice, and blend on high until well combined, about 30 seconds to 1 minute. This helps to make the hummus extra light and fluffy.
  3. Once blended, add the chickpeas, olive oil, garlic clove, and salt, and blend again on high until smooth, about 1-2 minutes. You may need to stop the food processor a couple of times to scrape down the sides to remove chunks and ensure it is smooth. If you find the mixture too thick, just add a small splash of cold water to loosen it up.
  4. Once blended, remove the blade from the food processor or transfer the hummus to a bowl, and add the sesame seeds, poppy seeds, minced onion, and minced garlic. Using a large spoon or spatula, stir to blend until well combined. Season with additional salt to taste.
  5. Once combined, the hummus can be served immediately as is or with an extra drizzle of oil and sprinkle of seeds and spices on top, or stored in an airtight container in the fridge for up to 5 days.

Nutrition

  • Serving Size: 2 tablespoons
  • Calories: 88 calories
  • Sugar: 0 grams
  • Fat: 6 grams
  • Carbohydrates: 7 grams
  • Fiber: 2 grams
  • Protein: 3 grams

Did you make this recipe?

Share a photo and tag us — we can’t wait to see what you’ve made!

Is Dried Fruit Healthy?

Published on July 13, 2021 by Stephanie Kay

Dried fruit has been present and a staple in many cultural diets for thousands of years, but is dried fruit healthy? And is all dried fruit created equal? Here is a complete guide to dried fruit; what it is, its benefits, its drawbacks, and an answer to whether it’s good for you or not.

Is Dried Fruit Healthy?

What is Dried Fruit?

Dried fruit is fresh fruit from which the original water content has been removed through various drying methods. Fruit can be dried naturally, by the sun, or by specialized driers or dehydrators. As the fruit dries, water evaporates, shrinking the fruit in size, and leaving a smaller piece of fruit that is rich in carbohydrates, sugar, and fiber. Popular forms of dried fruit include raisins (dried grapes), dates, apricots, and prunes (dried plums). Cranberries, cherries, berries, pineapple, and mango are also common.

Dried Fruit vs. Fresh Fruit

Compared to fresh fruit, gram per gram, dried fruit is lower in water content, higher in calories, higher in sugar, higher in carbohydrates, and higher in fiber. Here is a comparison of fresh fruit vs. dried fruit. (1)(2)

Nutrition per 100 grams Grapes Raisins
Calories69 calories299 calories
Protein0.7 grams3.1 grams
Fat0.2 grams0.5 grams
Carbohydrate18.1 grams79.2 grams
Fiber0.9 grams3.7 grams
Sugar 15.5 grams59.2 grams

Benefits of Dried Fruit

Source of Fibre: Much like fresh fruit, dried fruit is a good source of fiber. The reduced level of water in dried fruit allows it to provide, on average, 3.5 times the amount of fiber than fresh fruit, when compared gram per gram. (3) Thanks to their high concentrations of fiber, dried fruits, especially prunes, have been shown to support GI regularity and are commonly suggested as a tool for constipation thanks to their natural laxative effects. Per 1/4 cup, dates, figs, prunes, and raisins provide 8.0 grams, 3.7 grams, 3.1 grams, and 2.5 grams of fiber respectively. (4)

Source of Micronutrients: Dried fruit is a natural source of vitamins, minerals, and antioxidants. Although some of the water-soluble vitamins, specifically vitamin C, are lost as water is lost, dried fruit remains a good source of other micronutrients. For instance, prunes, raisins, and apricots contain iron, while peaches and apricots are a food source of pre-formed vitamin A known as beta-carotene. (5)

Efficient Source of Energy: Although this could be seen as a drawback, the high concentration of simple carbohydrates in dried fruit makes them a good source of quick-release sugar and an efficient source of energy. While this is certainly not required at all times, as part of a pre-workout snack, intra-workout nutrition source of fuel, or post-workout recovery carbohydrate, dried fruit is a great source of energy.

Convenient and Long Lasting: The loss of water in dried fruit helps to extend its shelf life by months, if not years in some cases. Dried fruit can be stored in the pantry or frozen for longer periods of time than fresh fruit. Not to mention, it’s also convenient and easily transportable in various storage and weather conditions.

Drawbacks of Dried Fruit

Concentrated in Sugar: While this is not inherently a bad thing (see above for benefit of being concentrated in carbohydrates), it’s important to remember that dried is more concentrated in natural sugar than fresh fruit. The loss of water in dried fruit increases the concentration of sugar per gram and, therefore, it provides more carbohydrates, sugar, and calories per serving. It is for this reason that the suggested portion size of dried fruit is typically much smaller than that of fresh fruit.

May Contain Additives: Depending on the type and brand, some versions of dried fruit may contain added sugars and vegetable oils. For this reason, it is important to read the ingredients to ensure that you know exactly what you are buying. Whenever possible, opt for versions with no or limited added sugar, and without added vegetable oils.

So, Is Dried Fruit Healthy?

In short, yes, dried fruit is healthy. Dried fruit is a natural source of carbohydrates, fiber, vitamins, and minerals, as well as antioxidants. Although it is more concentrated in natural sugars than fresh fruit, it is still incredibly nutrient-dense and can be included in a healthy diet.

The Bottom Line

Dried fruit is a good source of fiber, vitamins, minerals, and antioxidants. Because dried fruit is more concentrated in sugar and calories than fresh fruit, it is important to be mindful of portion size. Some brands may contain added sugar, syrups, and oils, so be sure to read the ingredients when shopping for dried fruit.

Cornmeal Pancakes

Published on July 11, 2021 by Stephanie Kay

These cornmeal pancakes are the perfect combination of savory cornbread and fluffy buttermilk pancakes. Although they can certainly be eaten on their own or with a drizzle of syrup, the addition of fresh, seasonal strawberry compote takes them to the next level to create a sweet weekend breakfast treat.

Cornmeal Pancakes

These cornmeal pancakes are made with buttermilk to help make them light and fluffy. Although the term buttermilk may sound like a rather rich choice, buttermilk is actually the thin, low-fat but rich-tasting liquid leftover after churning butter. In fact, buttermilk is a natural probiotic-rich food, which helps to provide a boost of beneficial bacteria to these healthy cornmeal pancakes.

More Healthy Pancakes Recipes:

  • Lemon Ricotta Pancakes
  • Blueberry Yogurt Pancakes
  • Banana Oatmeal Pancakes
Print
Cornmeal Pancakes

Cornmeal Pancakes

Author: Stephanie Kay

These cornmeal pancakes with buttermilk are light and fluffy and perfect for breakfast or brunch.

  • Author: Stephanie Kay
  • Prep Time: 10 minutes
  • Cook Time: 20 minutes
  • Total Time: 30 minutes
  • Yield: 10 panckes
  • Category: Breakfast
  • Method: Stovetop
  • Cuisine: American
Print Recipe
Pin Recipe

Ingredients

Pancakes:

  • 3/4 cup all-purpose flour
  • 3/4 cup cornmeal, fine-ground
  • 2 tablespoons sugar
  • 1/2 teaspoon baking powder
  • 1/2 teaspoon baking soda
  • 1/2 teaspoon salt
  • 1 1/4 cups buttermilk
  • 2 eggs
  • 3 tablespoons butter, melted, plus more for cooking

Strawberry Compote:

  • 3 cups strawberries, diced
  • 2 tablespoons sugar (optional)
  • 1/2 lemon, juiced

Instructions

  1. Place the diced strawberries, sugar, and lemon juice in a small saucepan on medium heat. Bring to a simmer and cook, stirring frequently, until the strawberries release their liquid to create a syrup-like texture, about 12-15 minutes. While the strawberry compote is cooking, make the pancakes.
  2. In a large bowl, add the flour, cornmeal, sugar, baking powder, baking soda, and salt, and stir to combine.
  3. In a medium bowl, add the buttermilk, eggs, and melted butter, and whisk until well combined.
  4. Transfer the buttermilk mixture to the flour mixture, and stir gently until well mixed.
  5. Heat a griddle or pan to medium heat, add a knob of butter, and allow to melt. Working in batches, add a 1/4 cup of the batter to the grilled or pan and cook until golden brown, roughly 1-2 minutes. Flip and cook until golden brown on the other side, about 1 minute.
  6. Continue this process until all of the batter is done. You can store the cooked pancakes in the oven at 200°F to keep them warm.
  7. Once complete, serve the pancakes with strawberry compote and/or maple syrup or honey.

Nutrition

  • Serving Size: 1 pancake
  • Calories: 141 calories
  • Sugar: 4 grams
  • Fat: 6 grams
  • Carbohydrates: 19 grams
  • Fiber: 1 gram
  • Protein: 4 grams

Did you make this recipe?

Share a photo and tag us — we can’t wait to see what you’ve made!

Buffalo Shrimp Taco Bowls

Published on July 8, 2021 by Stephanie Kay

Turn taco night inside out with these quick and easy grilled shrimp tacos bowls. Filled with lettuce, corn, tomatoes, avocado, and spicy buffalo shrimp, this recipe is everything you love about tacos turned into a light and healthy bowl.

Buffalo Shrimp Taco Bowls

In my opinion, these grilled shrimp taco bowls are a great meal for a simple high-protein dinner; just light up the grill, cook the shrimp, and layer it into a bowl of veggies. The buffalo shrimp in this recipe is pretty spicy so, if you’re not a fan of heat, you can reduce the total amount of hot sauce used or simply grill the shrimp on its own or with a season of garlic powder and salt. Once prepared, these bowls can be eaten right away or stored in the fridge for up to 3 days as a healthy meal prep idea.

More Healthy Shrimp Recipes:

  • Grilled Shrimp Burrito Bowl
  • Grilled Cajun Shrimp Tacos
  • Spicy Blackened Shrimp
Print
Buffalo Shrimp Taco Bowls

Buffalo Shrimp Taco Bowls

Author: Stephanie Kay

Full of colour and fresh flavours, these buffalo shrimp taco bowls are perfect for a quick, easy and light meal.

  • Author: Stephanie Kay
  • Prep Time: 5 minutes
  • Cook Time: 10 minutes
  • Total Time: 15 minutes
  • Yield: 4 servings
  • Category: Main
  • Method: Stovetop
Print Recipe
Pin Recipe

Ingredients

Buffalo Shrimp:

  • 1 lb. shrimp
  • 1/4 cup hot sauce, such as Frank’s
  • 1 tablespoon olive oil
  • 1/4 teaspoon garlic powder

Bowls:

  • 1 head romaine lettuce, chopped
  • 2 cups corn, frozen, thawed
  • 2 cups cherry tomatoes, quartered
  • 1 avocado, cubed
  • 1/4 red onion, thinly sliced
  • 4 oz. Cotija cheese*, crumbled
  • 1/4 cup cilantro, roughly chopped
  • 1 lime, quartered
  • Salt

Instructions

  1. In a large bowl, combine the hot sauce, olive oil, and garlic powder and whisk to combine.
  2. Add shrimp to the hot sauce mixture and toss to combine until well coated.
  3. Heat a grill or grill pan to medium-high heat, add shrimp, and cook for 2-3 minutes per side or until pink. Once cooked, remove from the grill and set aside.
  4. In serving bowls, combine the lettuce, corn, tomatoes, avocado, and red onion. Layer each both with a handful of shrimp, a sprinkle of cheese, cilantro, and a slice of lime. Season with salt and pepper to taste.
  5. These bowls can be served immediately or stored in the fridge for up to 3 days. If you are going to make them ahead of time, don’t add or cut the avocado until it’s time to serve to ensure that it does not go brown.

Notes

Cotija Cheese: Cotija cheese is a Mexican aged cheese made from cow’s milk with a salty taste and crumbly texture. If you can’t find Cotija cheese, feta cheese will also work well.

Nutrition

  • Serving Size: 1 bowl
  • Calories: 412 calories
  • Sugar: 11 grams
  • Fat: 19 grams
  • Carbohydrates: 31 grams
  • Fiber: 9 grams
  • Protein: 35 grams

Did you make this recipe?

Share a photo and tag us — we can’t wait to see what you’ve made!

Tomato Burrata Salad

Published on July 4, 2021 by Stephanie Kay

Made with heirloom tomatoes, creamy burrata cheese, pine nuts, and fresh pesto, this tomato burrata salad is an eye-catching and crowd-pleasing dish. Not only does this salad work well as an appetizer or side dish but you can easily make a smaller portion to serve as a light lunch or simple dinner.

Burrata Salad with Tomato and Pesto

If you’ve never tried burrata cheese, I highly suggest you do! Burrata cheese is an Italian-style cheese, typically made from cow’s milk, with a pillowy texture, soft exterior, and creamy interior. From the outside, it can easily be mistaken as mozzarella but burrata is distinguished by its small, soft, small cheese curds and cream packaged on the inside. Not to mention, it’s a wonderful source of vegetarian protein and healthy fats, and can easily help to create a well-balanced meal.

This burrata salad is served on a bed of seasonal heirloom tomatoes, however, you could certainly add some leafy greens if you like; arugula, watercress, and herby mixed greens would all work particularly well.

More Cheese Salad Recipes:

  • Grilled Halloumi Salad
  • Greek Village Salad
  • Arugula, Watermelon and Feta Salad
Print
Burrata Salad with Tomato and Pesto

Tomato Burrata Salad

Author: Stephanie Kay

This tomato burrata salad works equally well as an appetizer, side dish, or simple main course.

  • Author: Stephanie Kay
  • Prep Time: 10 minutes
  • Total Time: 10 minutes
  • Yield: 4 servings
  • Category: Salad
Print Recipe
Pin Recipe

Ingredients

  • 1 ball burrata cheese
  • 4 heirloom tomatoes, red and yellow
  • 1 cup cherry tomatoes
  • 1/4 cup fresh basil
  • 2 tablespoons olive oil
  • 2 tablespoons pine nuts
  • 1/4 cup pesto
  • Salt
  • Pepper
  • Crusty bread, to serve

Instructions

  1. Slice heirloom tomatoes into wedges, cherry tomatoes in half, and layer onto a platter. 
  2. Drizzle with olive oil and season generously with salt and pepper.
  3. Sprinkle with basil, pine nuts, and dollop with pesto.
  4. Top with burrata cheese, season cheese generously with salt and pepper and a final dollop of pesto.
  5. Serve with crusty bread and enjoy!

Nutrition

  • Serving Size: 1 serving
  • Calories: 241 calories
  • Sugar: 5 grams
  • Fat: 18 grams
  • Carbohydrates: 10 grams
  • Fiber: 4 grams
  • Protein: 12 grams

Did you make this recipe?

Share a photo and tag us — we can’t wait to see what you’ve made!

What Are Micronutrients?

Published on June 28, 2021 by Stephanie Kay

You’ve likely heard of macronutrients; the carbohydrates, proteins, and fats found in food, but what about micronutrients? From vitamins to minerals and everything in between, here is a breakdown of micronutrients; the different types, functions, benefits, and sources.

What Are Micronutrients?

What Are Micronutrients?

All food contains macronutrients and micronutrients; they are the primary elements of nutrition and our bodies require them every day. The term micronutrient refers specifically to vitamins and minerals; a smaller category of nutrients that do not contain calories and are required in smaller amounts than macronutrients. Vitamins and minerals are vital to healthy development, disease prevention, and overall wellbeing.

Nutrients can be divided into two primary categories: macronutrients and micronutrients. Macronutrients (carbohydrates, protein, and fat) are the primary nutrients in our diet and supply the body with energy via calories, while micronutrients (vitamins and minerals) are essential nutrients that play a wide variety of roles in metabolic processes in the human body. Micronutrients are equally important as macronutrients but are required in much smaller amounts, hence the terms micro (small) and macro (large) nutrients.

Infographic on the types of micronutrients: vitamins and minerals.

Types of Micronutrients

There are two primary types of micronutrients; vitamins and minerals, each of which includes various formats.

Vitamins

Vitamins are organic substances produced by plants and animals and are required for cell function, growth, metabolism, and development. There are two categories of vitamins: fat-soluble and water-soluble.

  • Fat-Soluble Vitamins: Fat-soluble vitamins include vitamins A, D, E, and K. These vitamins are typically present in sources of fat and are more easily digested, assimilated, and absorbed in the presence of fat. Fat-soluble vitamins are stored in the liver and fatty tissues for future use and the reserves of these vitamins will remain in the body for extended periods of time, days, and sometimes months.
  • Water-Soluble Vitamins: Water-soluble vitamins include the B vitamins and vitamin C. These vitamins are called water-soluble vitamins because they are dissolved in water and, therefore, do not stay or cannot be stored by the body. Because they are excreted through urine when consumed in excess, regular consumption of water-soluble vitamins is vital.

Minerals

Minerals are chemical elements found in soil and water and are not produced by living organisms. Unlike vitamins, minerals are not easily destroyed by the elements and are transported by soil and water into plants and animals. Minerals are also classified by macro and micro terms: macrominerals are required in amounts greater than 100 mg per day, while microminerals are those nutrients required in amounts less than 100 mg per day. (1)

  • Macrominerals: Macrominerals include calcium, phosphorus, magnesium, sodium, chloride, potassium, and sulfur. These minerals are required in larger amounts and perform a number of very specific roles in the body.
  • Microminerals: Also known as trace minerals, microminerals include iron, zinc, iodine, selenium, copper, manganese, fluoride, chromium, and molybdenum. Although still essential to the human body, microminerals are required in smaller amounts than macrominerals.

Functions and Benefits of Micronutrients

Because the human body cannot obtain or create micronutrients on its own, they must be obtained through our diet. Each micronutrient plays a different role in the human body, all of which are important and essential. Consuming adequate amounts of vitamins and minerals is vital for optimal health and preventing disease. Deficiencies in vitamins and minerals have been linked to a number of chronic health conditions. (2)

Sources of Micronutrients

Fortunately, vitamins and minerals can be found in a wide variety of food sources and adequate consumption of whole food and macronutrients can help to support overall micronutrient intake. Primary food sources of micronutrients include (3)(4).

Vitamin A: Retinol from animal sources: fortified milk, cheese, cream, butter, fortified margarine, eggs, liver; Beta-carotene from plant sources: leafy dark green vegetables, dark orange fruits (apricots, cantaloupe), and vegetables (carrots, winter squash, sweet potatoes, pumpkin)

Vitamin D: Egg yolk, liver, fatty fish, milk, sunlight

Vitamin E: Polyunsaturated plant oils (soybean, corn, cottonseed, safflower); leafy green vegetables, wheat germ, whole-grain products, liver, egg yolks, nuts, seeds

Vitamin K: Leafy green vegetables such as kale, collard greens, and spinach, green vegetables such as broccoli, brussel sprouts, and asparagus; also produced in the intestinal tract by bacteria

B Vitamins: Meat, organ meats, fish, eggs, milk, whole grains, generally widespread in foods

Calcium: Milk and milk products; canned fish with bones (salmon, sardines), fortified tofu and fortified soy milk, greens (broccoli, mustard greens), legumes

Phosphorus: Meat, fish, poultry, eggs, milk

Magnesium: Nuts, seeds, legumes; leafy, green vegetables, seafood, dark chocolate, artichokes

Sodium: Salt, soy sauce, small amounts in milk, breads, vegetables, unprocessed meats

Chloride: Seaweed, salt, celery, soy sauce

Potassium: Meats, milk, fresh fruits and vegetables, whole grains, legumes

Sulfur: Occurs in foods as part of protein: meats, poultry, fish, eggs, milk, legumes, nuts

Iron: Organ meats, red meats, fish, poultry, shellfish (especially clams), egg yolks, legumes, dark leafy greens

Zinc: Meats, fish, poultry, leavened whole grains, vegetables

Iodine: Seafood, foods grown in iodine-rich soil, iodized salt, bread, dairy products

Selenium: Meats, seafood, grains

Copper: Legumes, nuts, seeds, whole grains, organ meats, drinking water

Manganese: Widespread in foods, especially plant foods, almonds, cashews, black beans

Fluoride: Fish, crab, tap water, fruit juice, tea

Chromium: Liver, brewer’s yeast, whole grains, nuts, cheeses

Molybdenum: Legumes, grains, leafy greens, milk, liver

Supplementing Micronutrients

The safest and most natural way to get micronutrients is through food sources, however, some individuals, especially those with nutrient deficiencies or underlying health conditions, can benefit from micronutrient supplementation. The supplementation of specific dosages of vitamins and minerals can help to support specific health conditions, stages of life (i.e. pregnancy or menopause), or personal health goals. If you are concerned you are not getting adequate nutrients through food, it is best to speak with a doctor, dietician, or registered health professional that specialized in this area.

The Bottom Line

The term micronutrient refers to a category of nutrients and includes vitamins and minerals, which are essential for overall health. Vitamins include fat-soluble and water-soluble vitamins, while minerals include macrominerals and trace minerals, all of which can be found in food and supplement forms. Generally speaking, adequate consumption of whole foods and a well-balanced diet of carbohydrates, protein, and fat can help to ensure adequate consumption of micronutrients, however, in some cases, individuals can benefit from micronutrient supplements.

Almond Butter Rice Crispy Bars

Published on June 25, 2021 by Stephanie Kay

Whether you are looking for a sweet snack or a simple dessert, these almond butter rice crispy bars are a delicious treat. Filled with puffed rice, almond butter, and honey, and drizzled with dark chocolate, the bars are the perfect mix of salty and sweet.

Almond Butter Rice Crispy Treats

These almond butter rice crispy bars are my homemade take on a Kind® bar mixed with a Rice Krispies® treat. If possible, I recommended using plain puffed brown rice, as opposed to Rice Krispies® cereal, as it does not contain added sugar or preservatives. Puffed rice can be found at all major grocery stores in the cereal aisle or health food aisle.

More Healthy Snack Ideas:

  • Chocolate Puffed Rice and Seed Bars
  • Super Seed Brittle
  • No-Bake Granola Bars
Print
Almond Butter Rice Crispy Bars

Almond Butter Rice Crispy Bars

Author: Stephanie Kay

These marshmallow-free almond butter rice crispy bars are a healthy no-bake, gluten-free snack everyone can enjoy. Although this recipe uses almond butter, you could certainly use peanut butter, cashew butter, or sunflower seed butter instead.

  • Author: Stephanie Kay
  • Prep Time: 10 minutes
  • Total Time: 10 minutes
  • Yield: 8 bars
  • Category: Snack
  • Method: No Cook
  • Cuisine: American
Print Recipe
Pin Recipe

Ingredients

  • 3 cups puffed rice
  • 3/4 cup almond butter, smooth
  • 1/3 cup honey
  • 2 tablespoons coconut oil
  • 1/4 cup almonds, roughly chopped
  • 1/4 cup dark chocolate chips
  • Sea salt, flaky

Instructions

  1. Line an 8’x8′ or 9’x9′ baking pan with parchment paper.
  2. Add puffed rice to a large mixing bowl and set aside.
  3. In a small saucepan or skillet on low-medium heat, warm coconut oil until melted, then add almond butter and honey and continue to heat, whisking gently, until well combined.
  4. Pour the coconut oil, almond butter, and honey mixture into the bowl over the puffed rice and, using a spoon or silicone spatula, gently mix and fold until well combined.
  5. Once the puffed rice is well coated, transfer the mixture to the lined baking pan. Spread it out evenly in the pan and dot with chopped almonds, then press it down firmly using the back of the spatula or your hand.
  6. Using a double boiler method or the microwave, melt the chocolate chips until completely smooth, then drizzle across the top of over the top of bars. Sprinkle with a bit of sea salt.
  7. Transfer the bars to the freezer for roughly 1 hour or until the chocolate has completely solidified.
  8. Once the chocolate has hardened, remove the pan from the freezer, remove the bars from the pan, transfer to a cutting board and allow to sit for a couple of minutes so that you can easily pass a knife through them.
  9. Slice bars in half and then slice each side into 4 equal-sized bars, for a total of 8 bars.
  10. Once sliced, the bars can be eaten immediately, stored in the fridge for up to 5 days or in the freezer for several months. It is not recommended to store these bars at room temperature as, if too warm, can become soft and fall apart.

Nutrition

  • Serving Size: 1 bar
  • Calories: 299 calories
  • Sugar: 15 grams
  • Fat: 21 grams
  • Carbohydrates: 26 grams
  • Fiber: 4 grams
  • Protein: 7 grams

Did you make this recipe?

Share a photo and tag us — we can’t wait to see what you’ve made!

Spinach Scrambled Eggs

Published on June 24, 2021 by Stephanie Kay

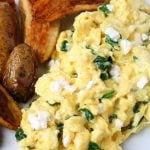
In need of a quick and healthy breakfast? Look no further than these spinach scrambled eggs. Filled with leafy greens and feta cheese, these scrambled eggs are high in protein and ready in minutes making them perfect for a healthy weekday breakfast or a delicious addition to a hearty weekend brunch.

Spinach and Feta Scrambled Eggs

These scrambled eggs include feta cheese, however, if you’re not a fan you can omit it altogether or add another type of cheese; cheddar, Havarti, and manchego would all work exceptionally well.

More Healthy Egg Recipes:

  • Feta and Spinach Egg Muffins
  • Greek Omelette Casserole
  • Kale and Egg Breakfast Skillet
Print
Spinach and Feta Scrambled Eggs

Spinach Scrambled Eggs

Author: Stephanie Kay

These spinach scrambled eggs with feta cheese are perfect for a quick, easy and high-protein morning meal.

  • Author: Stephanie Kay
  • Prep Time: 5 minutes
  • Cook Time: 5 minutes
  • Total Time: 10 minutes
  • Yield: 1 serving
  • Category: Breakfast
  • Method: Stovetop
Print Recipe
Pin Recipe

Ingredients

  • 2–3 eggs
  • 1 cup spinach, roughly chopped
  • 2 tablespoons feta cheese, crumbled
  • 1 teaspoon butter
  • Salt
  • Pepper

Instructions

  1. Crack eggs into a bowl, whisk to combine and set aside.
  2. Heat butter in a cast-iron skillet or heavy bottom pan on medium-high heat.
  3. Once the butter has melted, add the chopped spinach and a pinch of salt and cook, stirring often, until the spinach is wilted, tender and bright green, about 1 to 2 minutes.
  4. Once the spinach has cooked, reduce the heat to medium, add whisked eggs to the pan and, using a spatula, gently stir and fold the eggs. When eggs are about 1⁄2 way cooked, add crumbled feta cheese to continue folding and stirring eggs until cooked to your liking.
  5. Once cooked, remove from the pan, season with additional salt and pepper to taste, and serve immediately.

Nutrition

  • Serving Size: 2 eggs
  • Calories: 221 calories
  • Sugar: 1 grams
  • Fat: 16 grams
  • Carbohydrates: 2 grams
  • Fiber: 1 gram
  • Protein: 16 grams

Did you make this recipe?

Share a photo and tag us — we can’t wait to see what you’ve made!

Slow-Cooker Pulled Pork Tacos

Published on June 23, 2021 by Stephanie Kay

These carnitas-style pulled pork tacos are a simple take on a classic pork carnitas recipe. Made with seasoned pork shoulder cooked low and slow in the slow cooker, these pulled pork tacos are tender, juicy, and packed full of delicious flavor.

Slow-Cooker Pulled Pork Tacos

The best part about this pulled pork taco recipe is that it essentially cooks itself. Simply season the pork shoulder, add it to a crockpot, step away for hours and come back to tender and juicy pulled pork. I used a boneless pork shoulder in my recipes because that’s what I had available, however, a bone-in pork shoulder would work just as well and add additional flavor and nutritional value at the same time. Regardless of what option you choose, this slow-cooker pull pork makes plenty of servings to feed a crowd and stores very well in the fridge to create healthy leftovers for days to come.

More Healthy Taco Recipes:

  • Grilled Cajun-Style Shrimp Tacos
  • Roasted Cauliflower Tacos
  • Coconut-Crusted Fish Tacos
Print
Slow-Cooker Pulled Pork Tacos

Slow-Cooker Pulled Pork Tacos

Author: Stephanie Kay

Made in the slow-cooker, these pulled pork tacos are easy to make, high in protein and make wonderful leftovers perfect for simple meal prep idea or make-ahead meal.

  • Author: Stephanie Kay
  • Prep Time: 10 minutes
  • Cook Time: 6 hours
  • Total Time: 6 hours 10 minutes
  • Yield: 16-20 servings
  • Category: Main
  • Method: Slow Cooker
  • Cuisine: Mexican
Print Recipe
Pin Recipe

Ingredients

Pulled Pork:

  • 3–4 lbs. (2 kg.) boneless pork shoulder (see notes)
  • 1 tablespoon oregano, dried
  • 1 tablespoon cumin, ground
  • 2 teaspoons salt
  • 1 teaspoon black pepper
  • 1 onion, diced
  • 4 cloves garlic, minced
  • 1 bay leaf
  • 2 oranges, juiced, about 1/2 cup
  • 1/2 cup water

to serve:

  • corn tortillas
  • avocados, sliced
  • red cabbage, shredded
  • cilantro, roughly chopped
  • limes, cut into wedges
  • salsa
  • hot sauce (optional)

Instructions

  1. In a small bowl, combine the oregano, cumin, salt, and black pepper.
  2. Place the pork shoulder on a cutting board, sprinkle with the spice mix and rub into the pork until well covered.
  3. Transfer the pork shoulder to the slow cooker, top with onion and garlic, add orange juice and water to the slow cooker, and cover with the lid. Turn the slow cooker on and cook on low for 8-10 hours or high for 5-6 hours.
  4. Once cooked, remove the pork shoulder from the slow cooker and place it on a cutting board. Using two forks, shred the meat into small bite-size pieces. Set aside.
  5. Pour any remaining sauce from the slower cooker through a fine-mesh strainer into a bowl (don’t throw it away!) to remove excess onion and garlic, and pull out any pieces of meat and add them to the cutting board.
  6. If the sauce is really liquidy, return it to the slower cooker or a large pot, turn the heat to high, bring to a boil, and allow to cook for several minutes until it has reduced and thickened. Once the liquid has been reduced, return shredded pork to the slower cooker or pot and toss the pork until well coated.
  7. If the sauce appears rich and thick, skip the step above and return the shredded pork to the slower cooker with the liquid and toss until well coated. Set aside.
  8. Next, prepare the corn tortillas. Warm a cast-iron pan or heavy bottom skillet to medium-high heat. Fill a bowl with room temperature water, quickly dunk the corn tortilla in the water, transfer to the pan, and warm for about 15 to 45 seconds on each side until golden and toasted, using tongs to flip the tortillas.
  9. Once the pork and tortillas are ready, build the tacos by filling tortillas with pulled pork, avocado, and shredded cabbage, and top with cilantro, salsa, hot sauce and/or a squeeze of fresh lime. (See notes for crispy pork.)
  10. Any leftover pulled pork can be stored in an airtight container in the fridge for up to 5 days or in the freezer for 3 months.

Notes

Pork Shoulder: If using a bone-in pork shoulder you will need to extend the cooking time by 3-4 hours on low or 1-2 hours on high

Crispy Pork: For crispy pulled pork, warm a cast-iron pan or heavy bottom skillet to high heat. Once warm, add a drizzle of oil and a portion or two of pulled pork (this will need to be done in batches) and cook for 1-2 minutes per side until browned and crispy.

Nutrition

  • Serving Size: 85g/3oz pork
  • Calories: 160 calories
  • Sugar: 0 grams
  • Fat: 4 grams
  • Carbohydrates: 0 grams
  • Fiber: 0 grams
  • Protein: 25 grams

Did you make this recipe?

Share a photo and tag us — we can’t wait to see what you’ve made!

  • Previous
  • 1
  • …
  • 23
  • 24
  • 25
  • 26
  • 27
  • …
  • 54
  • Next

Recipes

  • Dinner
  • Breakfast
  • Meal Prep
  • Snacks

Nutrition

  • FAQs
  • Tips
  • This vs. That
  • Weight Loss

Connect

  • Instagram
  • Youtube
  • About
  • Cookbooks

About Stephanie

I’m a nutritionist on a mission to change the way you look at food and teach you how to make real food work for real life in a realistic way.

Learn More

Site Credits
2023 © Stephanie Kay Nutrition | Privacy Policy
To Top