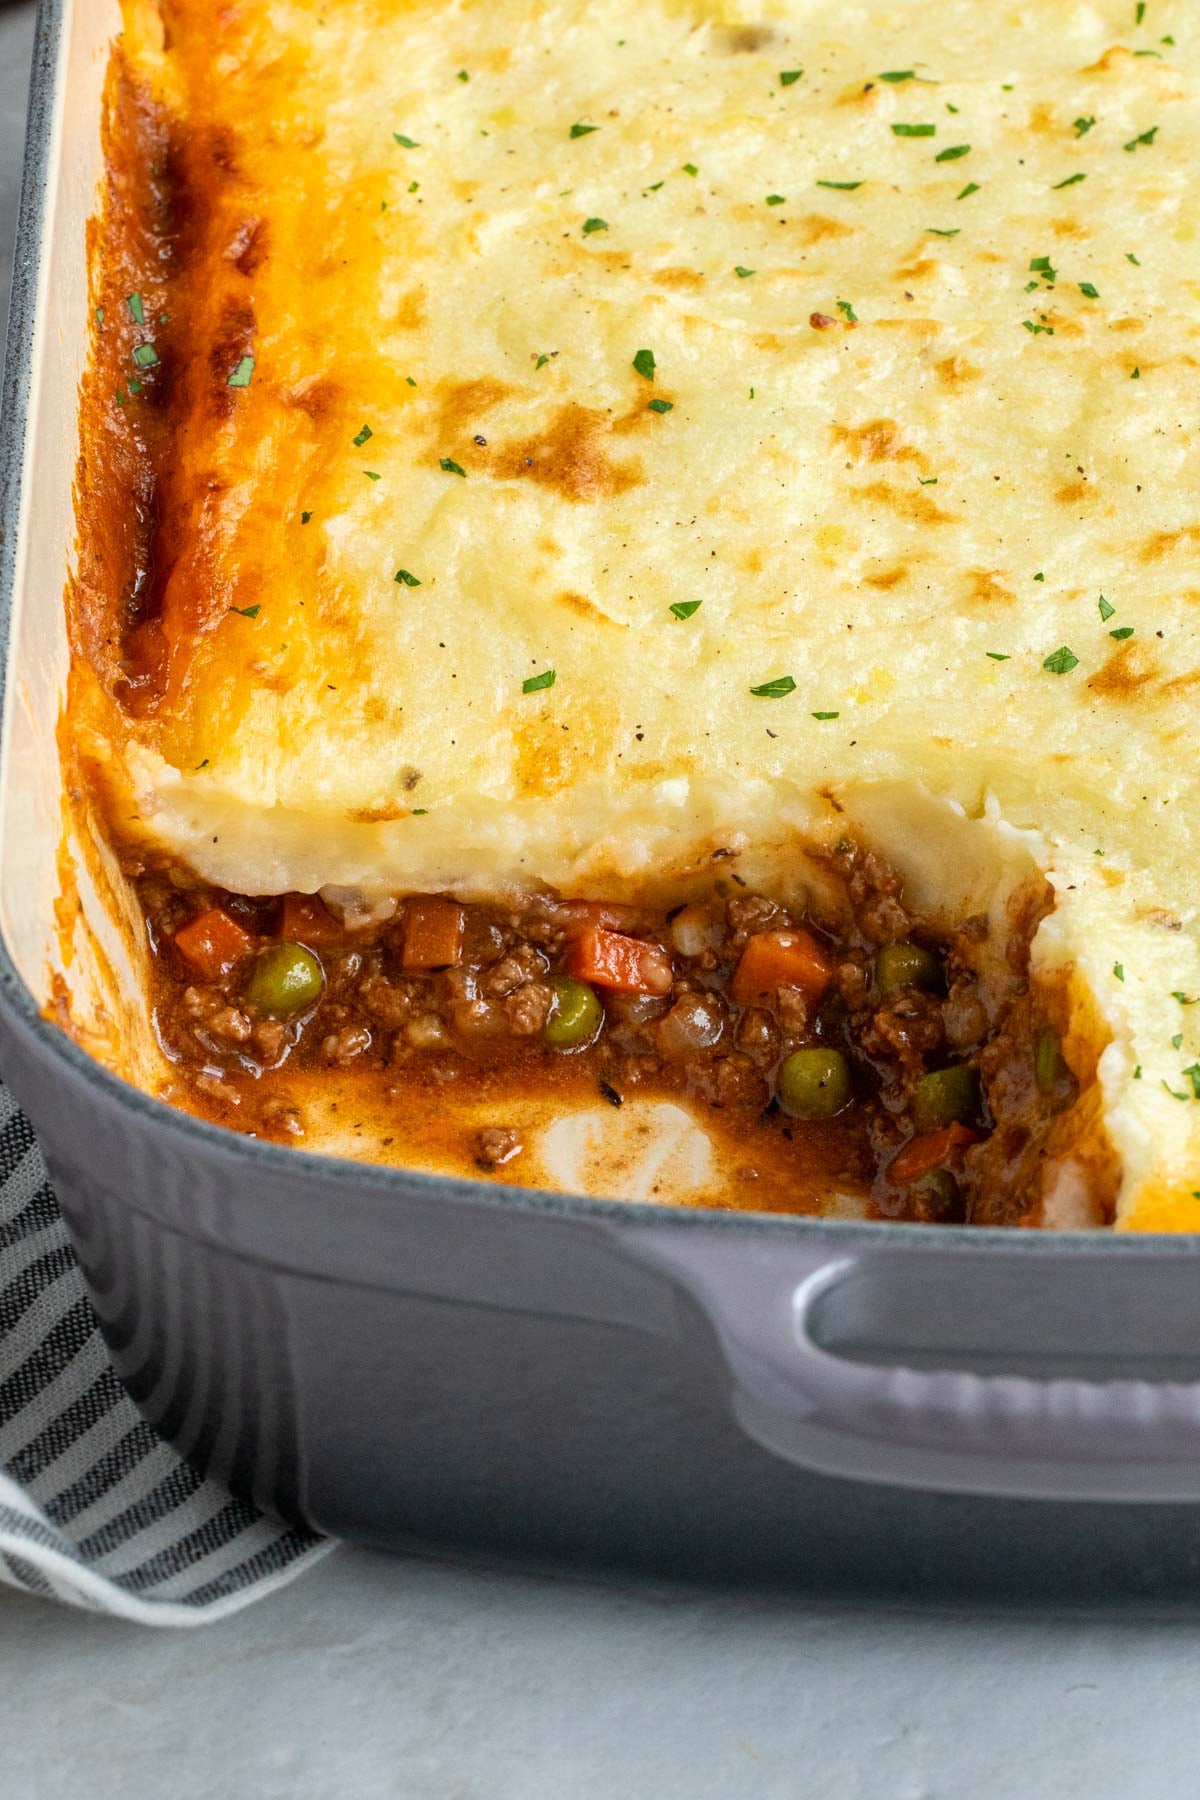
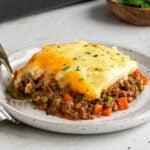
With layers of tender ground beef filling and creamy mashed potatoes, this easy shepherd’s pie recipe is my take on the classic comfort food. It’s the perfect dish to feed a crowd on a cold day.
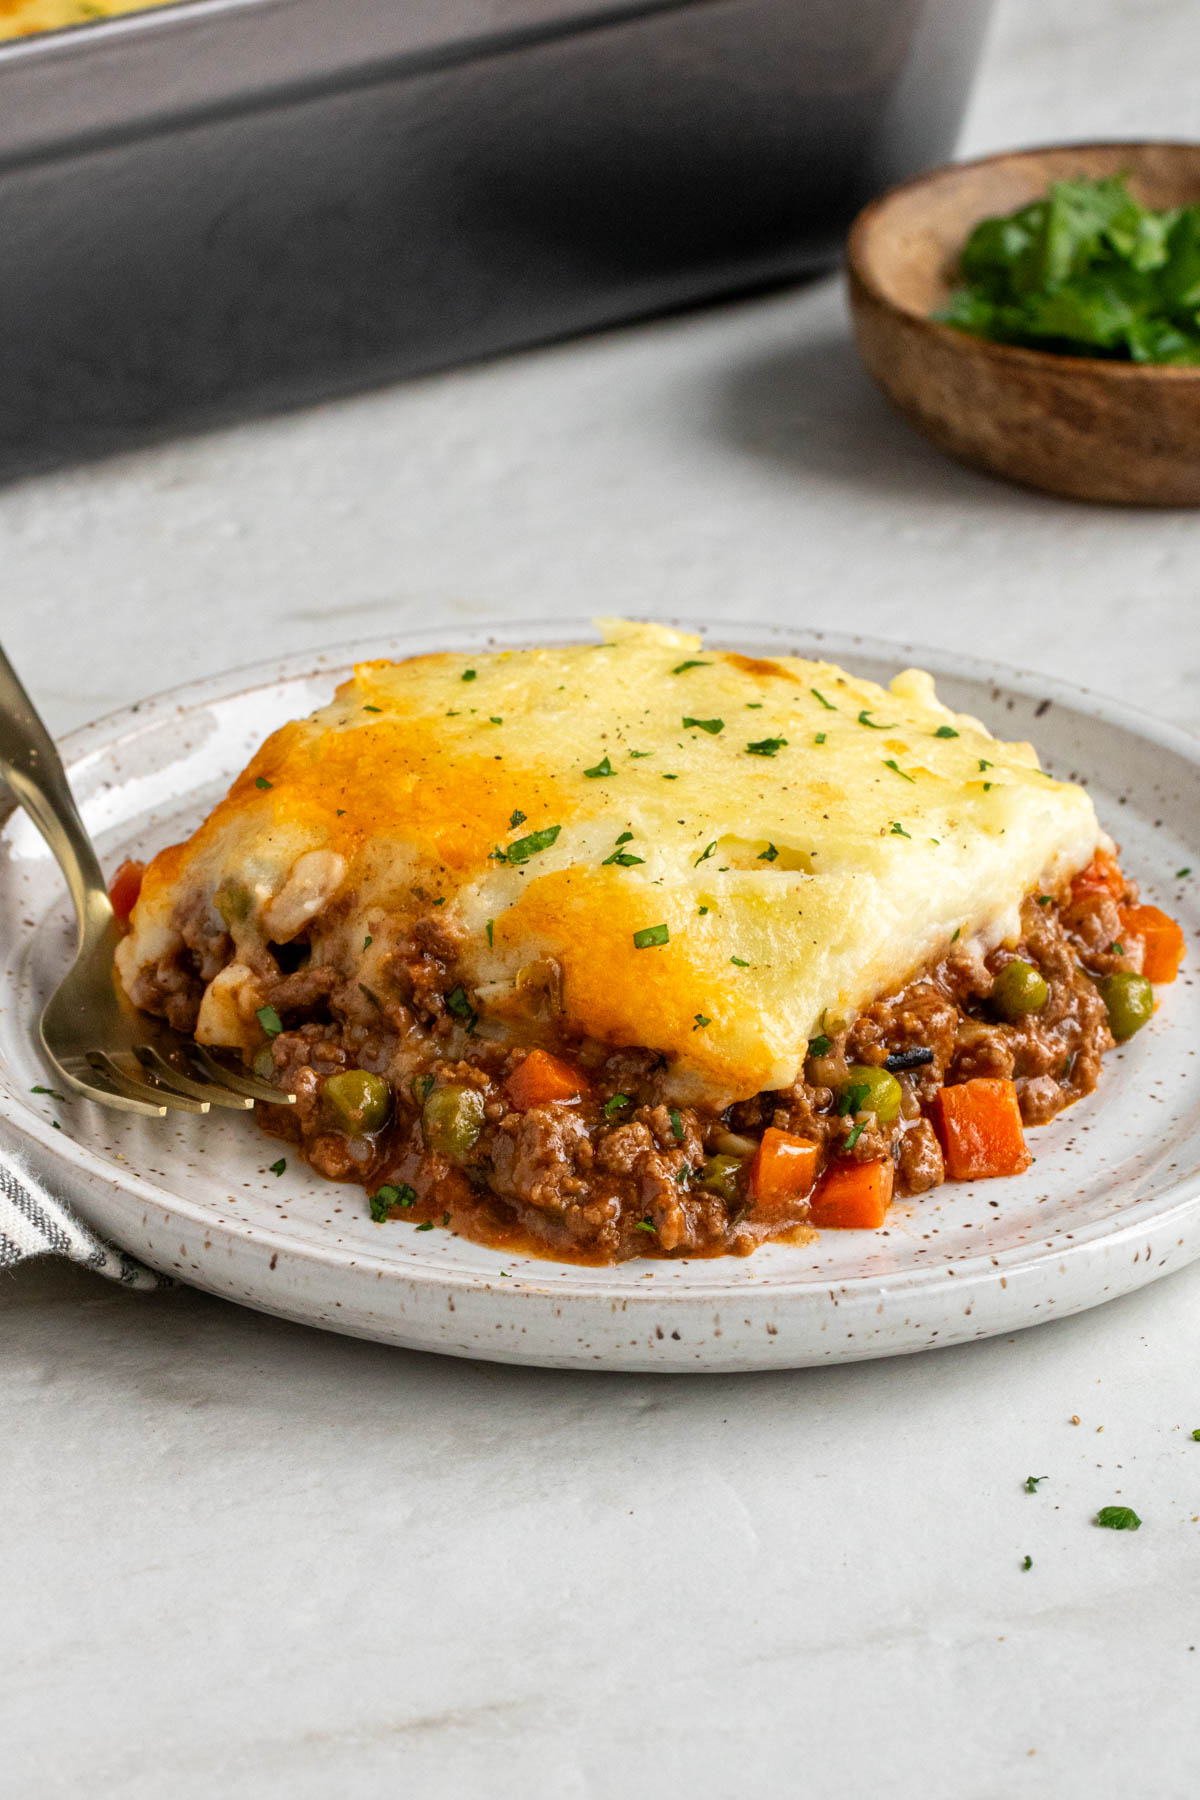
To me, the best shepherd’s pie combines tender beef in a gravy-like sauce with ultra-creamy mashed potatoes on top. It needs to be firm enough to hold together, but cannot be dry, and moist and fluffy enough that it melts in your mouth, without falling apart on the plate.
To accomplish this, it needs just the right amount of liquid in the beef, and the right amount of butter and milk in the potatoes, and I think this shepherd’s pie recipe does exactly that. And, the best part is, it’s still a well-balanced meal with plenty of protein, complex carbohydrates, fiber, and healthy fats.
Note: Traditional shepherd’s pie is made with ground lamb, as it refers to the pie made by the shepherds who tend to sheep, and versions made with ground beef are known as cottage pie. Although, in many regions of the US and Canada, shepherd’s pie is made with ground beef due to availability and cultural preferences. For this reason, I opted to make the recipe with ground beef; however, you can certainly make it with ground lamb if preferred.
Why You’ll Love It
- High in Protein – The use of lean ground beef boosts the protein content of this recipe without overly increasing the fat content.
- Feeds a Crowd – This recipe makes multiple servings, and can easily be doubled or tripled, making it great for family gatherings or meals with lots of leftovers.
- Keeps Well – This shepherd’s pie keeps well in the fridge and freezer, making it a great meal prep idea or make-ahead meal.
Ingredients + Substitutions
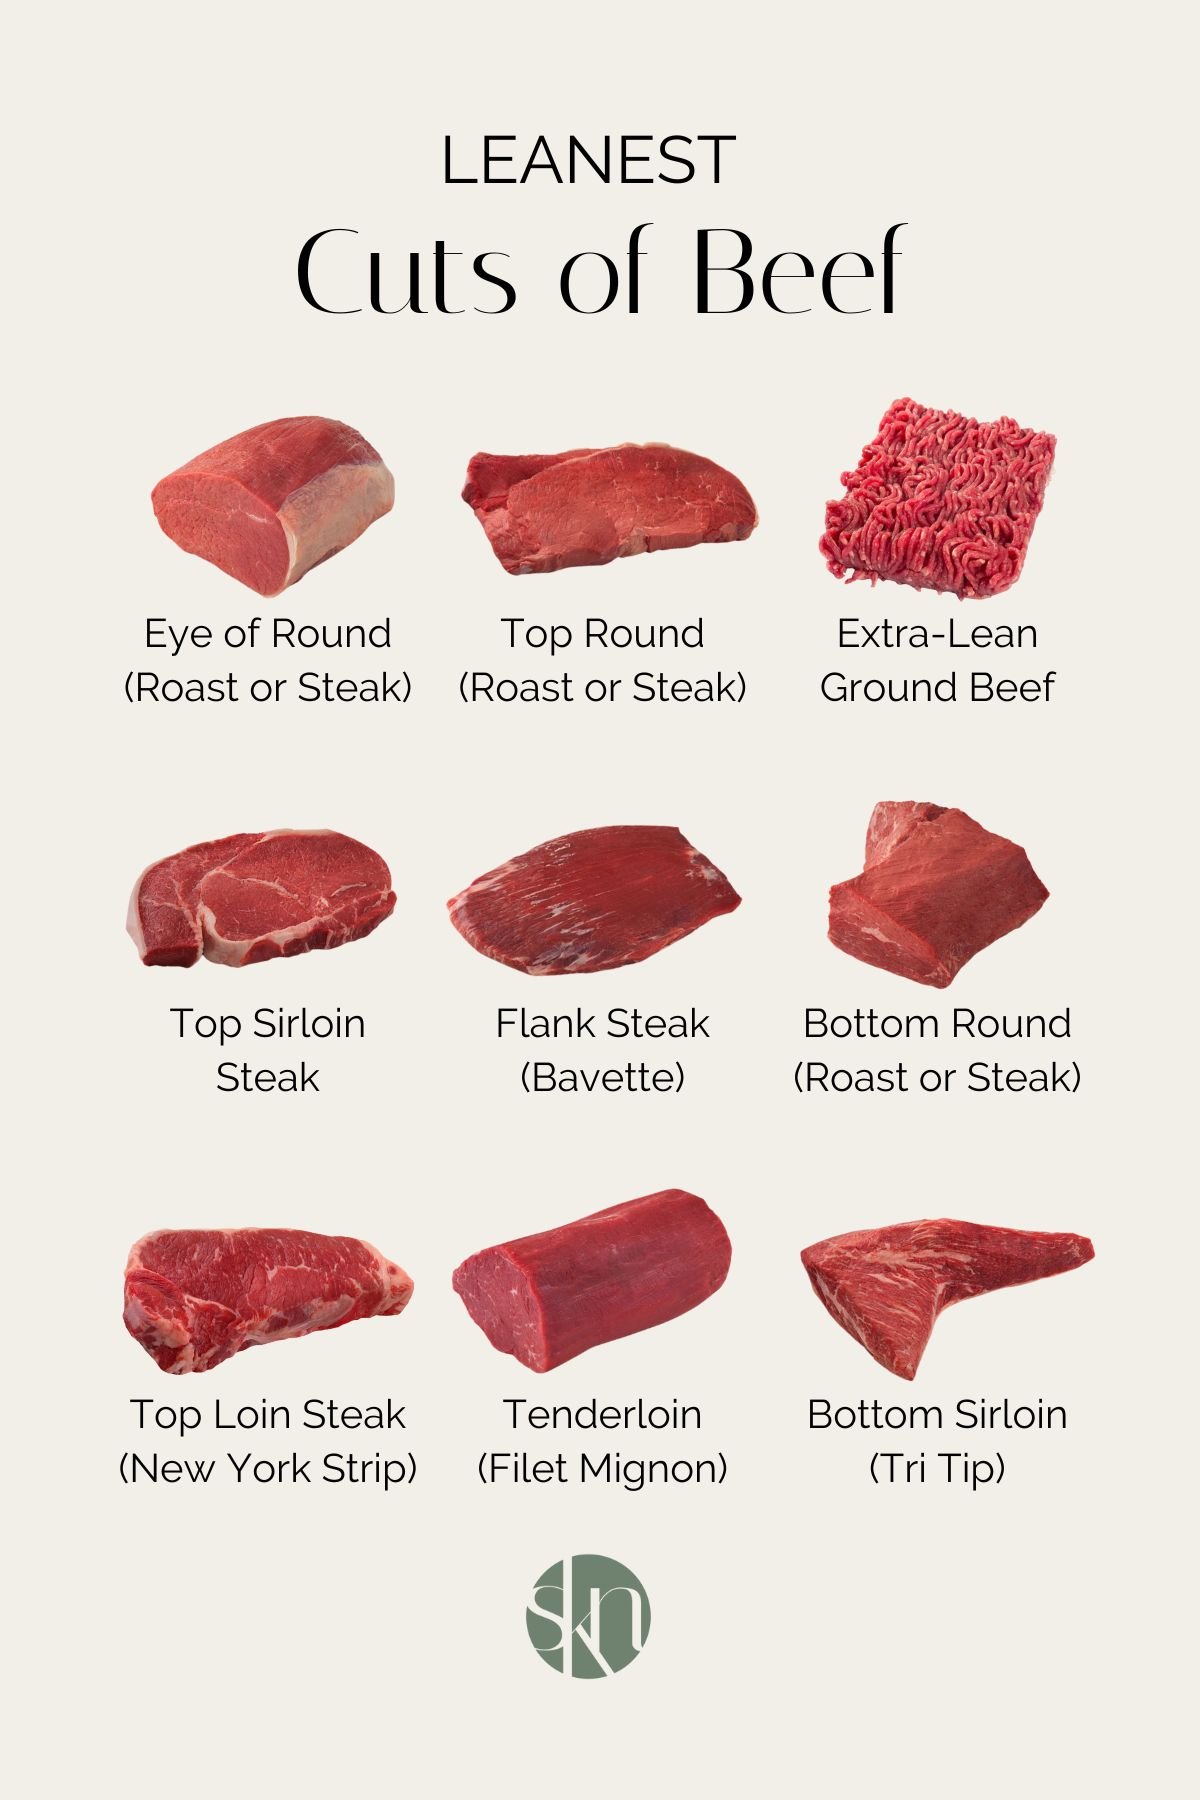
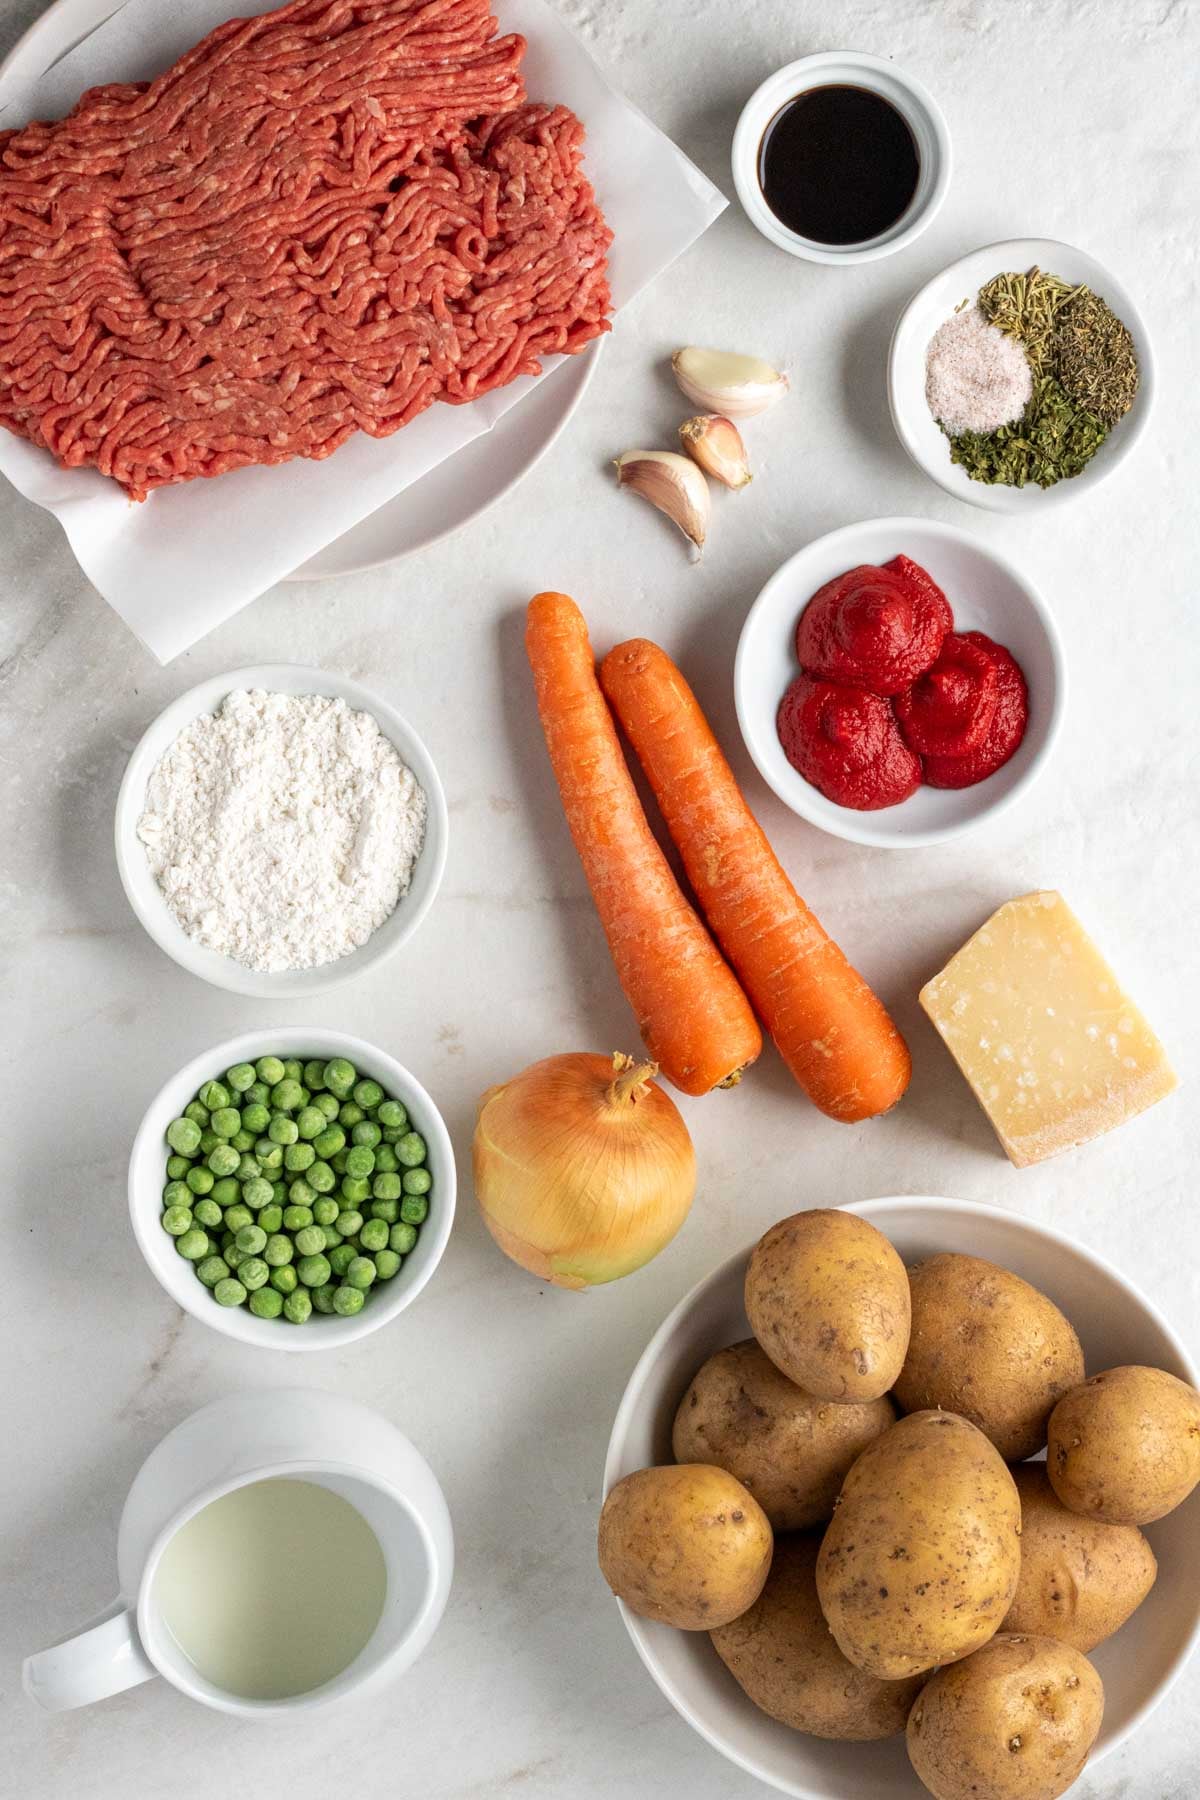
- Ground Beef – To add some protein and make the meat filling. The recipe calls for lean ground beef, but any type of ground beef or ground meat will work. Ground lamb, ground venison, and ground turkey would all work well.
- Potatoes – To add some carbohydrates and make the mashed potato topping. I used yellow potatoes (Yukon gold), but white potatoes (russet potatoes) would also work well.
- Onion + Garlic – To flavor the meat filling. The recipe calls for a whole onion and garlic cloves, but you can use onion powder and garlic powder if preferred. See the notes section of the recipe card for details.
- Carrots + Peas – To add some veggies, fiber, and micronutrients. The recipe calls for carrots and frozen peas, as I think they provide the best flavor; however, green beans, frozen corn, or frozen vegetables would also work well. See the notes section of the recipe card for details.
- Herbs – To flavor the ground beef mixture. The recipe calls for dried parsley, rosemary, and thyme, but you can use fresh herbs if preferred. See the notes section of the recipe card for details.
- Worcestershire Sauce – To flavor the ground beef.
- Tomato Paste – To thicken the ground beef filling.
- Flour – To thicken the meat filling. You can use 1-to-1 gluten-free flour if needed.
- Beef Broth – To flavor the meat filling and make a gravy. The recipe calls for beef broth, but chicken broth will also work. You can also swap 1/2 of the beef broth for red wine if you want to add some extra flavor.
- Butter – To make the mashed potatoes rich and creamy.
- Milk – To make the mashed potatoes, heavy cream would also work well.
- Parmesan – To make the cheesy mashed potatoes. The recipe calls for Parmesan cheese, but you can use shredded cheddar cheese if preferred.
- Olive Oil – To add some healthy fats.
- Salt and Pepper – Sea salt and freshly ground black pepper to season.
Dietary Adaptions
To Make it Gluten-Free: Swap the all-purpose flour for 1-to-1 gluten-free flour or cornstarch, and use gluten-free Worcestershire sauce and certified gluten-free beef broth.
To Make it Dairy-Free: Swap the milk for almond milk, swap the butter for 3 tablespoons of olive oil, and omit the parmesan cheese.

Red’s Nutrition Tip
This recipe calls for lean ground beef; however, if you’d like to reduce the fat and calorie content further, you can use extra-lean ground beef. Not only are these cuts the leanest cuts of beef, but they are also some of the best food sources of iron.
Serving Suggestions
This classic shepherd’s pie is a balanced meal with protein, carbohydrates, fiber, and fat. It can be enjoyed on its own or adapted to suit your personal calorie or macro needs, for example:
- To make it lower in fat, swap the lean ground beef for extra-lean ground beef, and use half the amount of butter in the mashed potatoes.
- To make it higher in fiber, add an additional cup of frozen peas or frozen corn to the meat filling.
- To make it low-carb, swap the mashed potatoes for mashed cauliflower topping.
Storage + Reheating
To Refrigerate: Allow the shepherd’s pie to cool completely, then cover the baking dish with plastic wrap or aluminum foil, or transfer it to an airtight container, and store leftovers in the fridge for up to 4 days.
To Freeze: Once cooked, allow the shepherd’s pie to cool completely, then cover the baking dish with plastic wrap and aluminum foil, place it in a freezer-safe bag, and place it in the freezer. To freeze leftovers, transfer the leftovers to an airtight container and place them in the freezer for up to 3 months.
To Reheat: From the fridge, transfer the whole shepherd’s pie, covered with aluminum foil, to the oven at 350°F for 20-30 minutes until heated through and bubbling. Individual portions can be reheated in an oven-safe casserole dish at 350°F for 10-15 minutes or in a microwave-safe dish in the microwave for 2-3 minutes. If frozen, allow the shepherd’s pie to thaw completely and then reheat at 350°F for 20-30 minutes or until heated through. To reheat from frozen, cover the baking dish with foil and warm it in the oven at 350°F for 40-50 minutes until heated through.
More Ground Beef Recipes:
- Stuffed Pepper Casserole
- Tex-Mex Ground Beef Skillet
- Stuffed Shells with Ground Beef
- Spaghetti Squash Casserole
Shepherd’s Pie
This classic shepherd’s pie recipe is easy to make, full of flavor, and absolutely delicious. You can make it with ground beef or ground lamb, depending on your preference.
-
 Prep Time: 45 minutes
 -
Cook Time: 30 minutes
-
Total Time: 1 hour 15 minutes
-
Yield: 8 servings 1x
-
Category: Dinner
-
Method: Baked
Ingredients
Meat Mixture:
- 2 tablespoons olive oil
- 1 large onion, diced
- 1 1/2 pounds lean ground beef, or ground lamb
- 2 carrots, peeled and diced
- 3 cloves garlic, minced
- 2 teaspoons dried parsley
- 1 teaspoon dried rosemary
- 1 teaspoon dried thyme
- 1 teaspoon salt
- 1/8 teaspoon ground black pepper
- 1 tablespoon Worcestershire sauce
- 3 tablespoons tomato paste
- 3 tablespoons all-purpose flour
- 2 cups beef broth
- 1 cup frozen peas
Potato Topping:
- 3 pounds white potatoes, peeled and cut into quarters
- 1/2 cup (1 stick) butter, cubed
- 1/2 cup whole milk, plus more as needed
- 1/4 cup freshly grated Parmesan cheese (optional)
- 1/2 teaspoon salt
- 1 pinch black pepper
Instructions
- Preheat the oven to 350°F and grab a 9×13-inch baking dish.
- Bring a large pot of water to a boil, then add the quartered potatoes, and cook for 20-25 minutes or until they can easily be pierced with a fork. While the potatoes are cooking, prepare the meat mixture.
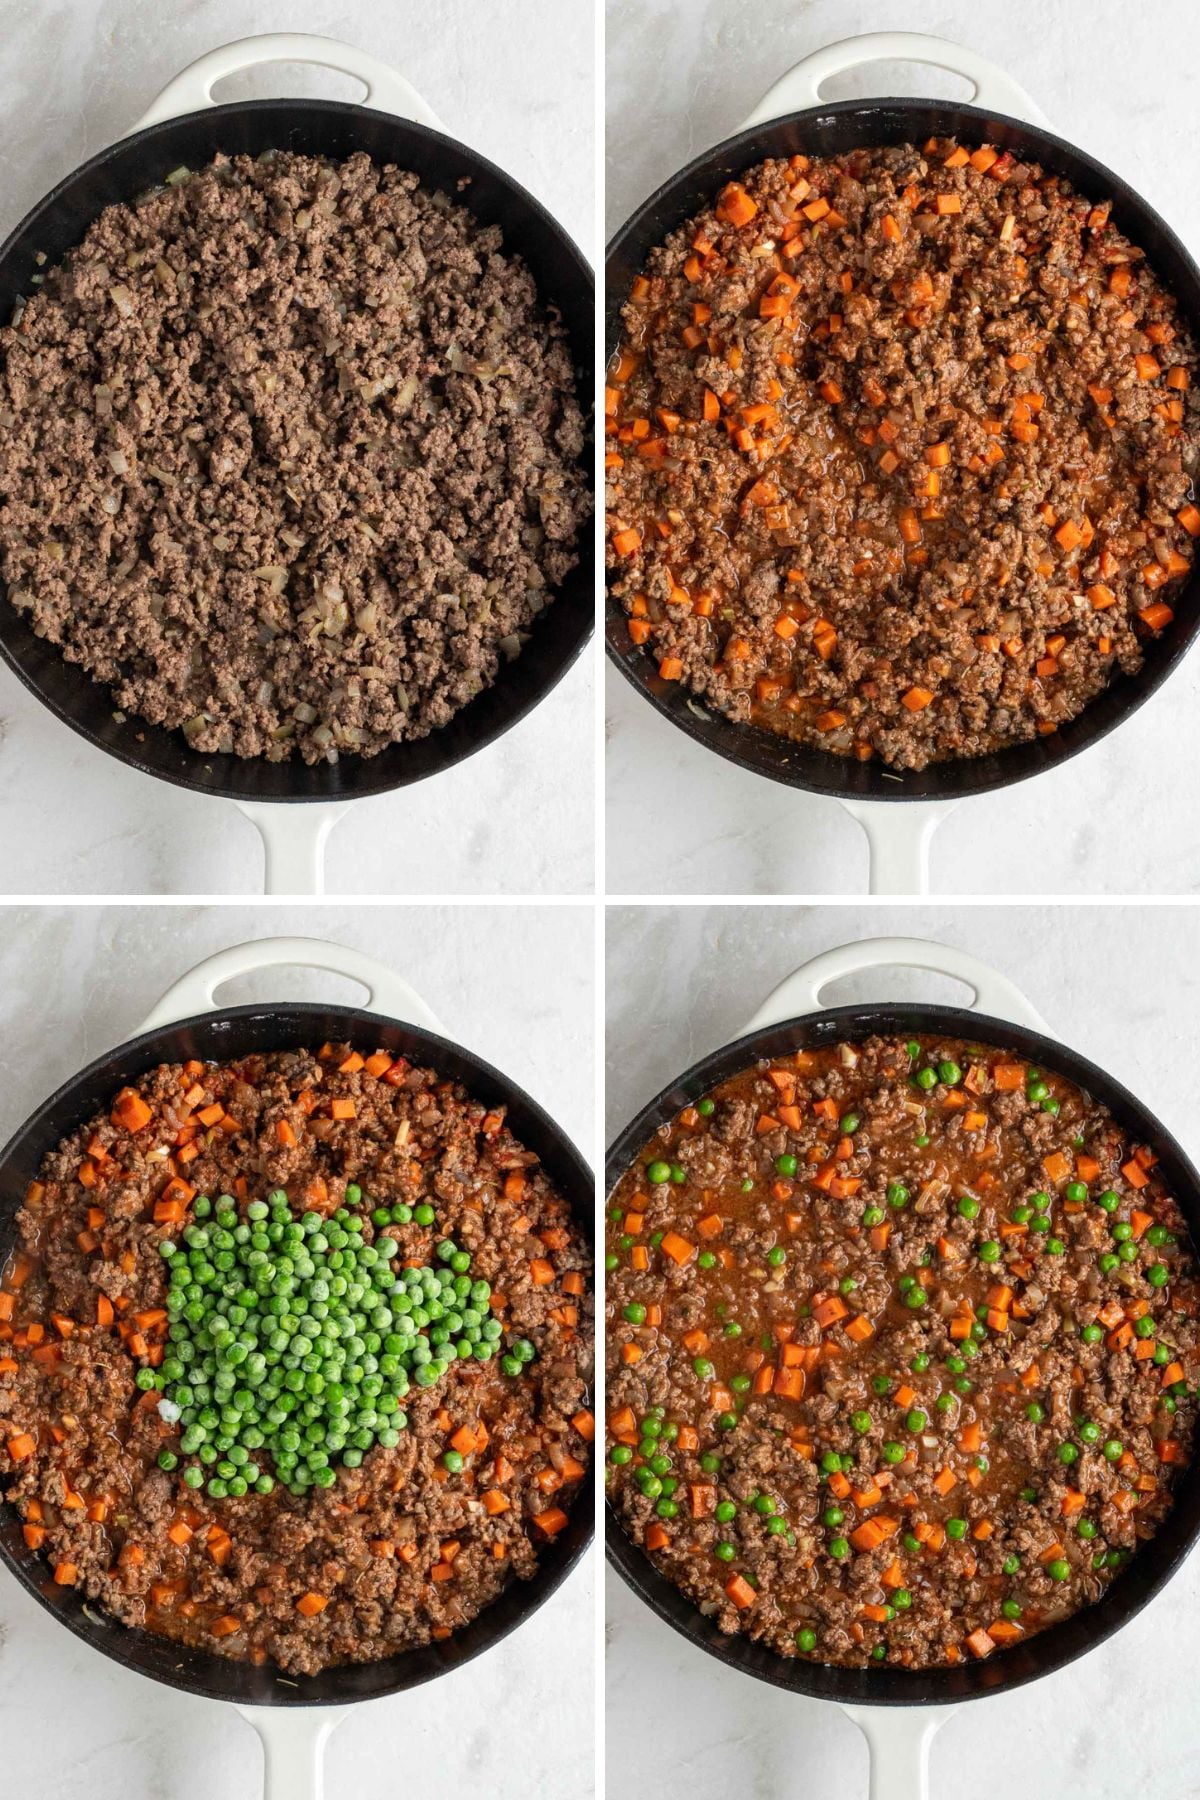
- In a large skillet or cast-iron pan on medium-high heat, warm the olive oil, then add the diced onion and cook for 2-3 minutes until they begin to soften.
- Add the ground beef to the pan and cook for 4-5 minutes, breaking it up with a wooden spoon or spatula, until no longer pink and mostly cooked through.
- Add the diced carrots to the pan, stir to combine with the meat mixture, and cook for another 2-3 minutes, stirring frequently.
- Add the minced garlic, parsley, rosemary, thyme, salt, and black pepper, stir to combine with the meat mixture, and cook for an additional minute until fragrant. Then add the Worcestershire sauce, tomato paste, and flour to the pan, and stir to combine completely with the meat mixture.
- Pour the beef broth into the pan, add the frozen peas, stir to combine, and bring to a boil. Once boiling, reduce the temperature to medium heat and cook for another 3-6 minutes, stirring frequently, until almost all of the liquid has been absorbed and a gravy forms. (The mixture should be thick, not runny.)
- Once cooked, transfer the cooked meat mixture to the baking dish, spreading it out evenly, and set it aside.
- Once the potatoes are cooked, turn off the heat. Then drain the potatoes in a colander, shaking to remove any excess water, and then return them to the pot.
- Add the cubed butter, milk, parmesan cheese, salt, and pepper to the potatoes and then, using a potato masher, mash until the potatoes are smooth and all of the ingredients are well incorporated. Add additional milk as needed until your desired texture is reached. Taste and adjust seasoning with salt and pepper as needed.
- Dollop the mashed potatoes on top of the meat mixture in the baking dish, and then use a spoon or a spatula to spread it out evenly.
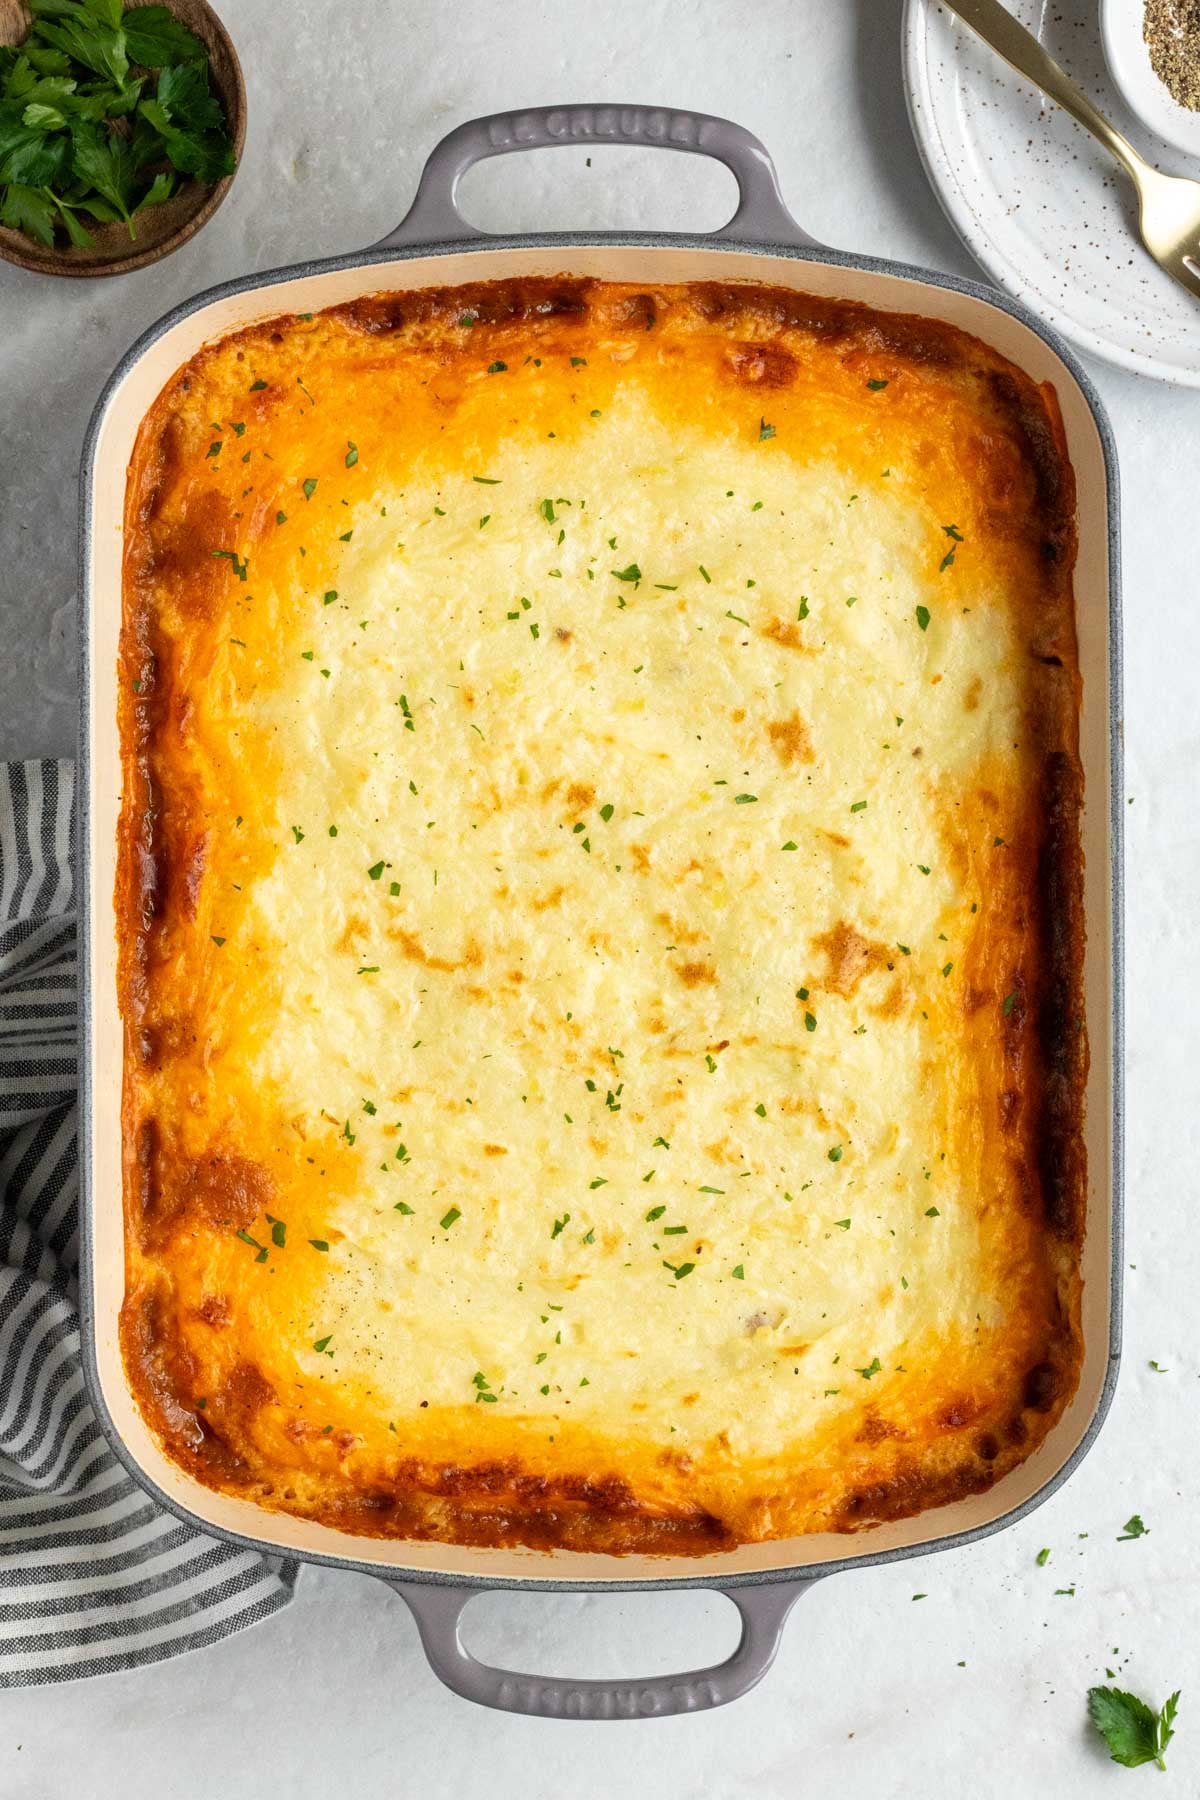
- Once assembled, transfer the baking dish to the oven for 25-30 minutes until the edges are bubbling and there is a slight golden crust. Then remove it from the oven and allow it to cool for 10 minutes before serving.
- Any leftovers can be cooled and stored in airtight containers in the fridge for up to 4 days or in the freezer for up to 3 months.
Notes
To Use Onion Powder: Swap the onion for 1 teaspoon of onion powder. Skip step #3 and add it in step #6 instead.
To Use Garlic Powder: Swap the garlic cloves for 1 teaspoon of garlic powder in step #6.
To Use Fresh Parsley: Swap the dried parsley for 1 tablespoon of finely chopped fresh parsley in step #6.
To Use Fresh Rosemary: Swap the dried rosemary for 1 tablespoon of finely chopped fresh rosemary in step #6.
To Use Fresh Thyme: Swap the dried thyme for 1 tablespoon of finely chopped fresh thyme in step #6.
To Use Frozen Mixed Vegetables: Omit the carrots and frozen peas. Skip step #5 and add 1 1/2 cups of frozen vegetables in step #7.
To Use Leftover Mashed Potatoes: Omit the mashed potato ingredients, skip step #, and top the meat filling with 6 cups of leftover mashed potatoes in step #.
Nutrition
- Serving Size: 1 serving
- Calories: 420 calories
- Sugar: 6 grams
- Fat: 19 grams
- Carbohydrates: 37 grams
- Fiber: 6 grams
- Protein: 26 grams