
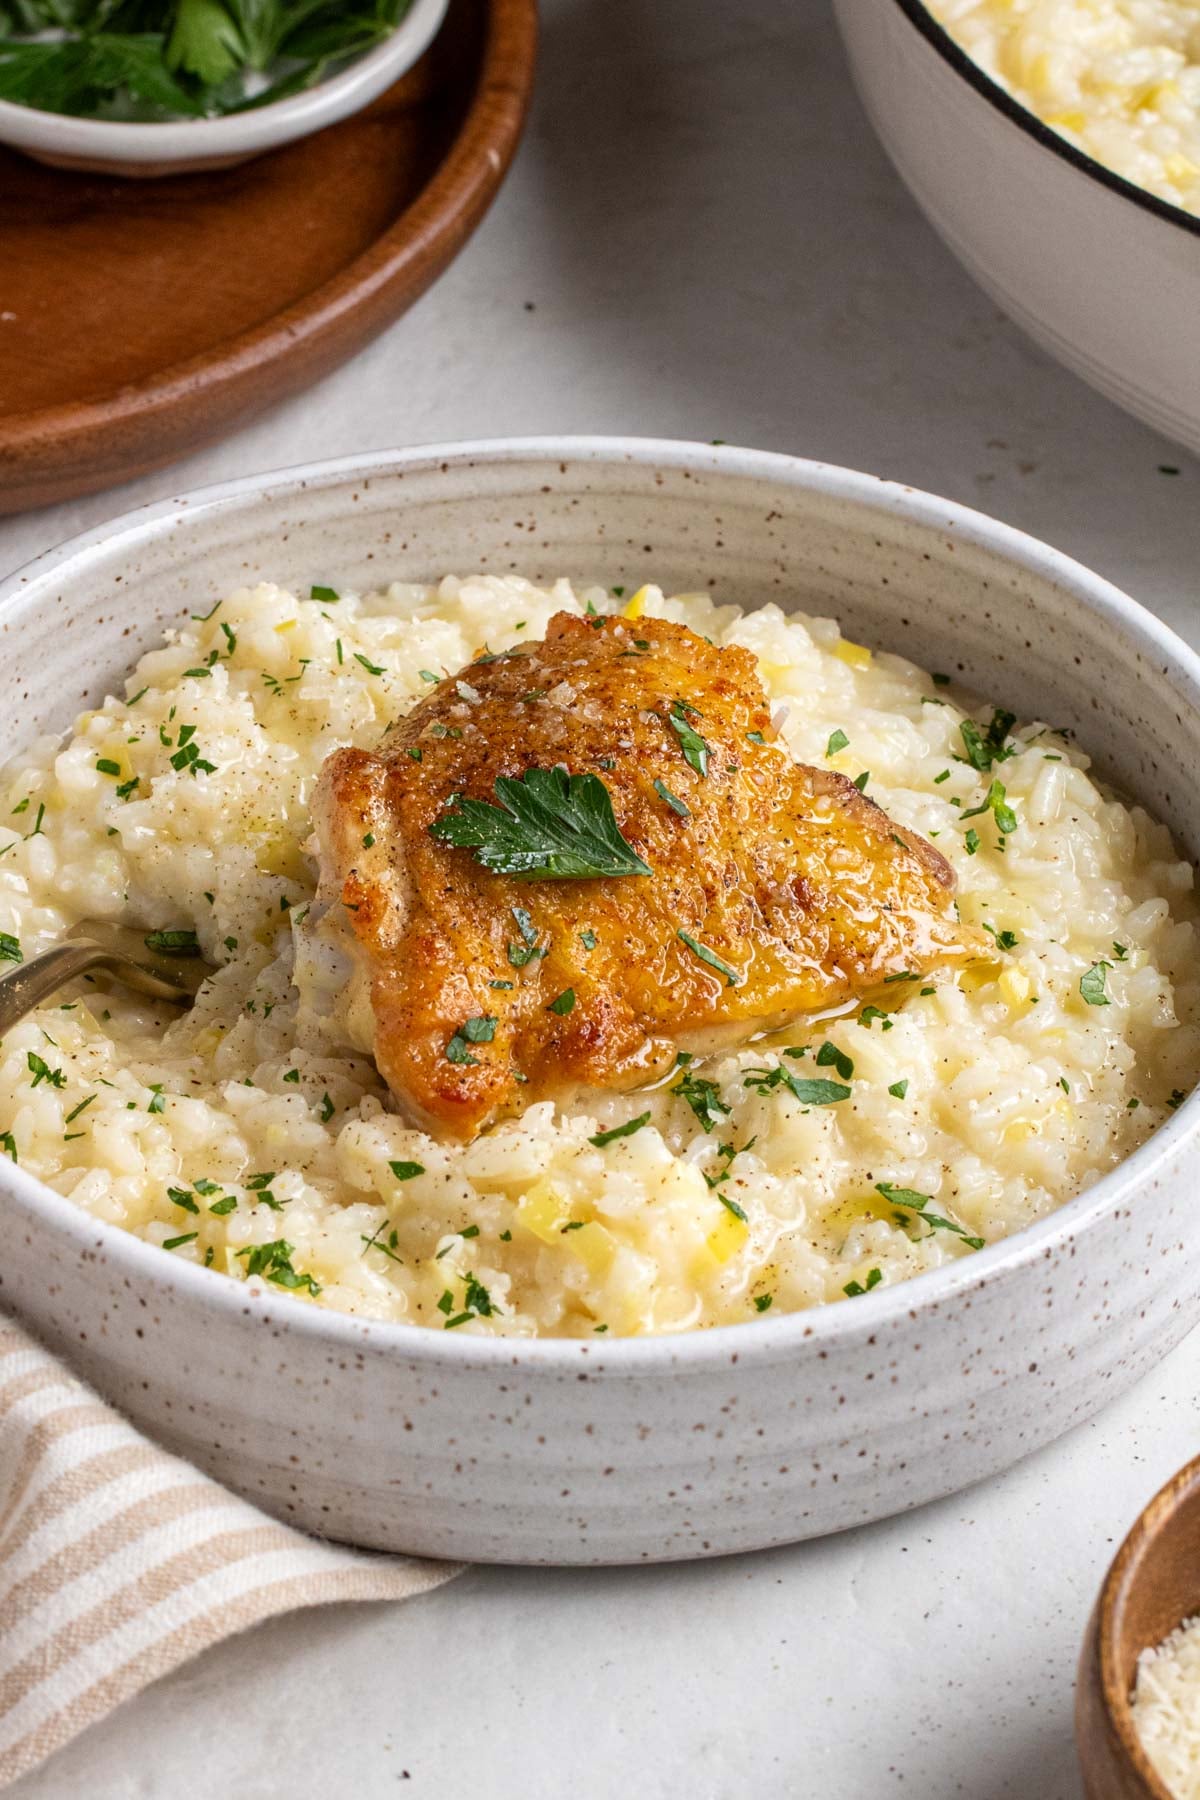
This chicken and leek risotto features crispy chicken thighs and creamy leek risotto to create a delicious and heart-warming meal. While it tastes like a restaurant meal, it’s incredibly simple to make.

Risotto is one of those dishes that people think is really difficult, but it’s actually a surprisingly meditative one-pan meal to prepare. With a little time and love, you can turn humble rice into a rich and creamy risotto without any cream at all.
In fact, the creamy texture of risotto comes from the constant friction of the rice as it cooks, which breaks down the naturally present starches. This creates a neutral backdrop that highlights any flavor you want to add, and this chicken and leek risotto recipe is a perfect example of that.

Why You’ll Love It
- Balanced Meal – This is a well-balanced meal with protein, carbohydrates, and healthy fats.
- Easy to Make – While it does take some time, the chicken and leek risotto is made with minimal ingredients and is easy to make.
- Seasonal – This dish is a great way to use spring leeks and eat with the seasons.
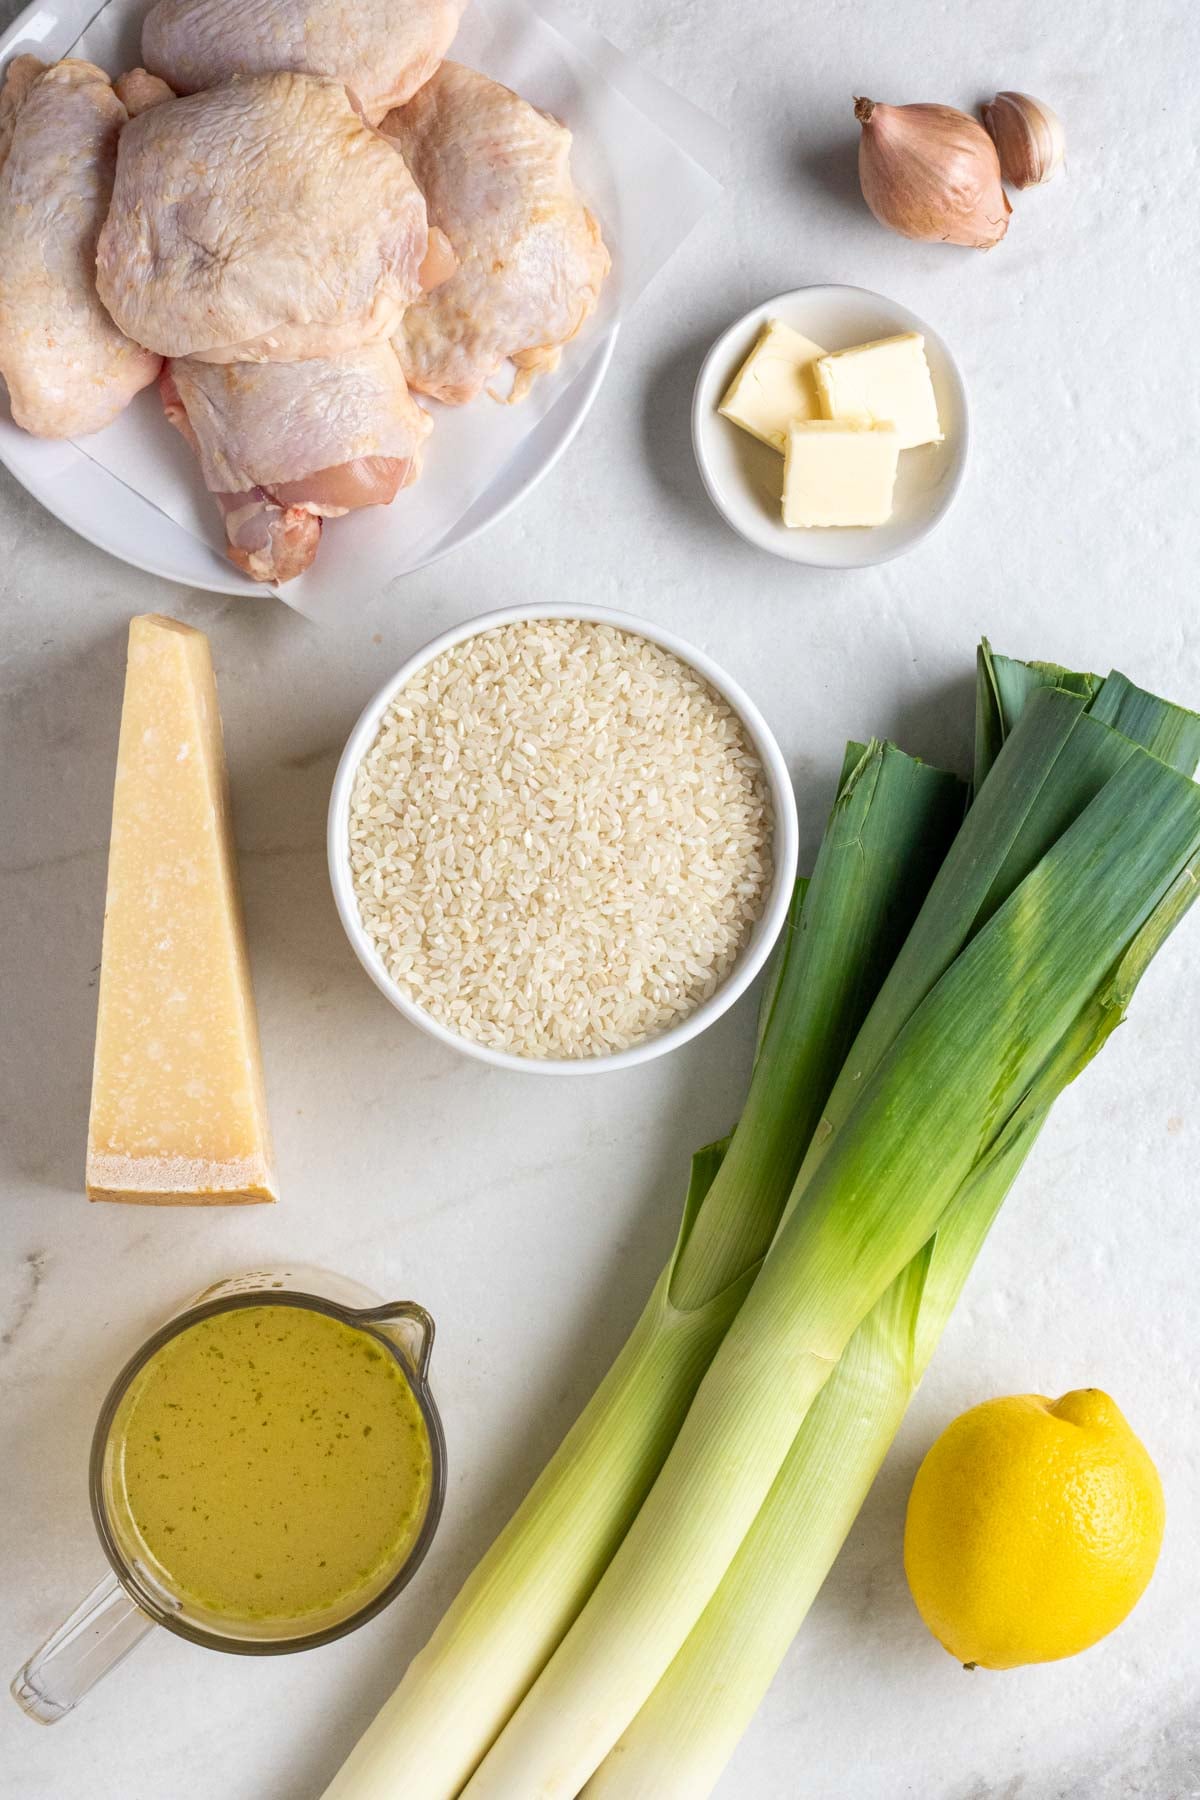
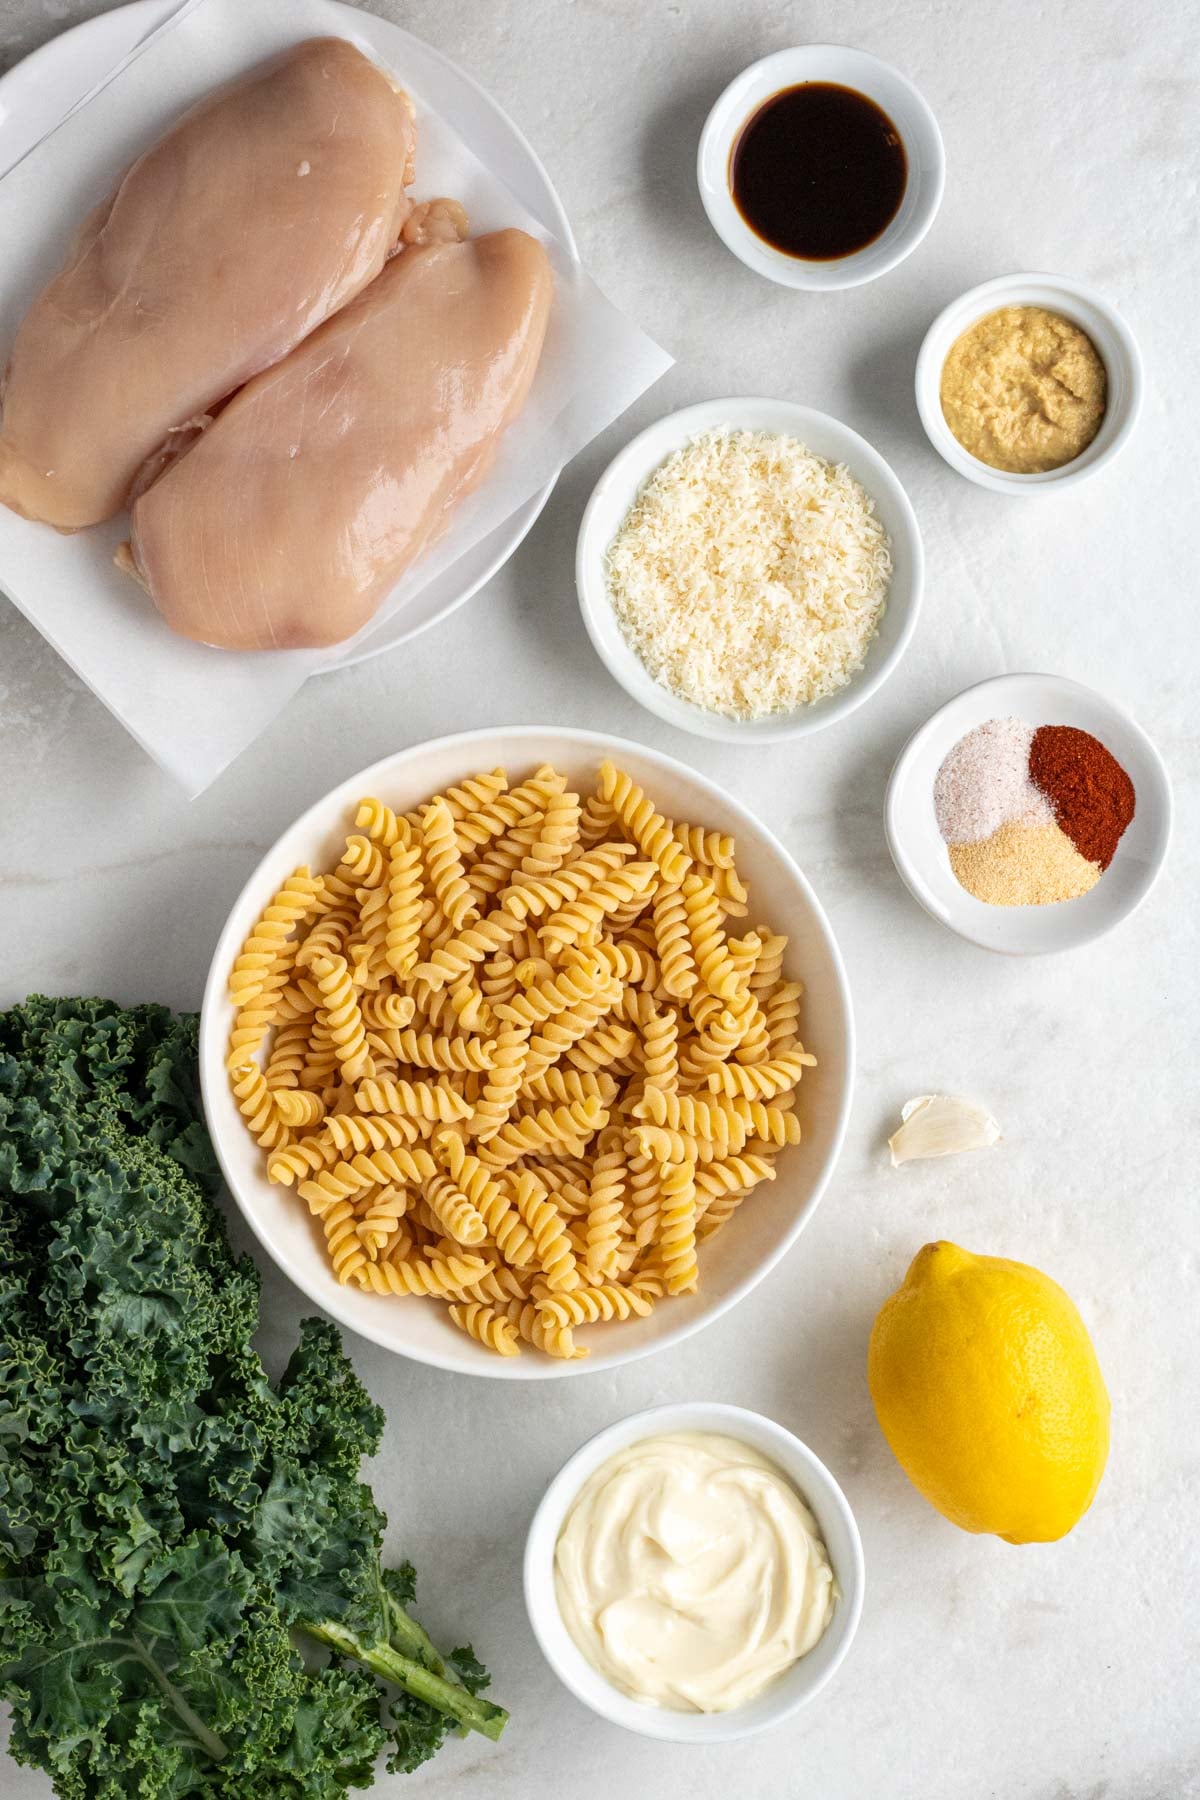
Ingredients + Substitutions
- Chicken Thighs – To add some protein. The recipe calls for bone-in, skin-on chicken thighs, but you can use boneless, skinless chicken breasts or boneless, skinless chicken thighs if preferred. See the notes section of the recipe card for details.
- Arborio Rice – To add some carbohydrates and make the risotto. The recipe calls for arborio rice, but you can use any risotto rice, such as carnaroli rice or vialone rice.
- Leeks – To flavor the leek risotto.
- Shallot and Garlic – To further flavor the risotto. The recipe calls for a whole shallot and garlic cloves, but you can use a small onion, onion powder, or garlic powder if needed. See the notes section of the recipe card for details.
- Broth – To cook the rice and add flavor. The recipe calls for chicken broth, but vegetable broth will also work.
- Lemon Juice – To balance the acidity in the risotto; however, you can use white wine if preferred. See the notes section of the recipe card for details.
- Olive Oil and Butter – To add some healthy fats and ensure the risotto is creamy. I opted for a mixture of olive oil and butter, but you can use one of the other if preferred.
- Parmesan – To make the risotto rich and creamy, and add some more protein.
- Salt and Pepper – To season.
Dietary Adaptions
To Make it Gluten-Free: Use certified gluten-free chicken broth.
To Make it Dairy-Free: Swap the butter for additional olive oil and omit the parmesan cheese.
Red’s Nutrition Tip
Leeks are a great source of prebiotics, a form of non-digestible plant fibers that help to stimulate the growth or activity of beneficial bacteria in the body. They are also a great source of antioxidants, making them a great addition to any meal.
Serving Suggestions
This leek and chicken risotto is a balanced meal with protein, carbohydrates, and fat. It can be enjoyed on its own or adapted to suit your personal calorie or macro needs. For example:
- To make it higher in protein, add an additional 1/2 pound of chicken thighs to the recipe.
- To make it lower in fat, use boneless, skinless chicken thighs or chicken breasts.
- To make it higher in fiber, add some frozen peas to the risotto and/or serve it with a side of steamed broccoli.
Storage + Reheating
To Refrigerate: Allow the risotto and chicken to cool completely, then transfer them to an airtight container and store them in the fridge for up to 4 days.
To Freeze: Once cooled, transfer the risotto and chicken to an airtight container and store them in the freezer for up to 3 months.
To Reheat: Once thawed, the risotto can be reheated in a pot with 1–2 tablespoons of broth or water per cup of risotto over medium-low heat, stirring constantly, until warm and creamy. Once thawed, the chicken thighs can be reheated in the oven at 350°F in a baking dish for 10-15 minutes or in the microwave for 2-3 minutes.
More Risotto Recipes:
Print
Chicken and Leek Risotto
This chicken and leek risotto is a crowd-pleasing meal full of cozy and comforting flavors. It works well for a weeknight meal or weekend dinner party, and leftovers keep well in the fridge and freezer.
-
 Prep Time: 10 minutes
 -
Cook Time: 45 minutes
-
Total Time: 55 minutes
-
Yield: 6 servings 1x
-
Category: Dinner
-
Method: Stovetop
Ingredients
- 2 tablespoons olive oil
- 1 1/2 pounds chicken thighs, bone-in, skin-on
- 1 shallot, minced
- 3 leeks, halved and thinly sliced, white and light green parts only
- 2 cloves garlic, minced or grated
- 2 cups arborio rice, uncooked
- 8–10 cups chicken broth
- 1/2 lemon, juiced
- 2 tablespoons butter
- 1/4 cup freshly grated Parmesan cheese
- Fresh parsley, finely chopped (to serve)
Instructions
- Preheat the oven to 400°F and line a baking sheet with aluminium foil or parchment paper.
- Add the chicken broth to a large pot on medium-low heat and keep warm.
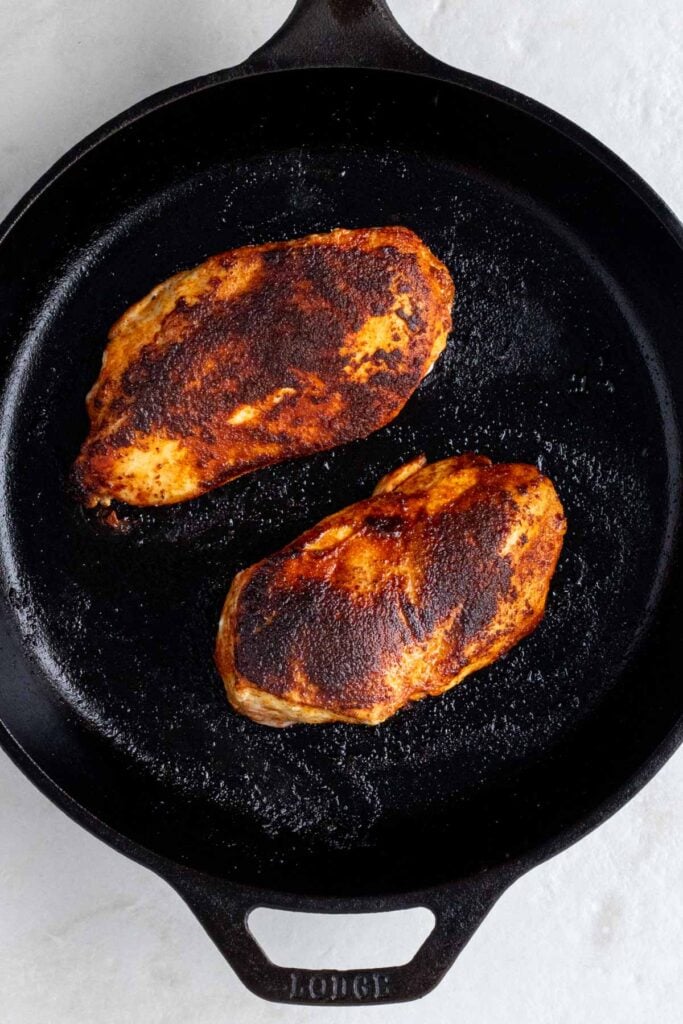
- Place the chicken thighs on a cutting board, pat them dry with a paper towel, and then season generously with salt and pepper on both sides.
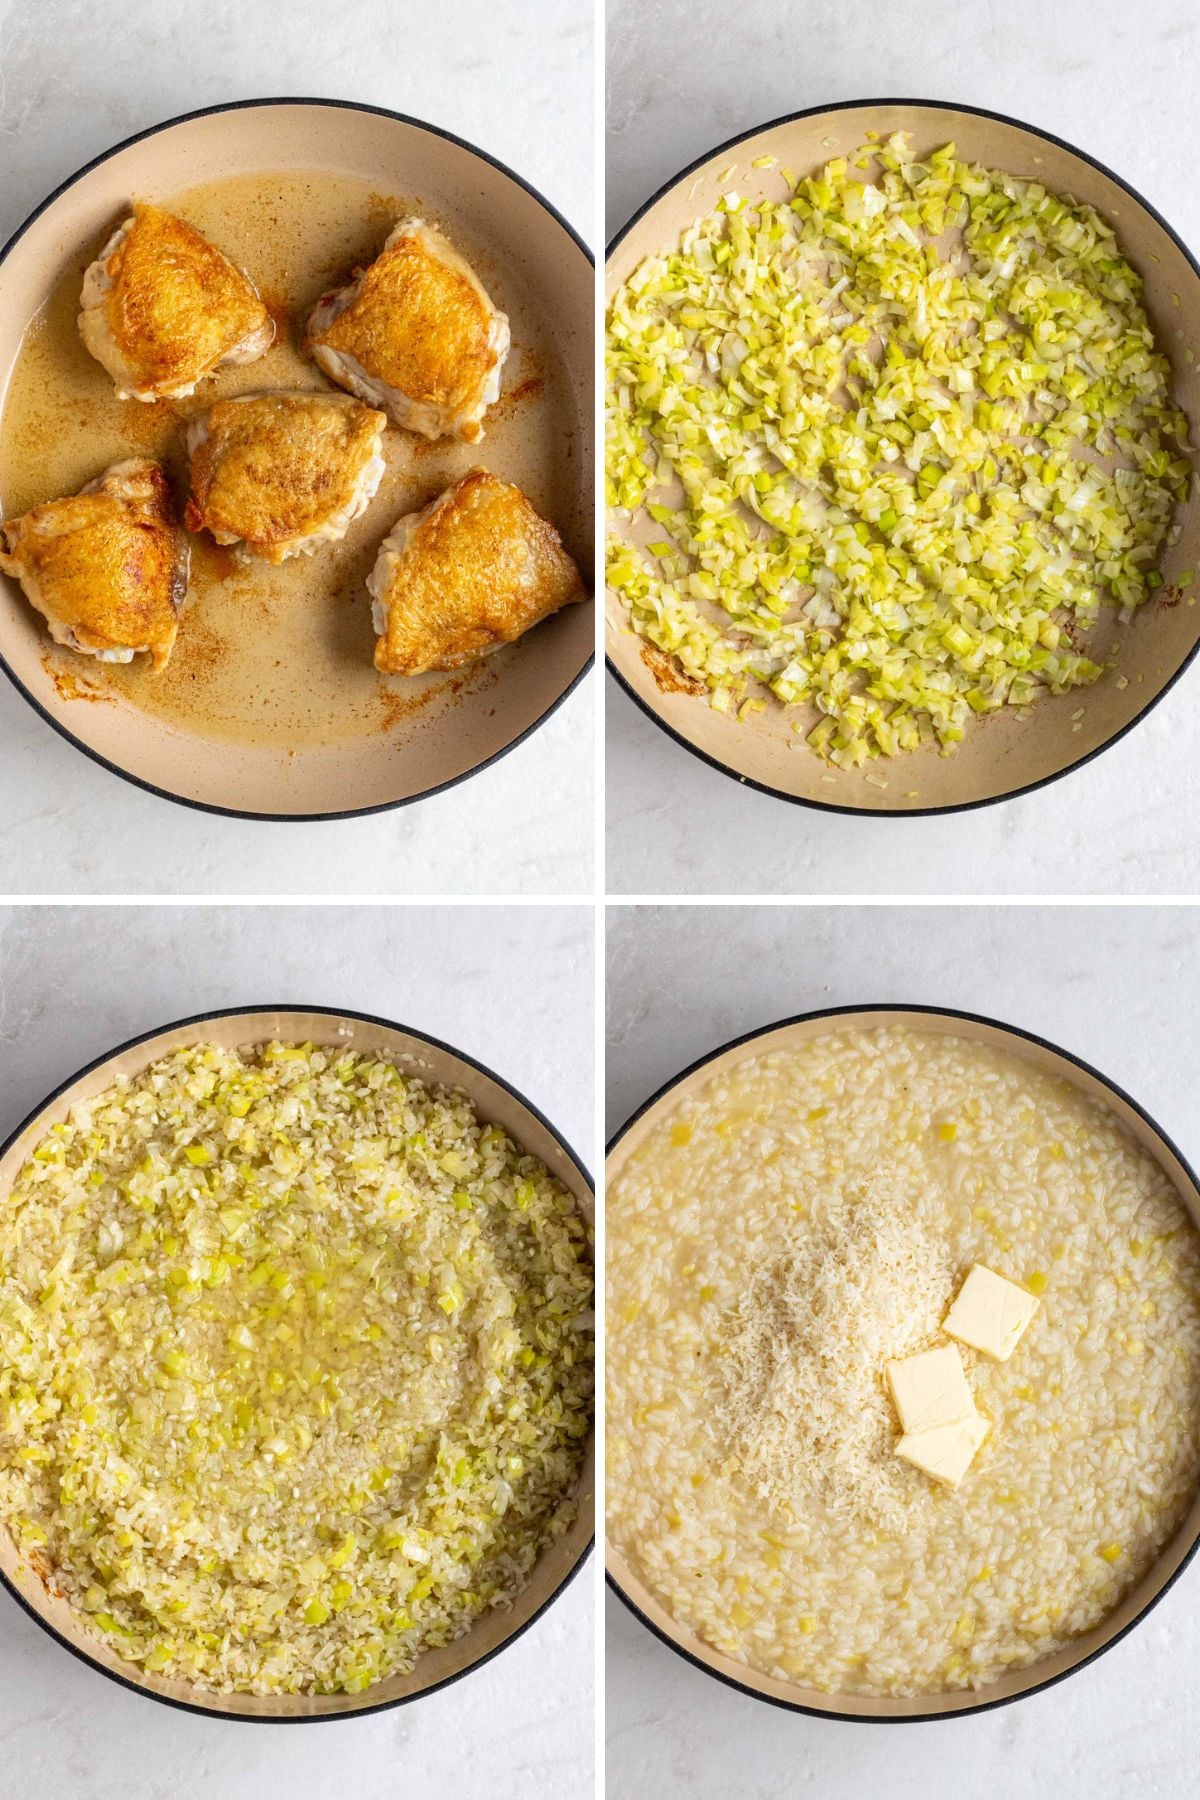
- In a large pot or cast-iron skillet, warm the olive oil on medium-high heat, then add the chicken thighs, skin side down, and cook for 7-8 minutes or until the skin is crispy, then flip and cook for an additional 2-3 minutes until the bottom of the thighs are seared.
- Transfer the chicken thighs to the baking sheet, skin side up, and then transfer them to the oven to cook for 20-25 minutes or until the chicken is cooked to an internal temperature of 165°F. Once cooked, remove them from the oven and allow them to rest on a cutting board while you finish the risotto.
- In the same pan used to sear the chicken thighs, on medium heat, add the minced shallot and cook for 3-4 minutes until tender, stirring frequently.
- Add the sliced leeks to the pan, stir to combine with the shallot, and cook for an additional 3-4 minutes, stirring constantly, until the leeks are tender and slightly translucent. Add the minced garlic to the pan, stir to combine, and cook for an additional 30 seconds.
- Add the uncooked rice and a pinch of salt to the pan, and cook for 1 minute, stirring constantly, until the rice is lightly toasted.
- Add a full ladle of chicken broth and the lemon juice to the pan to deglaze, and stir to combine with the rice and leek mixture until all of the liquid has absorbed.
- Continue adding ladles of chicken broth to the pan, while stirring continuously, allowing most of the liquid to be absorbed before adding more. This process can take 20-25 minutes; you’ll know it’s done when the rice reaches an al dente bite and a slightly creamy texture.
- Once the risotto is cooked, add the butter and parmesan cheese and stir until well combined. Taste and adjust seasoning with additional salt and pepper as needed.
- Return the cooked chicken thighs to the pan, nestling them into the risotto, and sprinkle with chopped parsley to serve.
- The chicken and leek risotto can be served immediately, or cooled and stored in an airtight container in the fridge for up to 4 days or in the freezer for up to 3 months.
Notes
To Use Boneless, Skinless Chicken Thighs: Swap the bone-in chicken thighs for equal parts boneless, skinless chicken thighs in step #3 and increase the cooking time to 10-12 minutes or until the chicken reaches an internal temperature of 165°F. Once cooked, remove them from the pan. Skip step #5.
To Use Boneless, Skinless Chicken Breasts: Swap the bone-in chicken thighs for equal parts boneless, skinless chicken breasts in step #3 and increase the cooking time to 15-20 minutes or until the chicken reaches an internal temperature of 165°F. Once cooked, remove them from the pan. Skip step #5.
To Use Onion Powder: Swap the shallot for 1/2 teaspoon of onion powder. Skip step #6 and add it in step #7 with the garlic instead.
To Use Garlic Powder: Swap the garlic clove for 1 teaspoon of garlic powder in step #7.
To Use White Wine: Swap the lemon juice for 2 tablespoons of white wine in step #9, but allow it to cook off completely before adding the chicken broth.
Nutrition
- Serving Size: 1 serving
- Calories: 550 calories
- Sugar: 4 grams
- Fat: 23 grams
- Carbohydrates: 63 grams
- Fiber: 1 gram
- Protein: 21 grams


