Stephanie Kay Nutrition

Stephanie Kay Nutrition

Real Food for Real Life

  • recipes
    • all recipes
    • Breakfast
    • Lunch
    • Dinner
    • Soups & Stews
    • Salads
    • Sides
    • Snacks
  • nutrition
    • All Articles
    • Tips
    • FAQs
    • This vs. That
    • How To/Guides
    • Weight Loss
  • resources
    • 10 Days of Nutrition
    • 7-Day Meal Plan
    • Balanced Meal Guide
    • 5-Ingredient Cookbook
    • Lunch Box Cookbook
  • About
    • About Steph
    • Contact
  • recipes
    • all recipes
    • Breakfast
    • Lunch
    • Dinner
    • Soups & Stews
    • Salads
    • Sides
    • Snacks
  • nutrition
    • All Articles
    • Tips
    • FAQs
    • This vs. That
    • How To/Guides
    • Weight Loss
  • resources
    • 10 Days of Nutrition
    • 7-Day Meal Plan
    • Balanced Meal Guide
    • 5-Ingredient Cookbook
    • Lunch Box Cookbook
  • About
    • About Steph
    • Contact
  • Dinner
  • Breakfast
  • Meal Prep
  • Nutrition Tips
  • facebook
  • instagram
  • pinterest
  • youtube

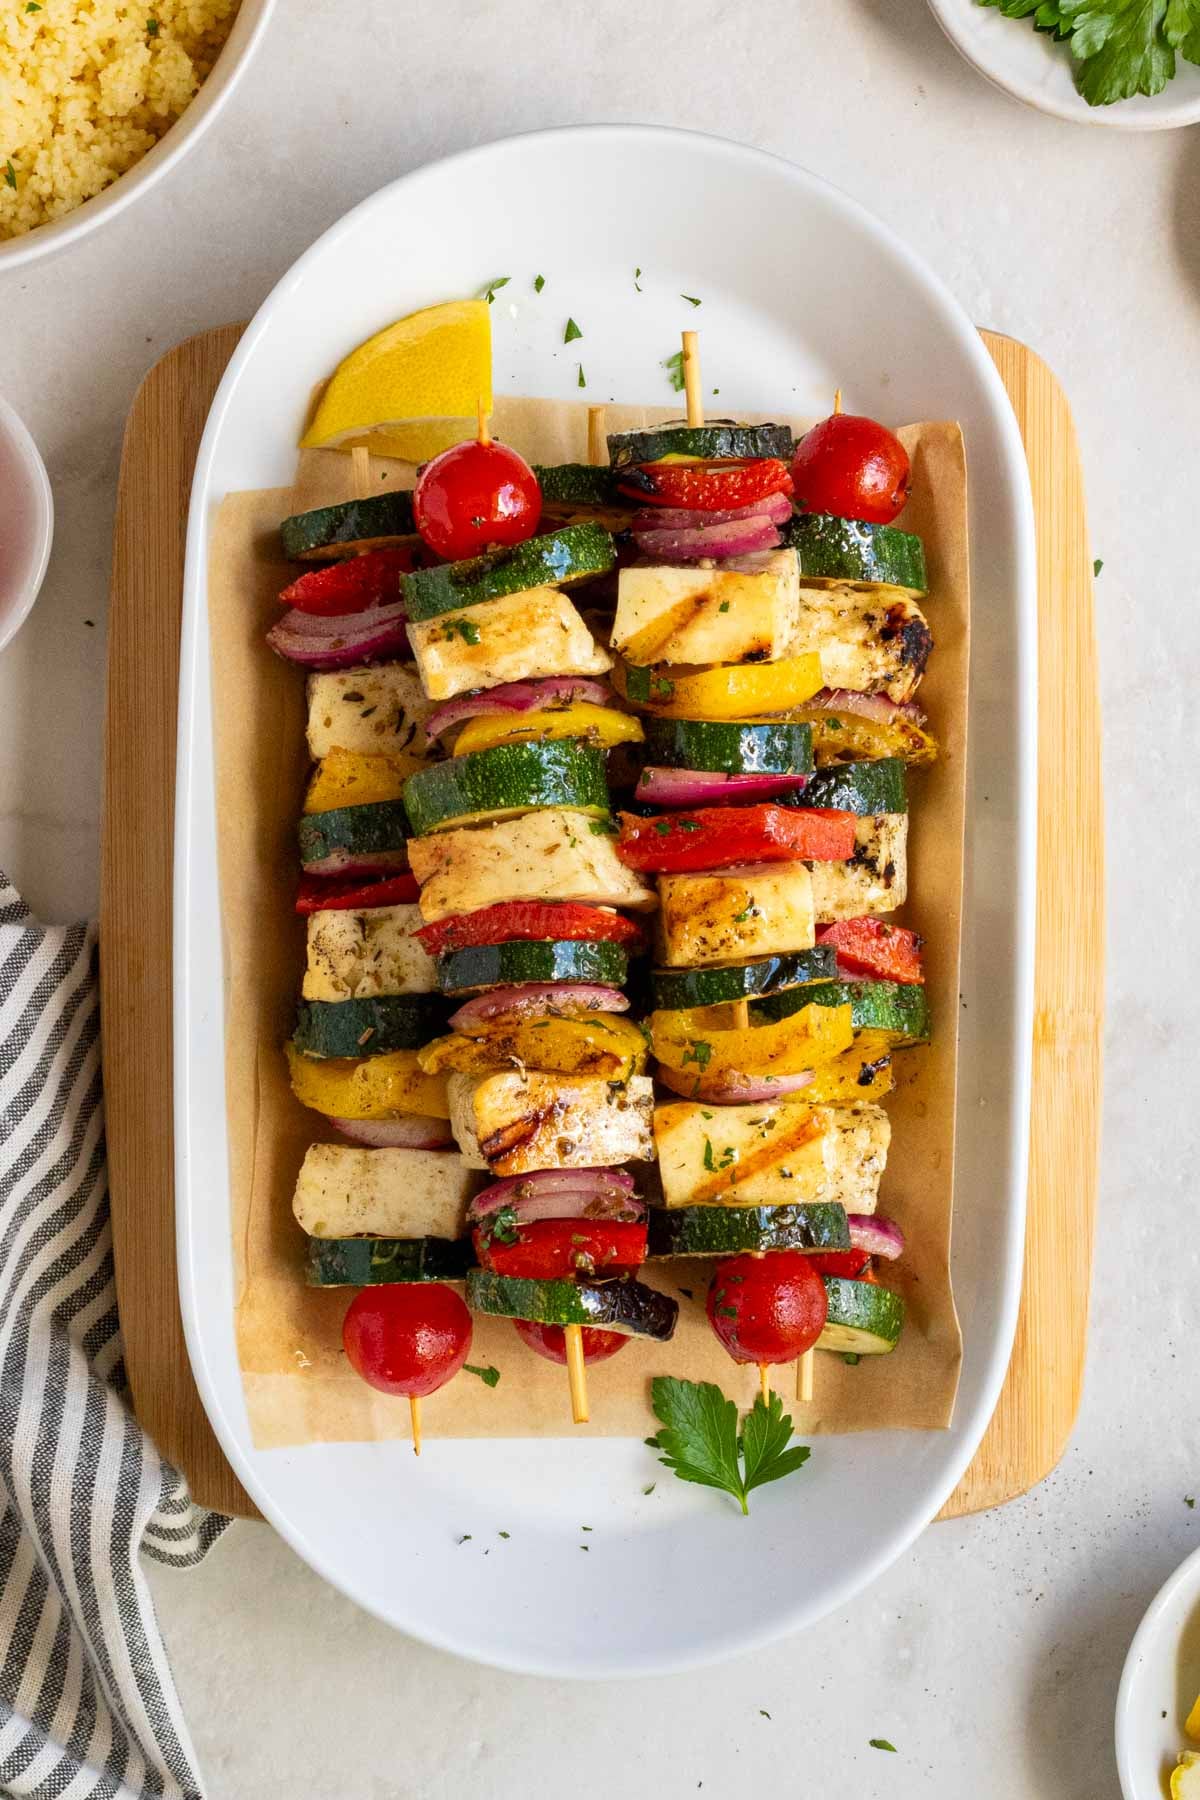
Grilled Halloumi and Vegetable Skewers

Published on July 2, 2026 by Stephanie Kay

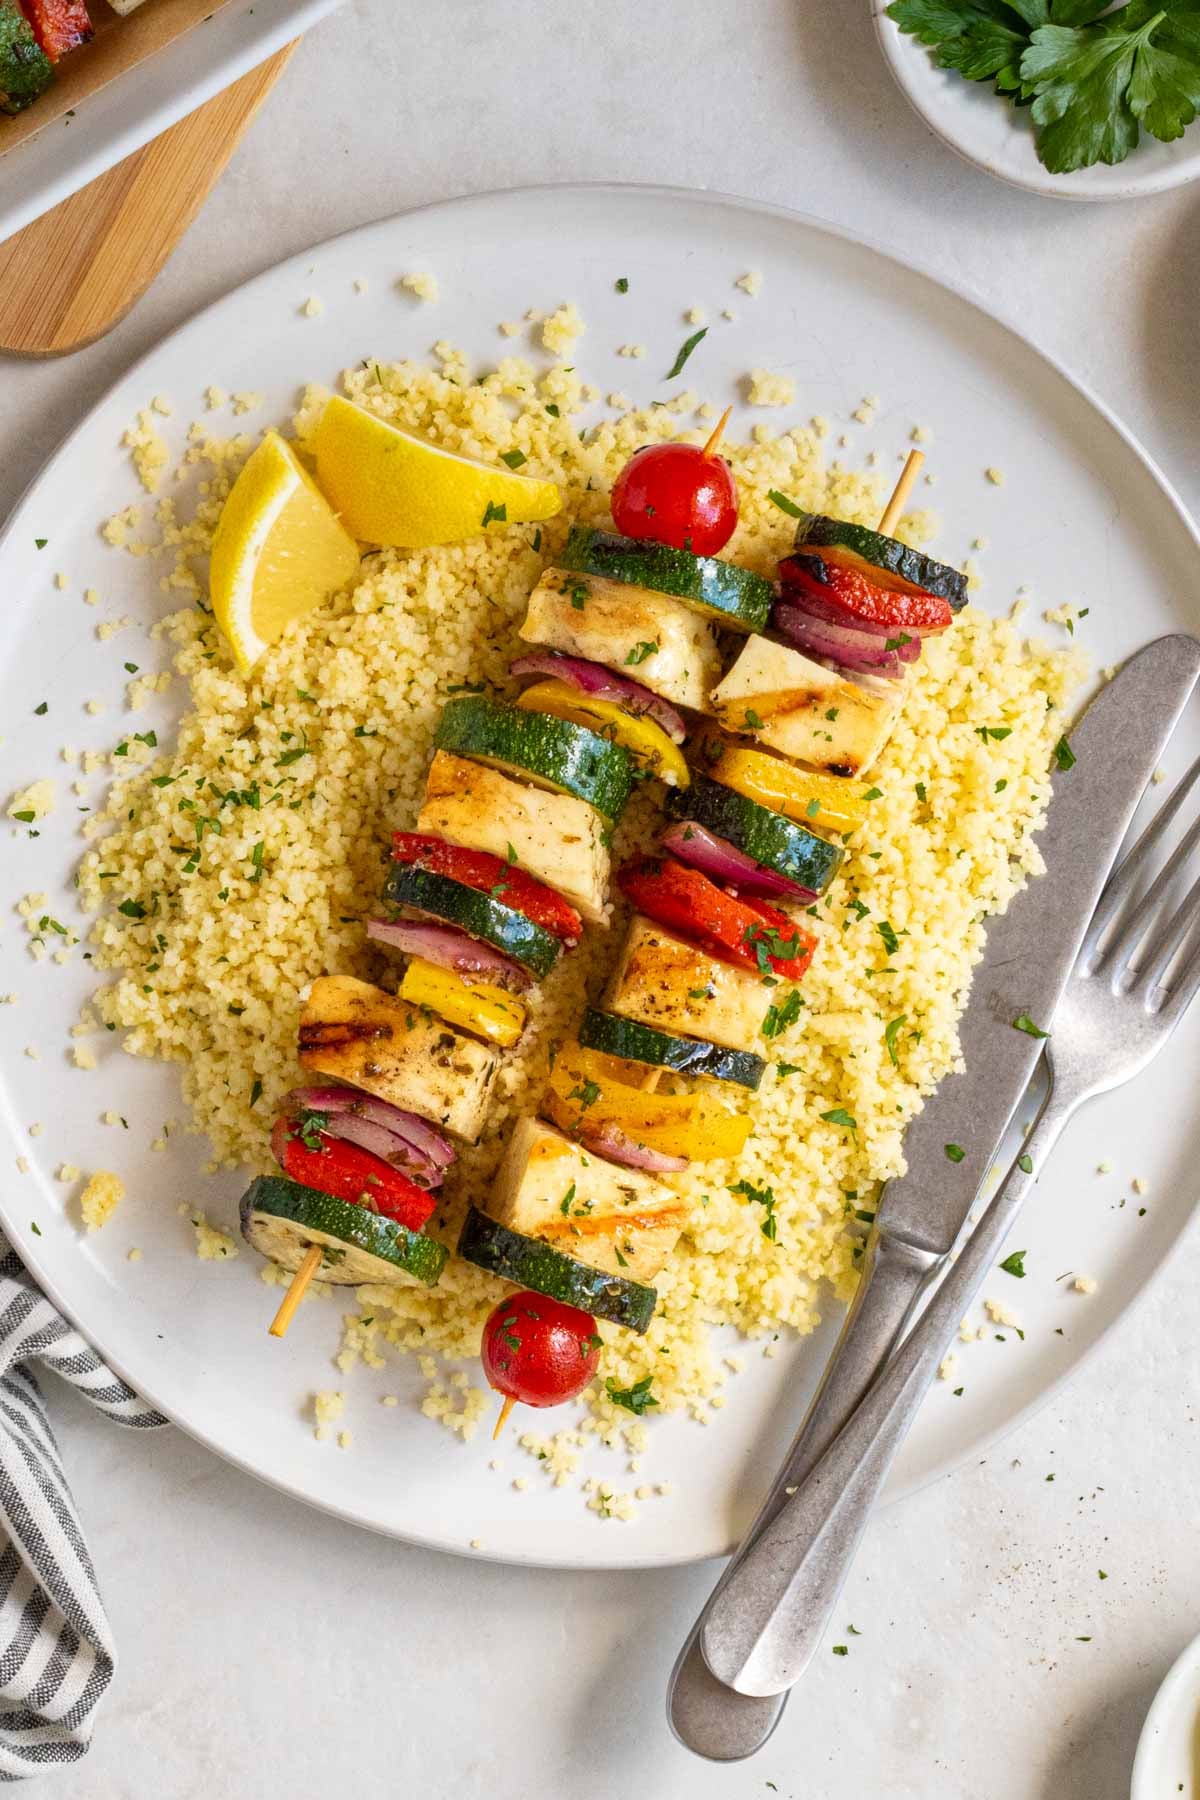
Filled with colorful veggies, these grilled halloumi and vegetable skewers are perfect for grilling season. They can be enjoyed on their own, on a bed of couscous, or in a pita with tzatziki sauce for a delicious lunch or dinner.

Grilled halloumi and vegetables skewers on a plate with parchment paper on a wood cutting board with a bowl of couscous, parsley, olive oil, and a white and grey striped tea towel on the side.

I don’t know about you, but when the weather warms up, I’m constantly looking for easy grilling recipes. Instead of turning on the oven, I want something I can pull together quickly, without compromising nutrition or flavor, and these grilled halloumi skewers with vegetables are exactly that.

Covered in a simple Greek-inspired marinade, these halloumi veggie skewers are as easy to prep as they are delicious to eat. And the best part is, leftovers keep well in the fridge, so you can grill up a double or triple batch and enjoy the warm or cold for days to come.

A large white plate with grilled halloumi and vegetable skewers on a bed of couscous with lemon wedges on the side and silver cutlery.

Why You’ll Love Them

  • Quick and Easy – Prepped and ready in under 30 minutes, they are perfect for a simple summer dinner.
  • Full of Protein – Halloumi is one of the highest protein cheeses.
  • Full of Veggies – Each skewer is loaded with colorful grilled veggies.
  • Versatile – The halloumi and grilled vegetable skewers can be enjoyed on their own, with some couscous, in a salad, or in pita bread.
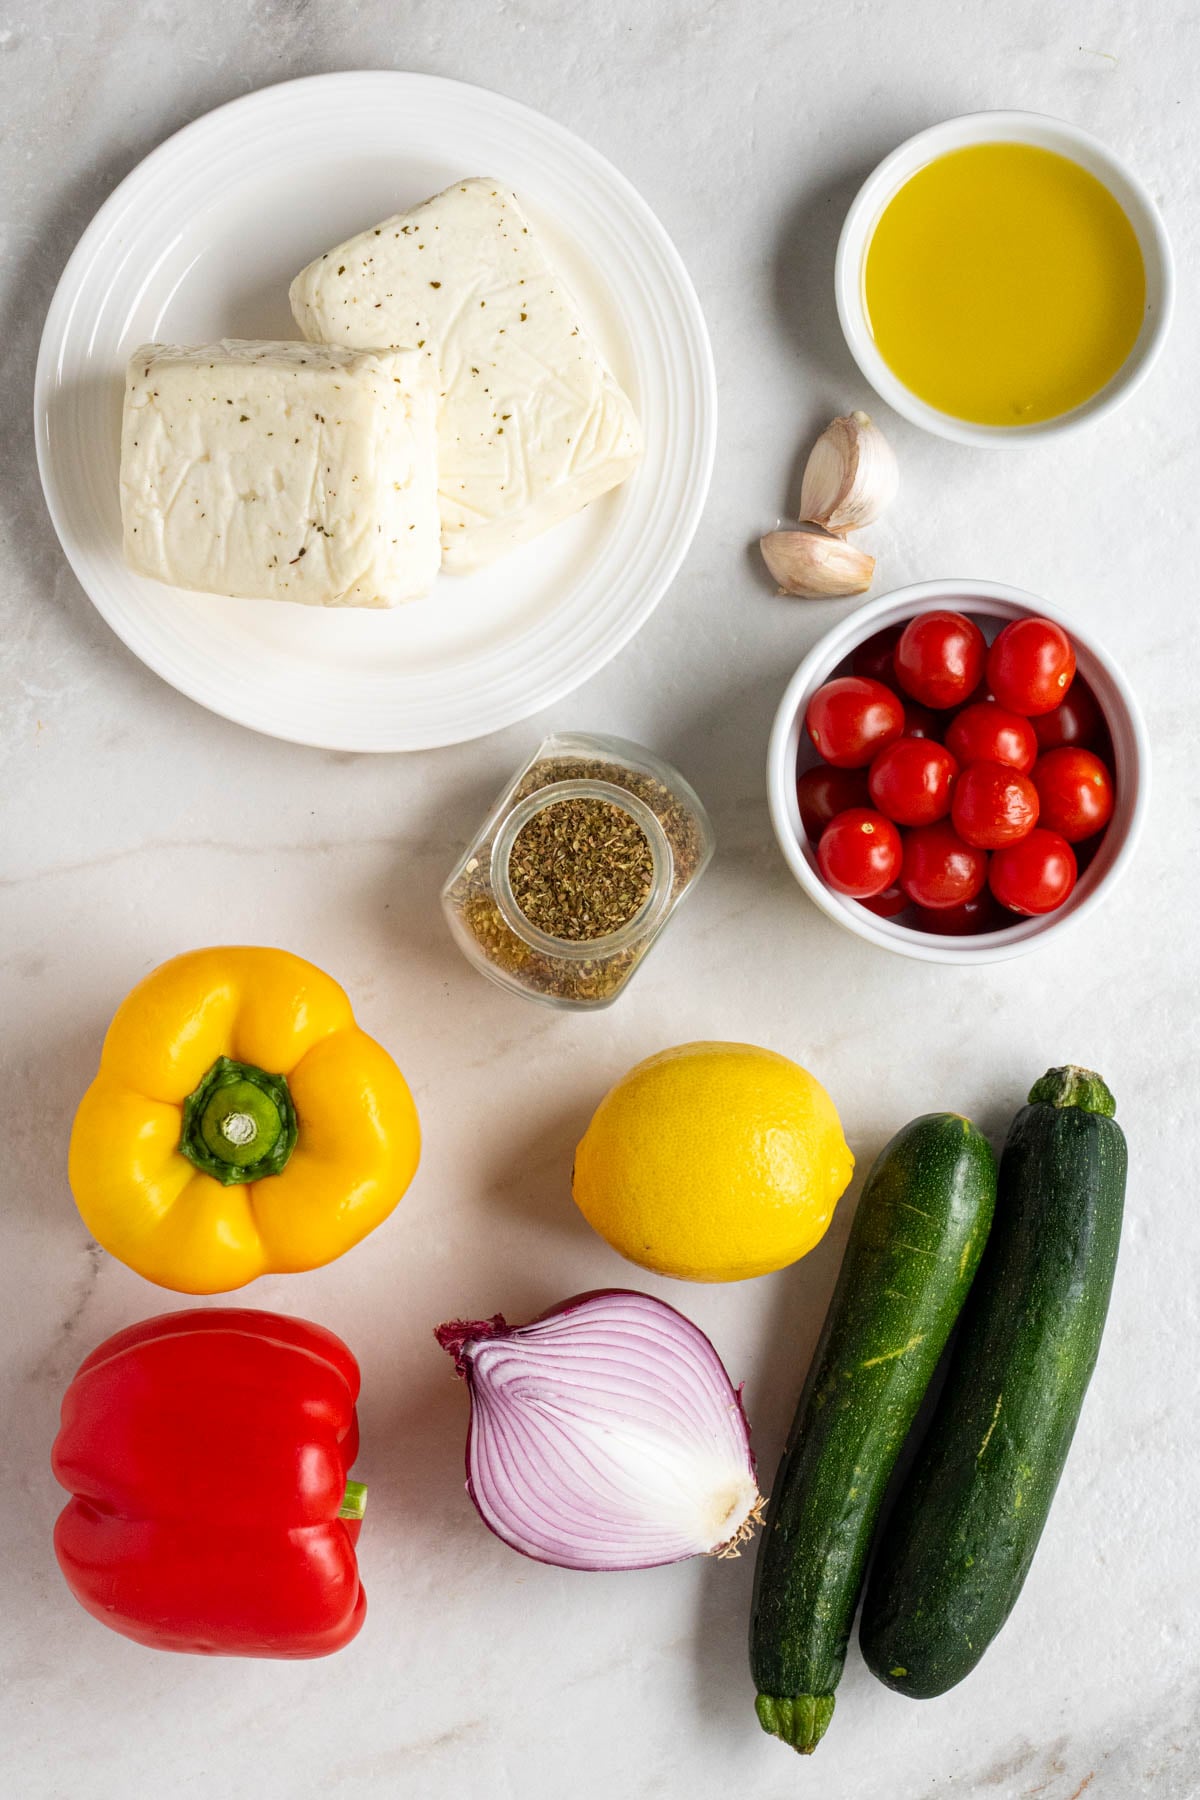
Plate of halloumi cheese, bowl of olive oil, bowl of cherry tomatoes, jar or oregano, with garlic cloves, bell peppers, red onion, lemon, and zucchini on a white background.

Ingredients + Adaptations

  • Halloumi Cheese -To make the skewers and add some vegetarian protein.
  • Vegetables – The recipe calls for a mixture of zucchini, bell peppers, red onion, and cherry tomatoes, but you can use any combination you like. Mushrooms, eggplant, and asparagus would also work well.
  • Olive Oil – To make the marinade and add some healthy fats. You can use regular or extra-virgin olive oil.
  • Lemon Juice – To balance the flavors in the marinade. I used fresh lemon juice, but you can use bottled lemon juice or red wine vinegar if preferred. See the notes section of the recipe card for details.
  • Garlic – To add some flavor to the marinade. The recipe calls for garlic cloves, but you can use garlic powder if preferred. See the notes section of the recipe card for details.
  • Oregano – To add some flavor. The recipe calls for dried oregano, but you can use fresh oregano if preferred. See the notes section of the recipe card for details.
  • Salt and Pepper – To season.

Dietary Adaptions

To Make them Gluten-Free: No adaptations are needed; this recipe is gluten-free.
To Make them Dairy-Free: This recipe cannot be made dairy-free.

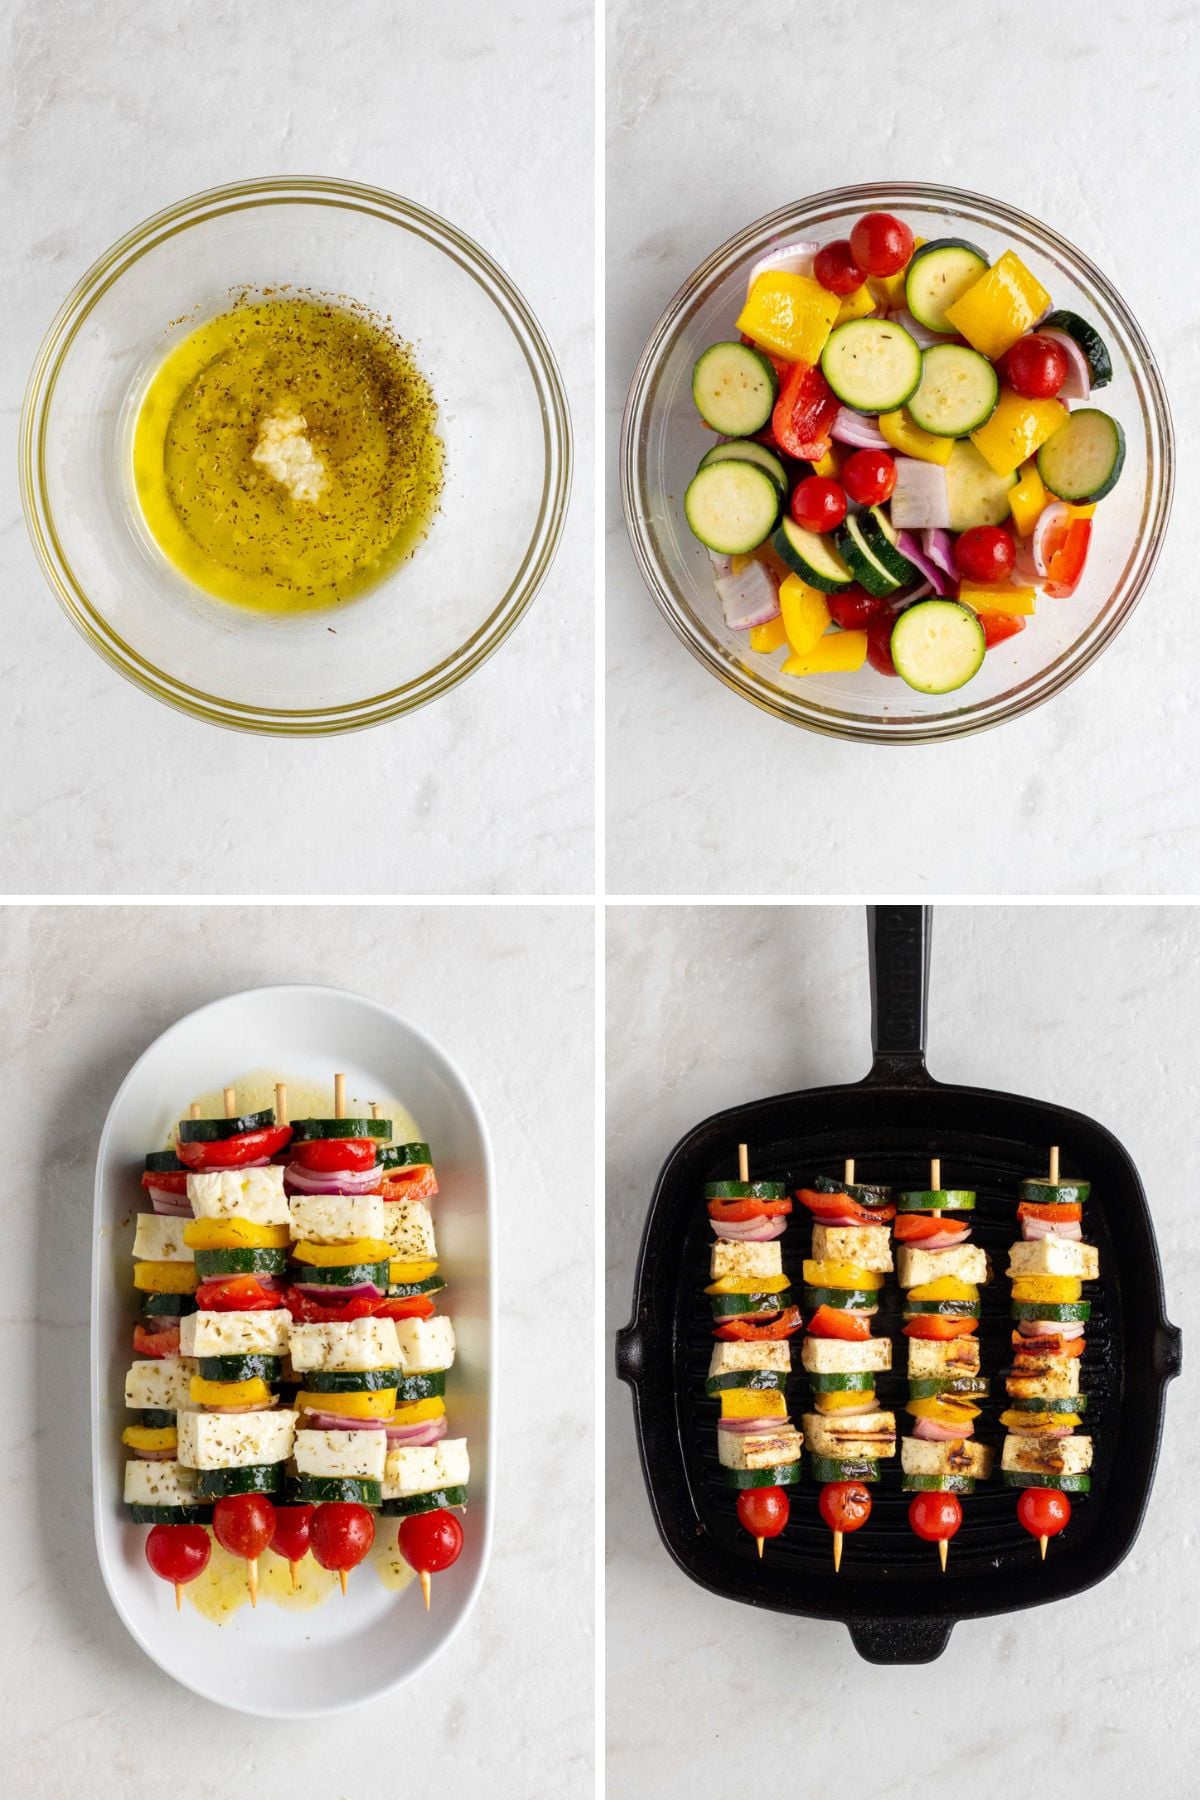
Grid of 4 images with a glass bowl of marinade; a glass bowl with marinated vegetables; a glass bowl with uncooked halloumi and vegetable skewers on a plate; and a grill pan with grilled vegetable and halloumi skewers.

Red’s Nutrition Tip

The halloumi veggie skewers are a good meatless meal since halloumi is one of the highest-protein cheeses. It’s also a good source of calcium and sodium; however, you can use a low-sodium version if you’re trying to reduce your sodium intake.

Serving Suggestions

These grilled veggie and halloumi skewers are a good source of protein and fat. To make them a more balanced meal, I suggest serving them with a source of complex carbohydrates and fiber. They can also be adapted to suit your personal calorie or macro needs. For example:

  • To make them higher in protein, add some cubed chicken, shrimp, or tofu to the skewers.
  • To make them higher in carbs, serve them with couscous or pita bread.
  • To make them lower in fat, use a light or low-fat halloumi cheese.
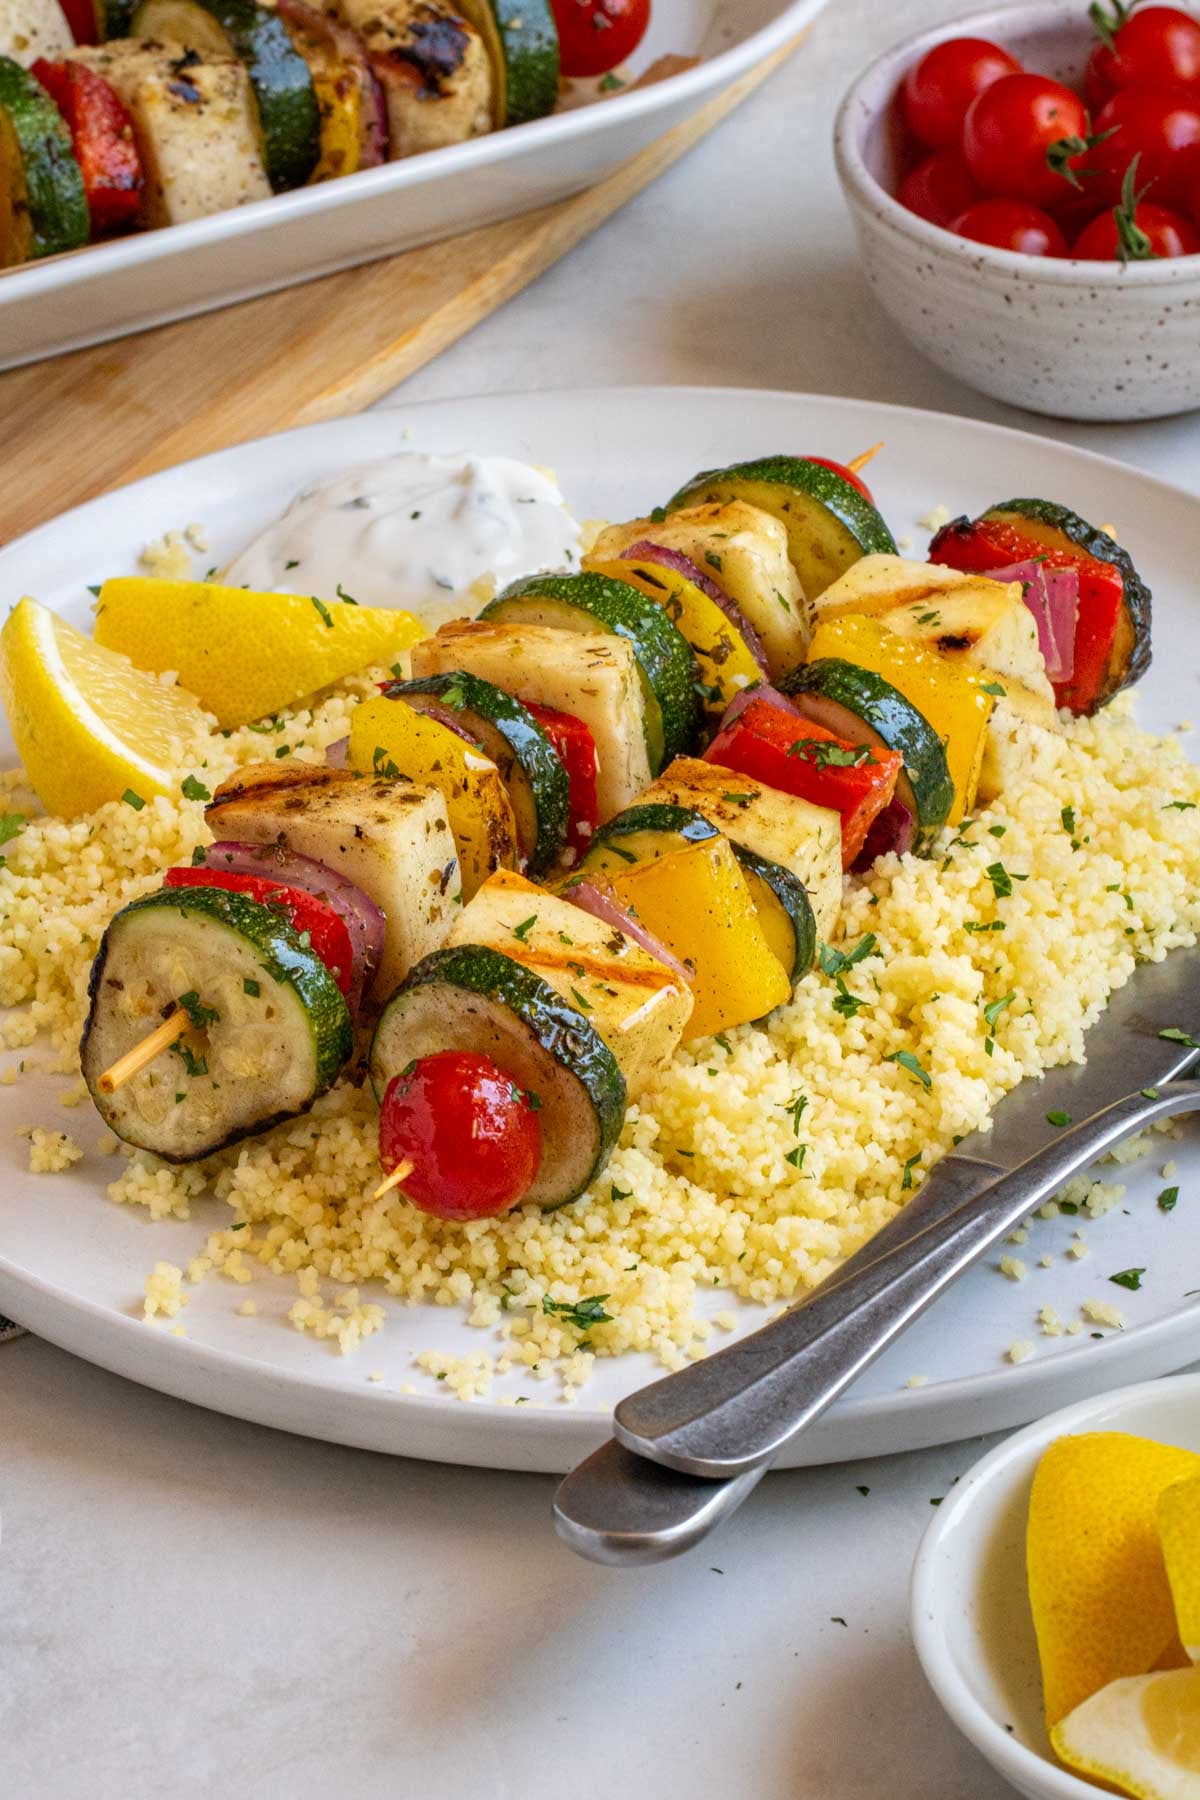
Close of up grilled veggie and halloumi skewers with couscous, tzatziki, and lemon wedges.

Storage + Reheating

To Refrigerate: Once cooled, transfer the halloumi and veggie kabobs to an airtight container and store them in the fridge for up to 4 days.

To Freeze: The skewers cannot be frozen.

To Reheat: The skewers can be reheated in the oven at 350°F for 5-10 minutes or in the microwave for 1-2 minutes.

More Halloumi Recipes:

  • Mediterranean Grilled Halloumi Wraps
  • Sheet Pan Halloumi Bowls
  • Grilled Halloumi Salad

12 Healthy Road Trip Snacks

Published on June 30, 2026 by Stephanie Kay

Whether you’re heading to the beach, to the mountains, or to visit family for a long weekend, snacks are essential to a good road trip. However, opting for greasy fast food and sugary gas station treats can leave you feeling tired and sluggish. So here is a list of healthy road trip snacks you can pack for your next adventure.

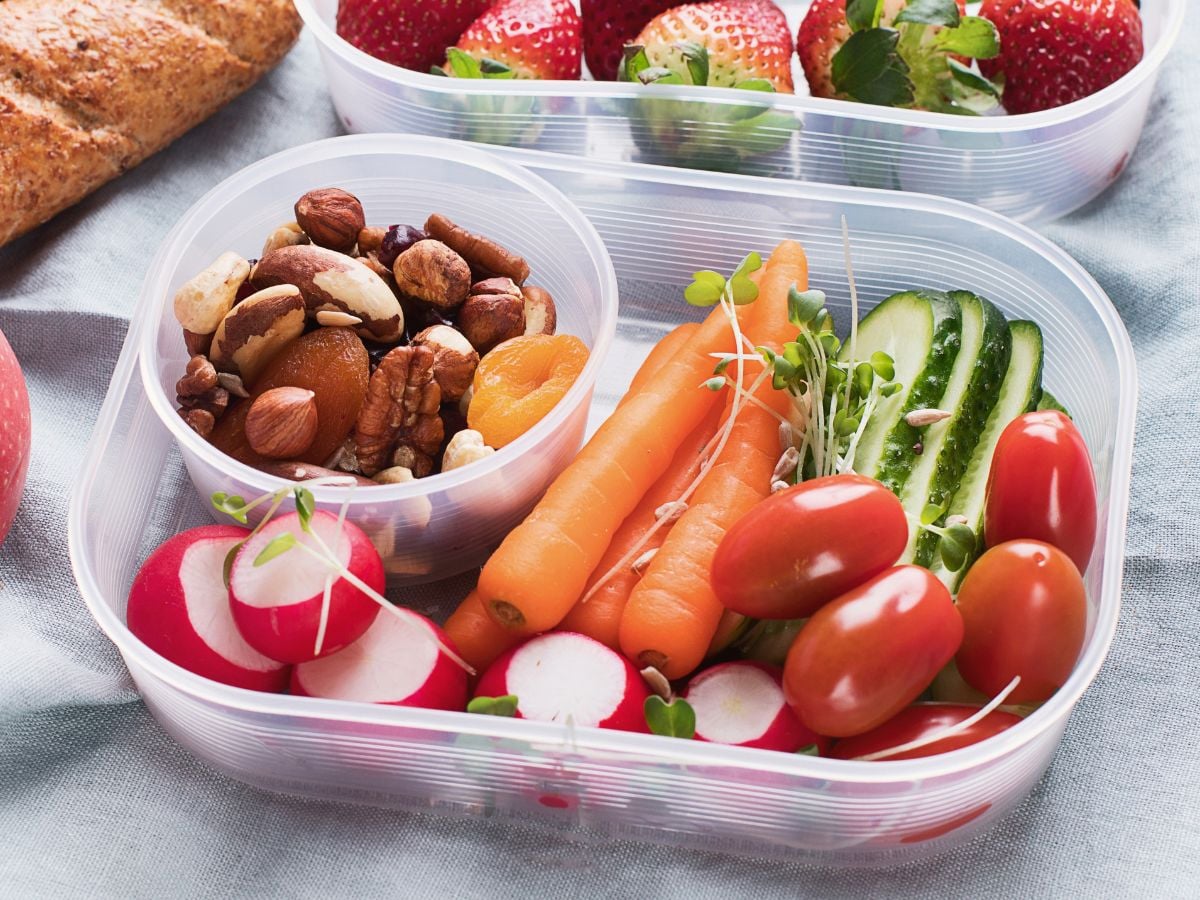
Meal prep container with baby carrots, cucumber, cherry tomatoes, and radishes with a small container of trail mix on a grey tea towel with a container of strawberries in the background and a loaf of bread and apple on the side.

Table of contents

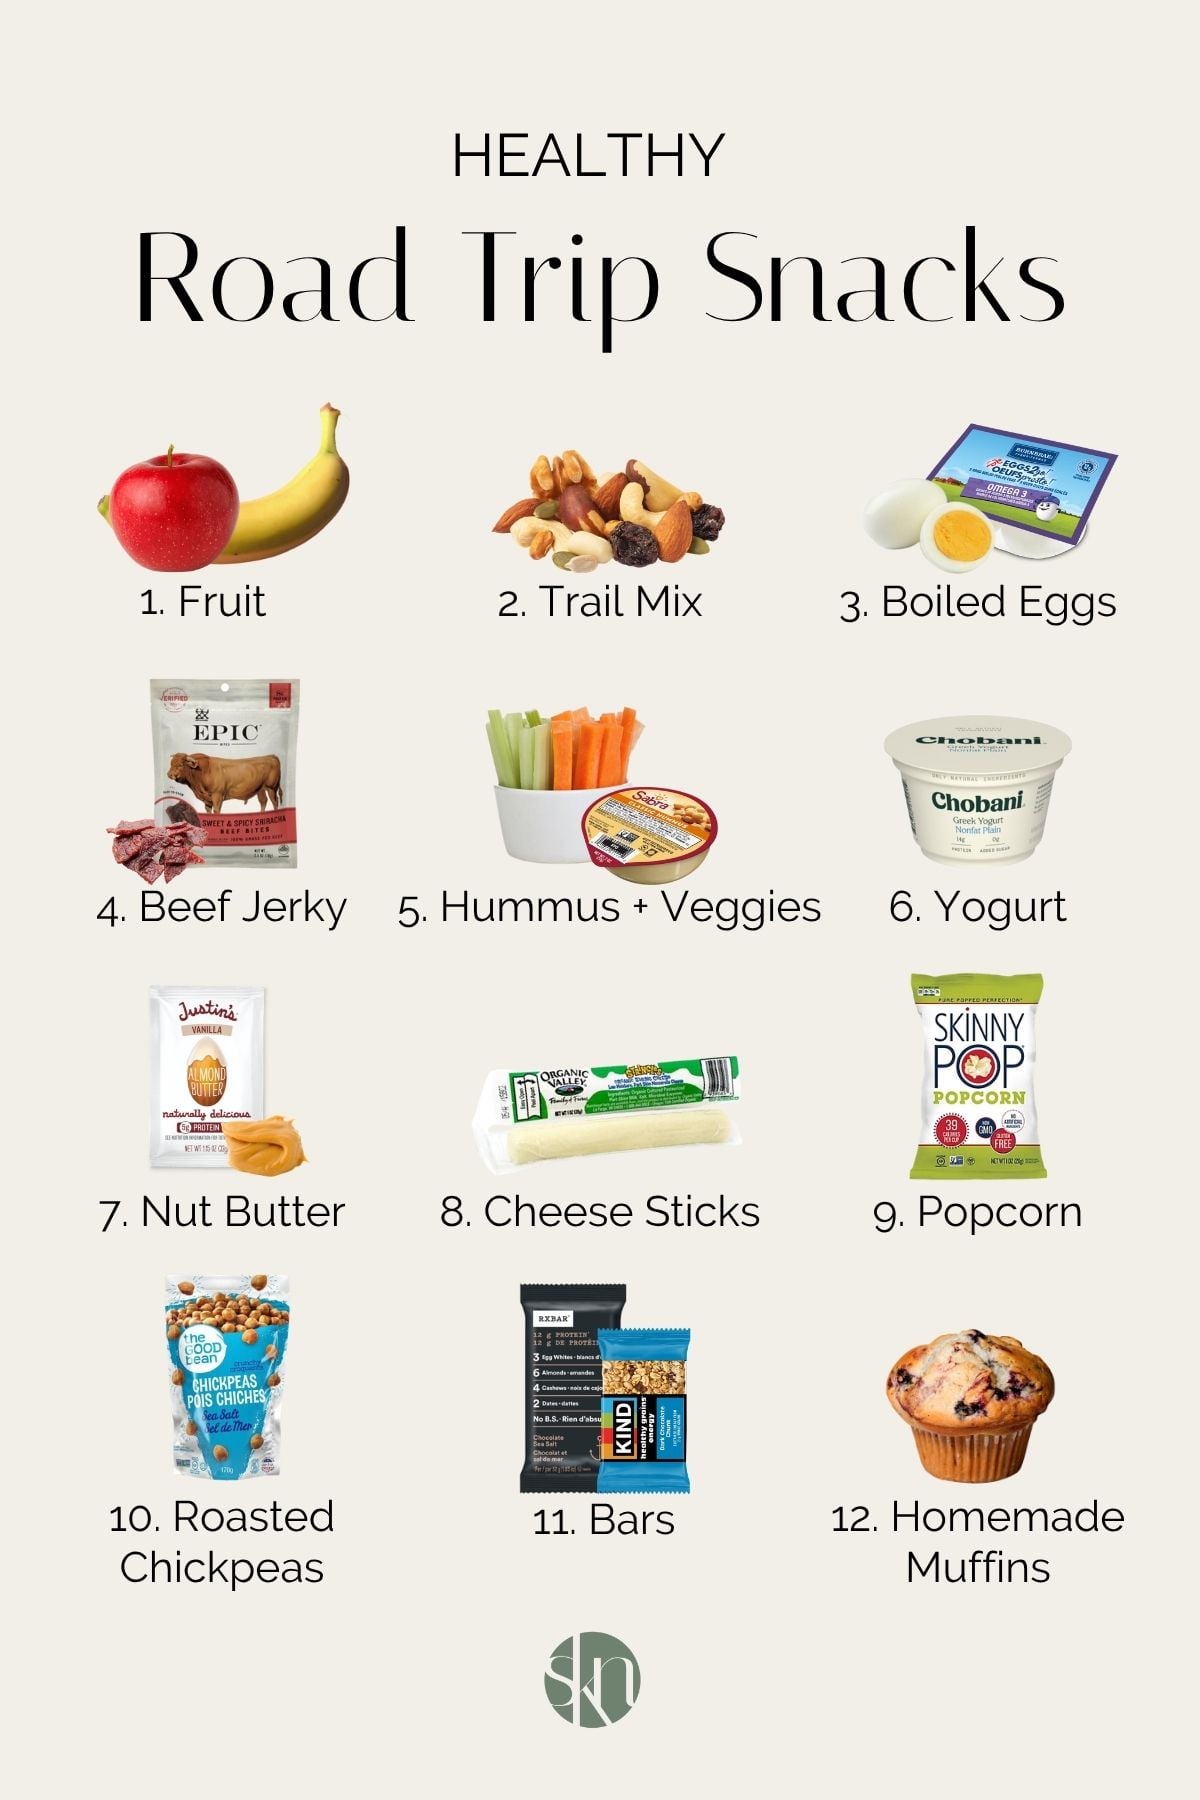
  • Healthy Snacks for a Road Trip
  • 1. Fresh Fruits
  • 2. Trail Mix
  • 3. Hard-Boiled Eggs
  • 4. Beef Jerky
  • 5. Hummus and Veggies
  • 6. Yogurt
  • 7. Nut Butter
  • 8. Cheese Sticks
  • 9. Popcorn
  • 10. Roasted Chickpeas
  • 11. Bars
  • 12. Homemade Muffins

Hitting the open road brings a sense of joy and adventure, but if you’re not prepared, you can find yourself at the gas station, grabbing not-so-healthy snacks, or pulling into the drive-thru ordering a burger and fries. Fortunately, doing a little meal prep before you leave the house can help save money and support your calorie and macro goals at the same time.

Generally speaking, the best road trip snacks are portable, non-messy, and packed with protein and fiber. Opting for high-protein snacks during road trips can help to provide steady and sustained energy, while a high-fiber snack can help to keep you full and avoid overeating.

Infographic of healthy road trip snacks.

Healthy Snacks for a Road Trip

Here is a list of healthy snack ideas you can pack for your next road trip.

1. Fresh Fruits

Fruit is one of the best healthy snacks for a road trip. Not only is fresh fruit a good source of fiber and one of the most hydrating foods, but it’s easy to pack and transport. While all fruit makes a healthy road trip snack, fresh produce that comes in its own natural skin tends to travel best, such as apples, pears, bananas, and oranges, as they are less prone to damage or being smushed at the bottom of your bag.

That said, finger fruits that don’t require peeling, like grapes and blueberries, are great for kids and also travel well when stored in a small container. And, if you need something even less messy and more kid-friendly, fruit pouches and dried fruit are just as nutritious.

2. Trail Mix

If you love a sweet-and-salty snack, trail mix is a great option, and it’s easy to eat with one hand while driving. While not all trail mix is created equal, as some store-bought versions are loaded with added sugar and salt, it’s easy to find healthy trail mix in most stores, and you can easily make your own at home.

The key to a healthy trail mix is combining high-protein nuts with high-protein seeds and just enough dried fruit or dark chocolate chips to give it a hint of sweetness. While almost any nuts or seeds can work in a trail mix, almonds, cashews, peanuts, sunflower seeds, and pumpkin seeds work particularly well. In addition to being a good source of protein and healthy fats, they are rich in fiber, which helps balance your blood sugar and keep you full.

3. Hard-Boiled Eggs

While I wouldn’t suggest packing them for a plane trip, hard-boiled eggs are a healthy snack for car road trips. You can prep a bunch ahead of time, peel them, season them with a bit of salt and pepper, and store them in an airtight container in your bag for a high-protein snack for later.

Pre-packaged hard-boiled eggs are also easy to find in many gas stations and grocery stores, so they are something you can grab on the road and eat along with some fresh fruit for a well-balanced snack with protein, fat, carbohydrates, and fiber.

4. Beef Jerky

Beef jerky and meat sticks are perfect for road trips as they are a great source of protein and highly portable. Because beef jerky is dehydrated, it does not require refrigeration; you can simply toss it in your bag, and it will easily last the whole trip.

That said, not all meat sticks and jerky are created equal, so it’s best to read the ingredients and opt for versions with low sugar, minimal sodium, and recognizable whole-food ingredients. Moreover, if you want a low-fat and low-calorie option, reach for turkey sticks instead of beef.

5. Hummus and Veggies

Hummus and veggies are a healthy snack combo loaded with plant-based protein, healthy fats, fiber, and micronutrients. While it can get a little messy, when properly packed, it’s perfect for a road trip.

To minimize mess, choose sturdy, bite-sized vegetables that do not require cutting in the car, such as baby carrots, snap peas, celery sticks, mini bell peppers, and/or cherry tomatoes, and use single-serving hummus or store it in a tight container. If you want something a little more filling, add some lightly salted pretzels or whole-grain crackers.

6. Yogurt

Although yogurt does require refrigeration and may not work for a long road trip, it’s great for short trips or if you’re looking to eat shortly after leaving the driveway. Both regular and Greek yogurt are good sources of protein and probiotics, particularly unflavored versions, which can help to keep you satiated and full and support digestion while you travel.

Pre-portioned, packaged yogurt cups are probably the best way to travel with yogurt, although you’ll need to bring some spoons, and yogurt tubes are a good option for kids. If you know you’re going to be in the jar for a while, simply throw some ice packs in a small cooler, and your yogurt will last for several hours or up to half a day.

7. Nut Butter

Be it peanut butter or almond butter, nut butter is a great snack for a road trip. Nut butters are good sources of protein, healthy fats, and fiber, providing sustained, slow-burning energy without requiring any refrigeration.

You can pack nut butters into a small container before hitting the road or find single-serve packs at certain coffee shops (i.e., Starbucks) during pit stops. They can be enjoyed on their own for a mess-free snack, or paired with whole-grain crackers or fruit, like apples or bananas, to add some complex carbohydrates and create a more satiating and satisfying snack.

8. Cheese Sticks

Cheese sticks make great road trip snacks since they are pre-packaged and pre-portioned. A single cheese stick can provide up to 7 grams of protein per serving and offer a concentrated dose of calcium.

They are also mess-free, so you don’t have to worry about crumbs between the seats, and their single-serving nature can help to practice portion control at the same time. Not to mention, unlike eggs and tuna pouches, they have a neutral scent, which helps to keep the car smelling fresh.

9. Popcorn

Popcorn is another good road trip snack. It’s lightweight, affordable, and offers a similar salty and satisfying crunch as potato chips, but with more nutrition. Since popcorn is a whole grain, it’s high in fiber while being low in calories, particularly when opting for lightly buttered versions.

Popcorn is also one of the most filling foods and a low-calorie, high-volume food that allows you to eat a large portion and keep your hands busy without ruining your nutritional goals. It’s also naturally gluten-free, making it something everyone can enjoy.

10. Roasted Chickpeas

Roasted chickpeas are also a good road trip snack idea. Typically made from chickpeas, cooking oil, and salt, they offer a combination of vegetarian protein and fiber with a crunchy bite.

Plus, homemade roasted chickpeas are simple to whip up and customize with whatever sweet or savory seasonings you crave. Don’t have time to bake a batch before hitting the road? Look for them next to the potato chips at local convenience stores.

11. Bars

Granola bars are easy to transport, mess-free, and shelf-stable, making them great for a road trip. That said, not all granola bars are healthy options, as some contain as much added sugar as a candy bar, so it’s best to read the label and opt for versions made with whole food ingredients and limited sugar.

In addition to granola bars, protein bars are also a good road trip snack and easily found in grocery stores, gas stations, train stations, and airports. Like granola bars, the best protein bars are made with whole food ingredients, have a low sugar content, and contain at least 10 grams of protein.

12. Homemade Muffins

While muffins from grocery stores or coffee shops are not always the most nutritious options, as they are often extra-large and loaded with added sugar and refined oils, homemade muffins can be a very healthy choice for road trips. They are naturally portion-controlled, easy to hold, and, when made with whole food ingredients, can be a good source of complex carbohydrates and fiber.

My blueberry banana muffins, apple carrot muffins, and mixed berry muffins are particularly healthy versions and kid-friendly. More ideas of healthy homemade road trip snacks include banana bread bites, no-bake granola bars, peanut butter protein bars, and almond butter rice crispy bars.

The Bottom Line

A healthy road trip snack is portable, mess-free, made of whole food ingredients, and high in protein and fiber. Some of the best options include fresh fruits, trail mix, hard-boiled eggs, beef jerky, hummus and veggies, yogurt, nut butter, cheese sticks, popcorn, roasted chickpeas, granola and protein bars, and homemade baked goods.


Roasted Cauliflower Salad

Published on June 25, 2026 by Stephanie Kay

Filled with spiced roasted cauliflower, chickpeas, raisins, pickled onions, and fresh parsley, this roasted cauliflower salad is equally delicious and nutritious. It works well as a light main course or hearty side dish for lunch or dinner.

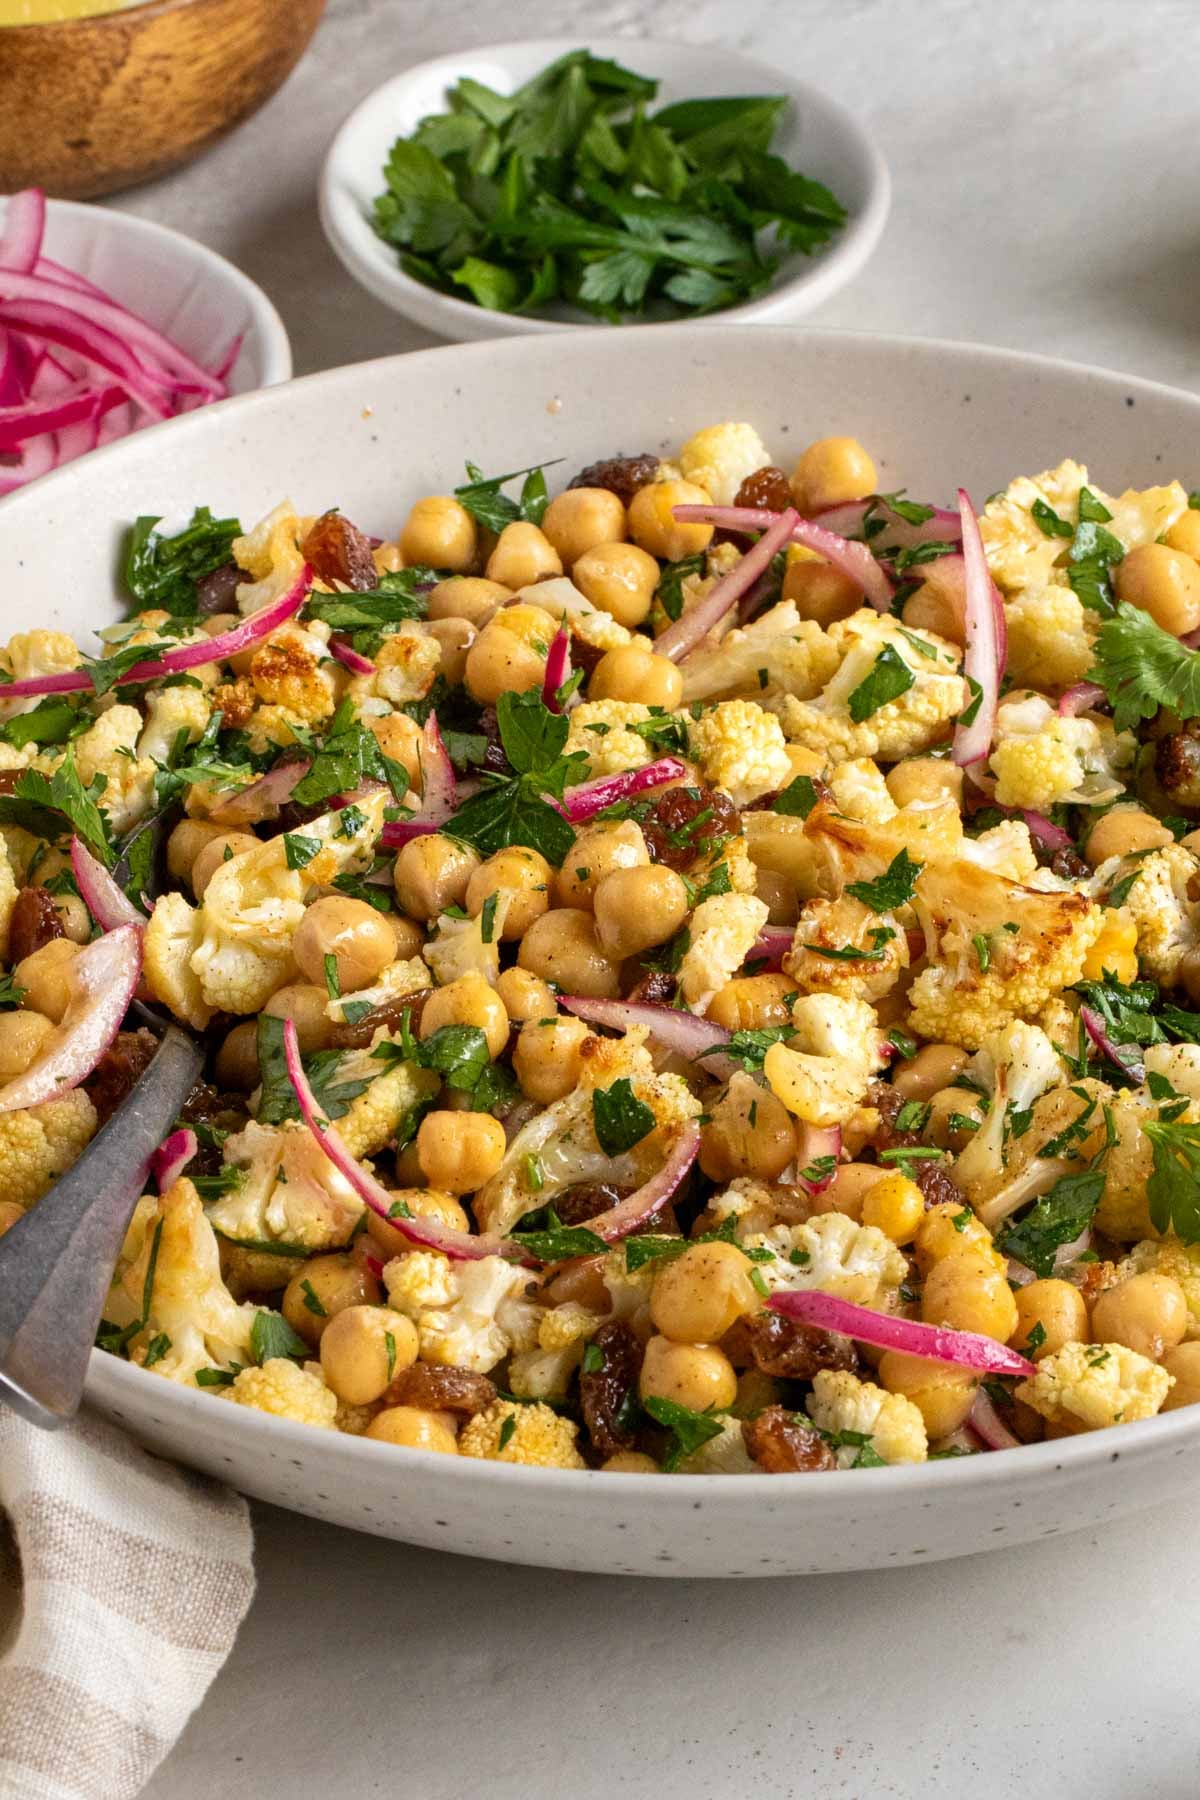
Close of up a beige speckled bowl filled with roasted cauliflower salad with a serving spoon.

Most people see cauliflower as a boring side dish, but this vegetable is an underrated ingredient and salad secret weapon. Roasting the cauliflower in spices before adding it to a salad unlocks flavor and texture that takes it to the next level, without compromising its nutritional benefits.

So, if you need a new summer side dish, give this roasted cauliflower salad recipe a try. It’s a vibrant and (mostly) effortless dish that will impress a crowd, and leftovers keep well in the fridge for quick meals and snacks for days to come.

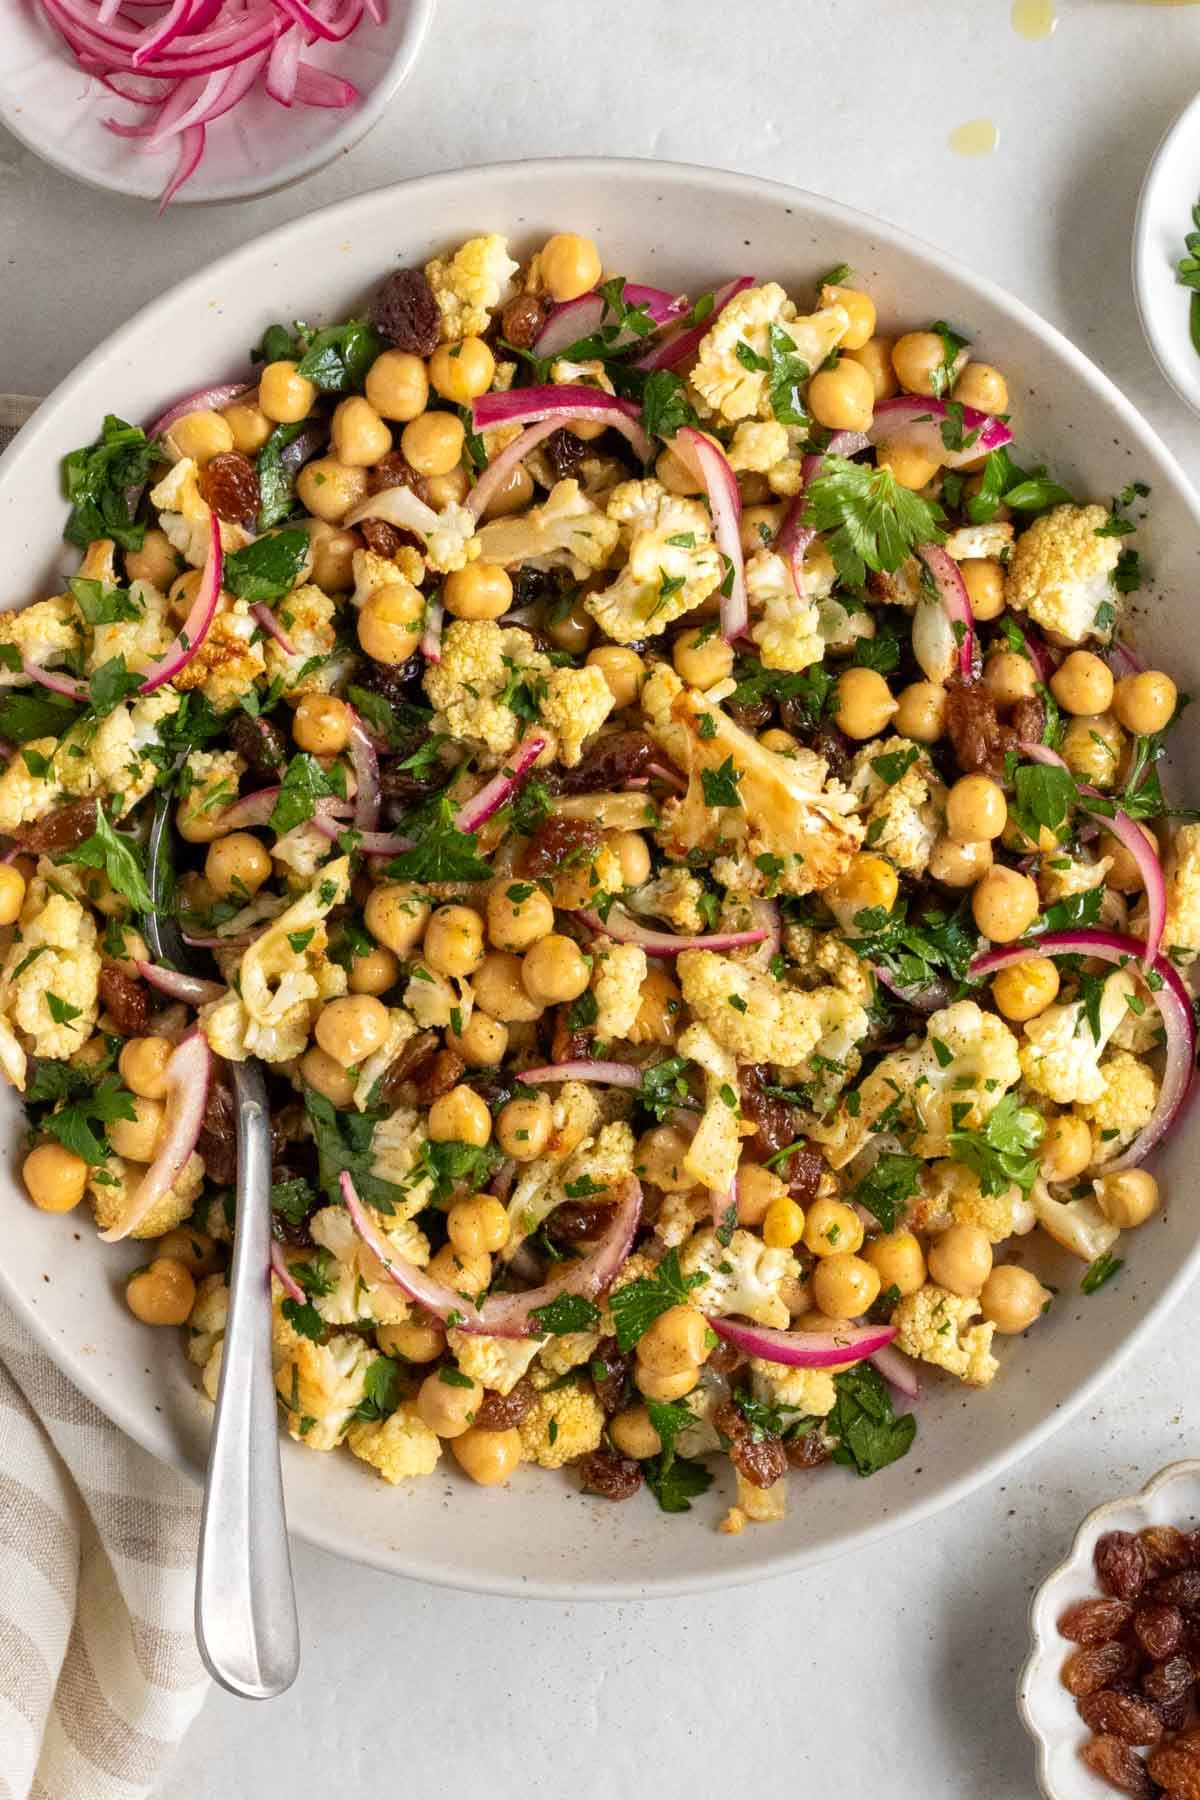
Large bowl of roasted cauliflower and chickpea salad with a serving spoon with small bowls of red pickled onions, fresh parsley, and raisins on the side.

Why You’ll Love It

  • Easy to Make -If you can turn on the oven and chop vegetables, you can make this recipe!
  • High in Fiber – The combination of cauliflower and chickpeas gives this salad 7 grams of fiber per serving.
  • Full of Flavor – This salad balances spicy, sweet, salty, and tangy flavors, ensuring every bite is absolutely delicious.
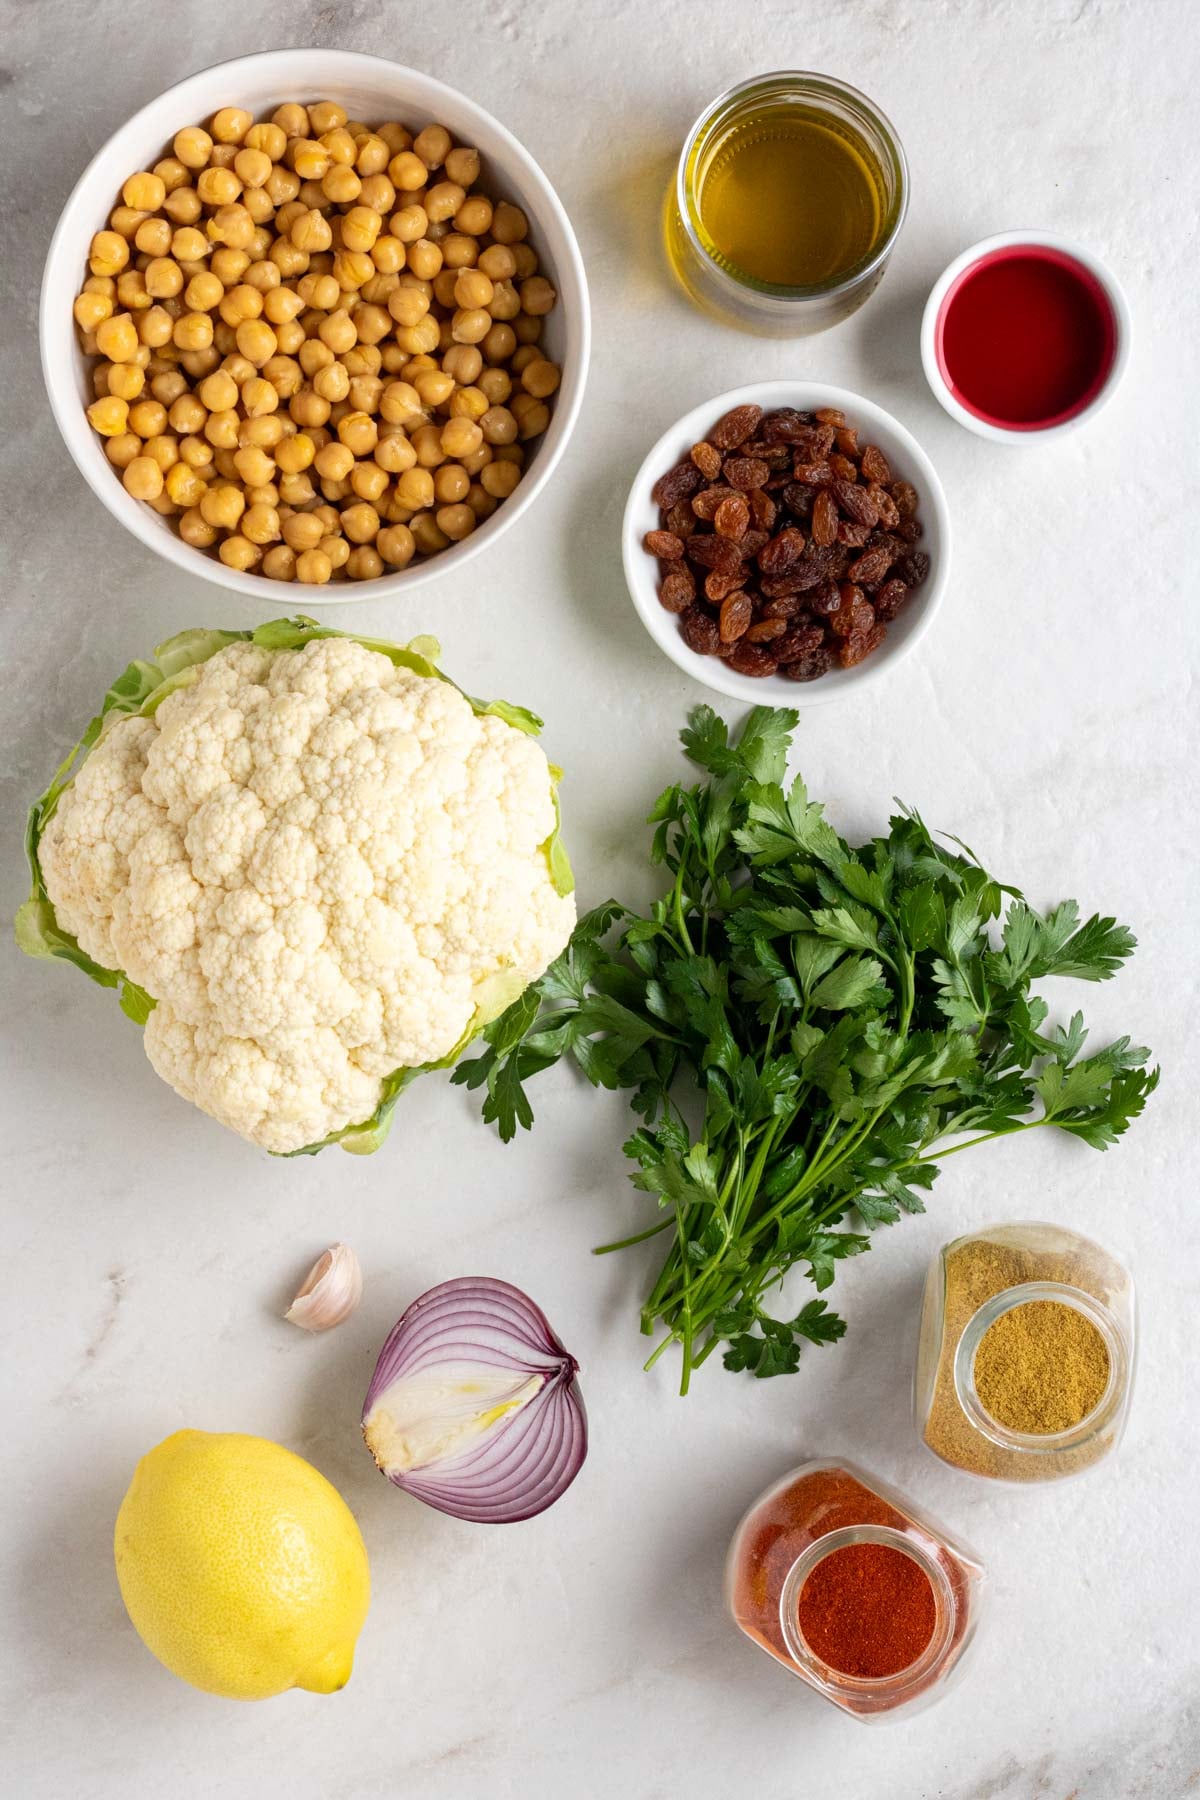
Large bowl of chickpeas, jar of olive oil, bowl of red wine vinegar, bowl of raisins, head of cauliflower, fresh parsley, red onion, garlic, lemon, jar of cumin, and jar of smoked paprika on a white background.

Ingredients + Substitutions

  • Cauliflower – To make the roasted cauliflower and add some veggies. The recipe calls for fresh cauliflower, but you can use frozen cauliflower if needed. See the notes section of the recipe card for details.
  • Chickpeas -To add some complex carbohydrates and fiber.
  • Red Onion -To add some color, texture, and tangy flavor. I opted to give the red onion a quick pickle, but you can use raw red onion if preferred.
  • Raisins -To add a hint of natural sugar and sweetness, although optional. You can use sultanas, Thompson raisins, or golden raisins.
  • Parsley – To add some greens and freshness. While the recipe calls for parsley, you can use any leafy greens or fresh herbs you like. Arugula, dill, and basil would all work well.
  • Olive Oil – To roast the cauliflower, make the salad dressing, and add some healthy fats.
  • Lemon Juice – To make the lemon garlic dressing.
  • Red Wine Vinegar – To pickle the red onion.
  • Sugar – To pickle the red onion. Maple syrup or honey will also work.
  • Spices – A bit of smoked paprika and ground cumin to flavor the cauliflower.
  • Garlic – To flavor the dressing. The recipe calls for a garlic clove, but you can use garlic powder if preferred. See the notes section of the recipe card for details.
  • Dijon Mustard – To emulsify the dressing.
  • Honey – To add a hint of sweetness to the dressing.
  • Salt and Pepper – To season.

Dietary Adaptions

To Make it Gluten-Free: No adaptations are needed; this recipe is gluten-free.
To Make it Dairy-Free: No adaptations are needed; this recipe is dairy-free.

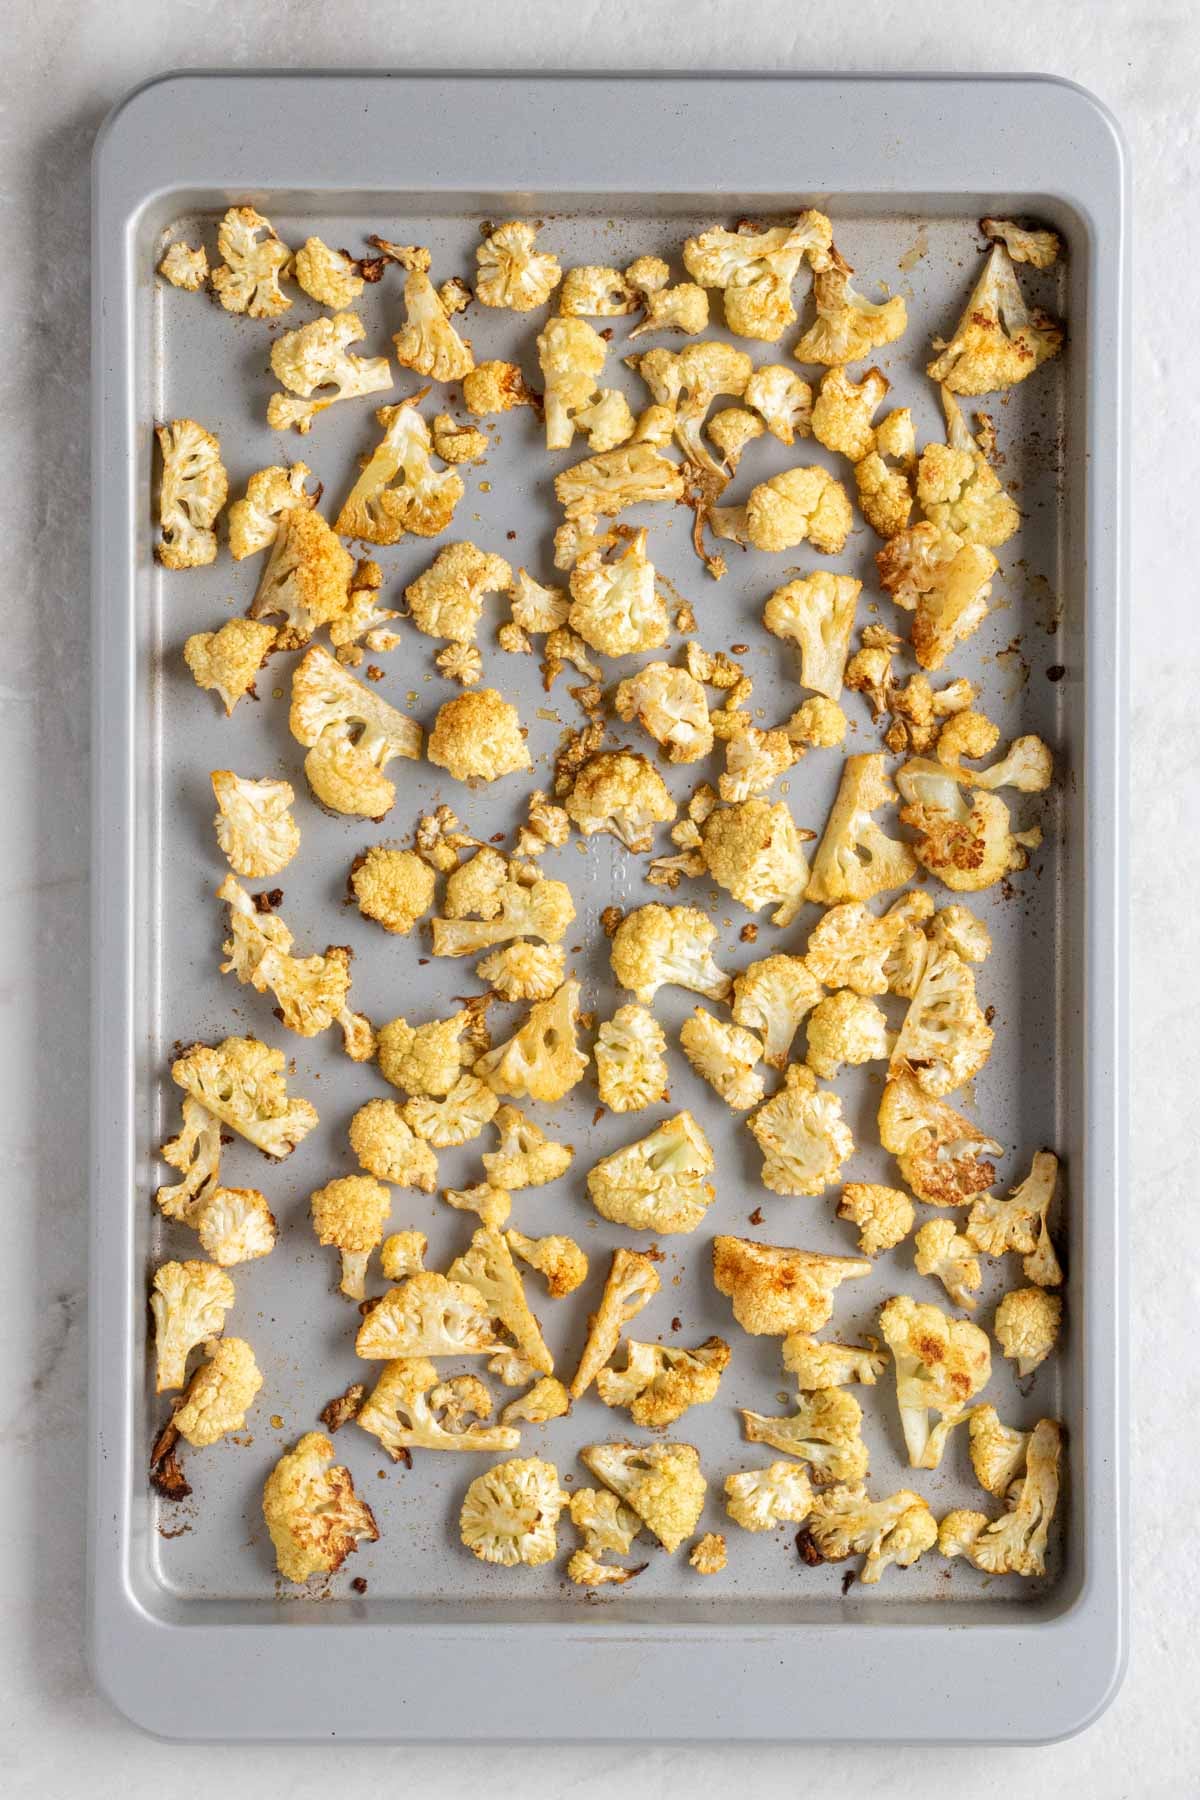
Baking sheet with roasted cauliflower florets on a white background.

Red’s Nutrition Tip

Cauliflower is a highly nutrient-dense cruciferous vegetable that deserves more recognition. Packed with vitamin C and K, it’s a great source of insoluble fiber, and its high water content makes it one of the most hydrating foods.

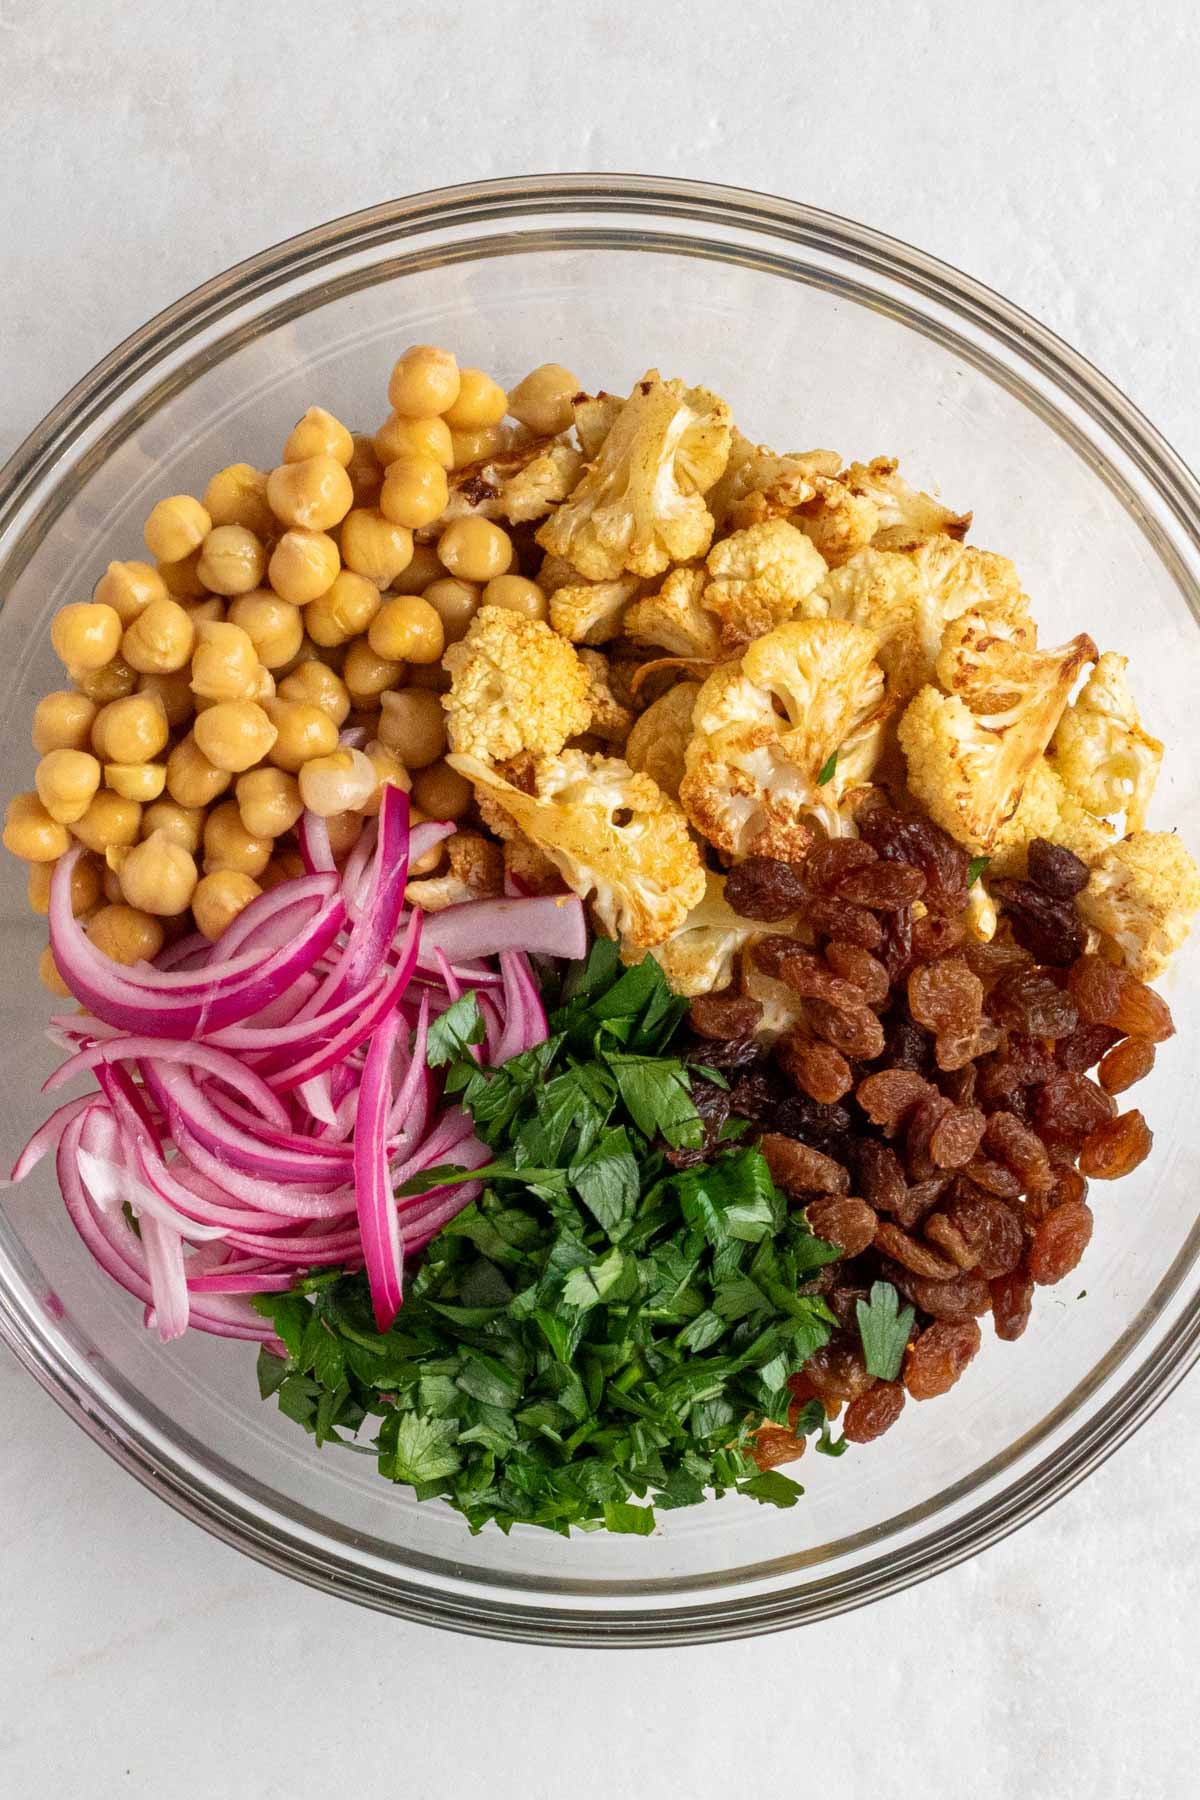
Large glass bowl filled with roasted cauliflower, chickpeas, pickled red onions, chopped parsley, and raisins on a white background.

Serving Suggestions

This roasted cauliflower salad is a good source of complex carbohydrates, fiber, and fat, with a moderate amount of protein. To make it a more balanced meal, I suggest serving it with a source of protein. It can also be adapted to suit your personal calorie or macro needs. For example:

  • To make it higher in protein, serve it with grilled steak, chicken, or tofu, and/or add some crumbled feta cheese.
  • To make it lower in fat, reduce the amount of olive oil slightly.
  • To make it lower in sugar, omit the raisins and/or honey.
  • To add more flavor, swap the olive oil dressing for a lemon tahini dressing.
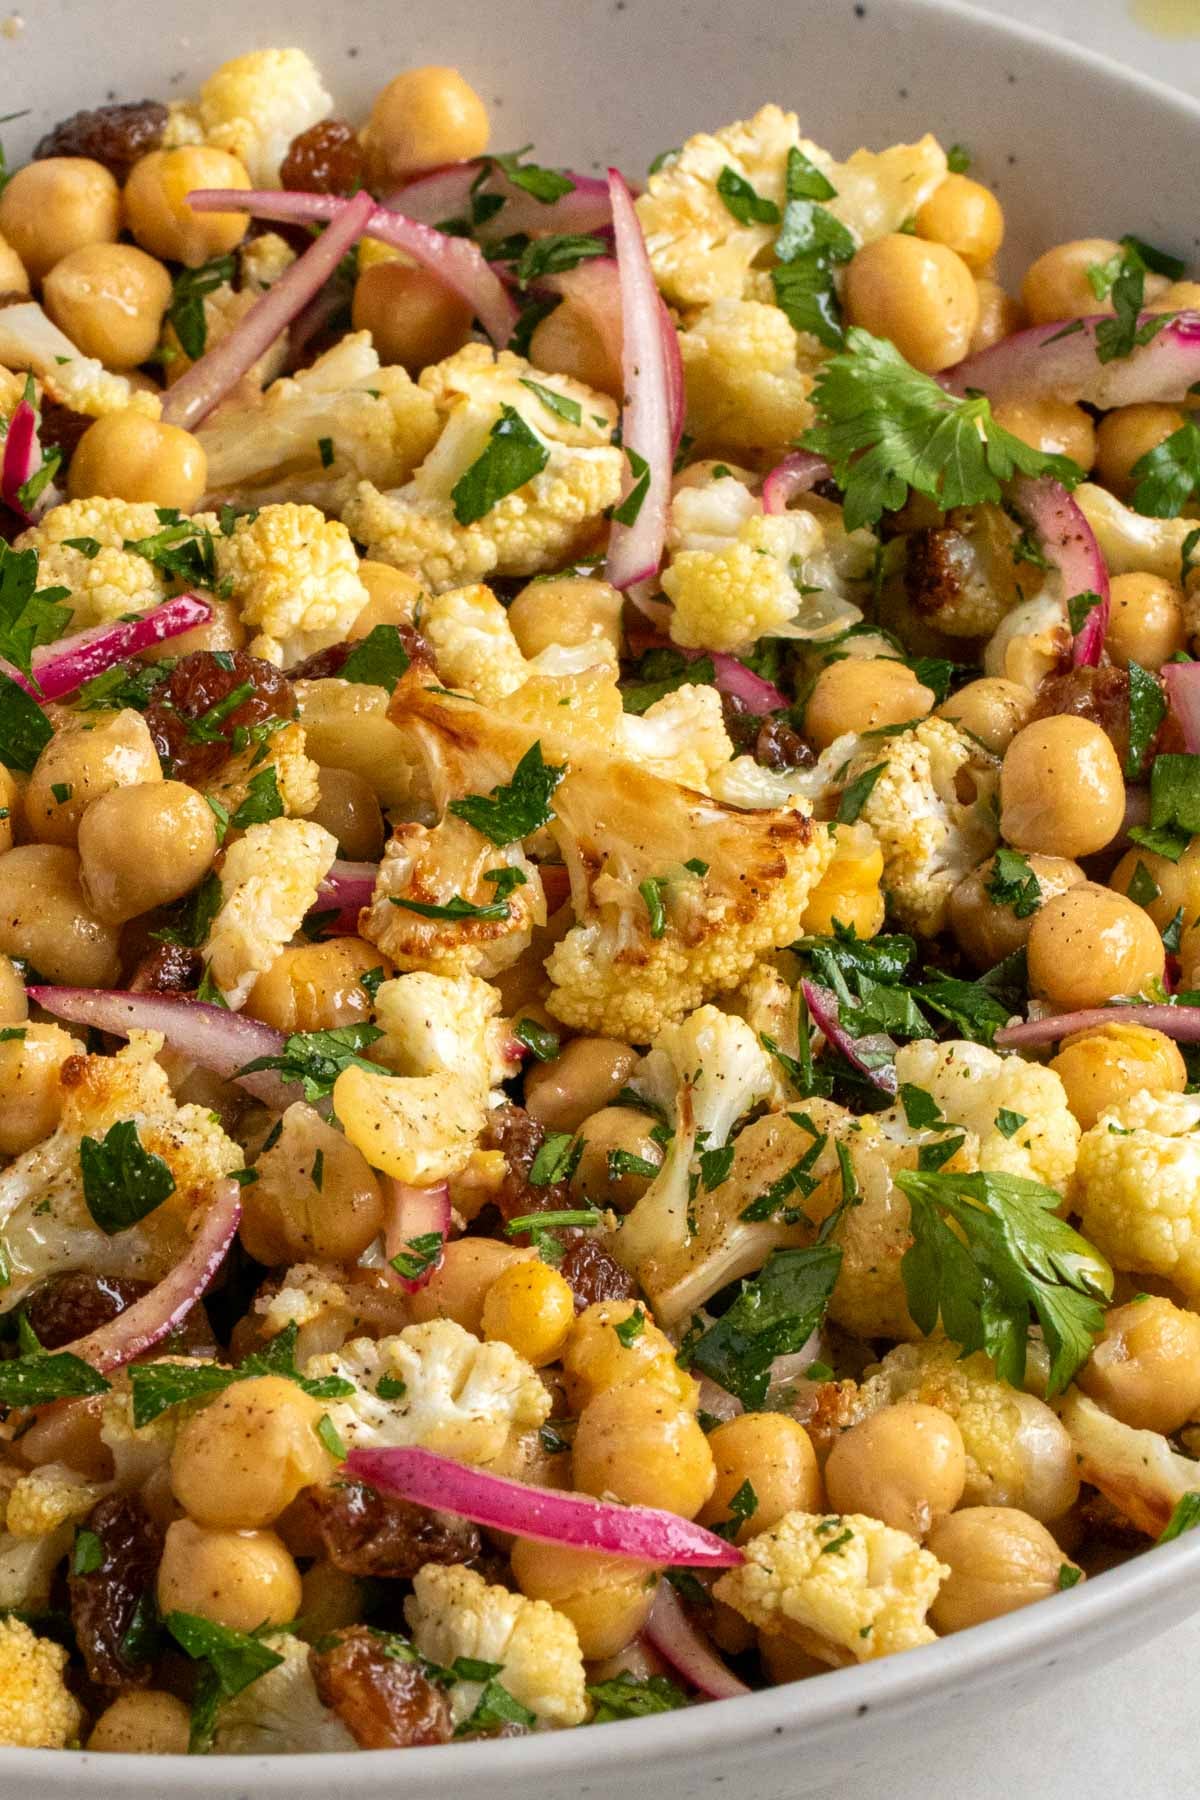
Close up of roasted cauliflower salad with chickpeas.

Storage

Once assembled, the salad can be stored in an airtight container in the fridge for up to 4 days.

More Cauliflower Recipes:

  • Roasted Cauliflower Tacos
  • Roasted Cauliflower Soup
  • Spiced Roasted Cauliflower

Asian Chicken Lettuce Wraps

Published on June 23, 2026 by Stephanie Kay

These Asian chicken lettuce wraps are perfect for a quick and easy lunch or dinner. They are quick to make, high in protein, low-carb, and full of flavor.

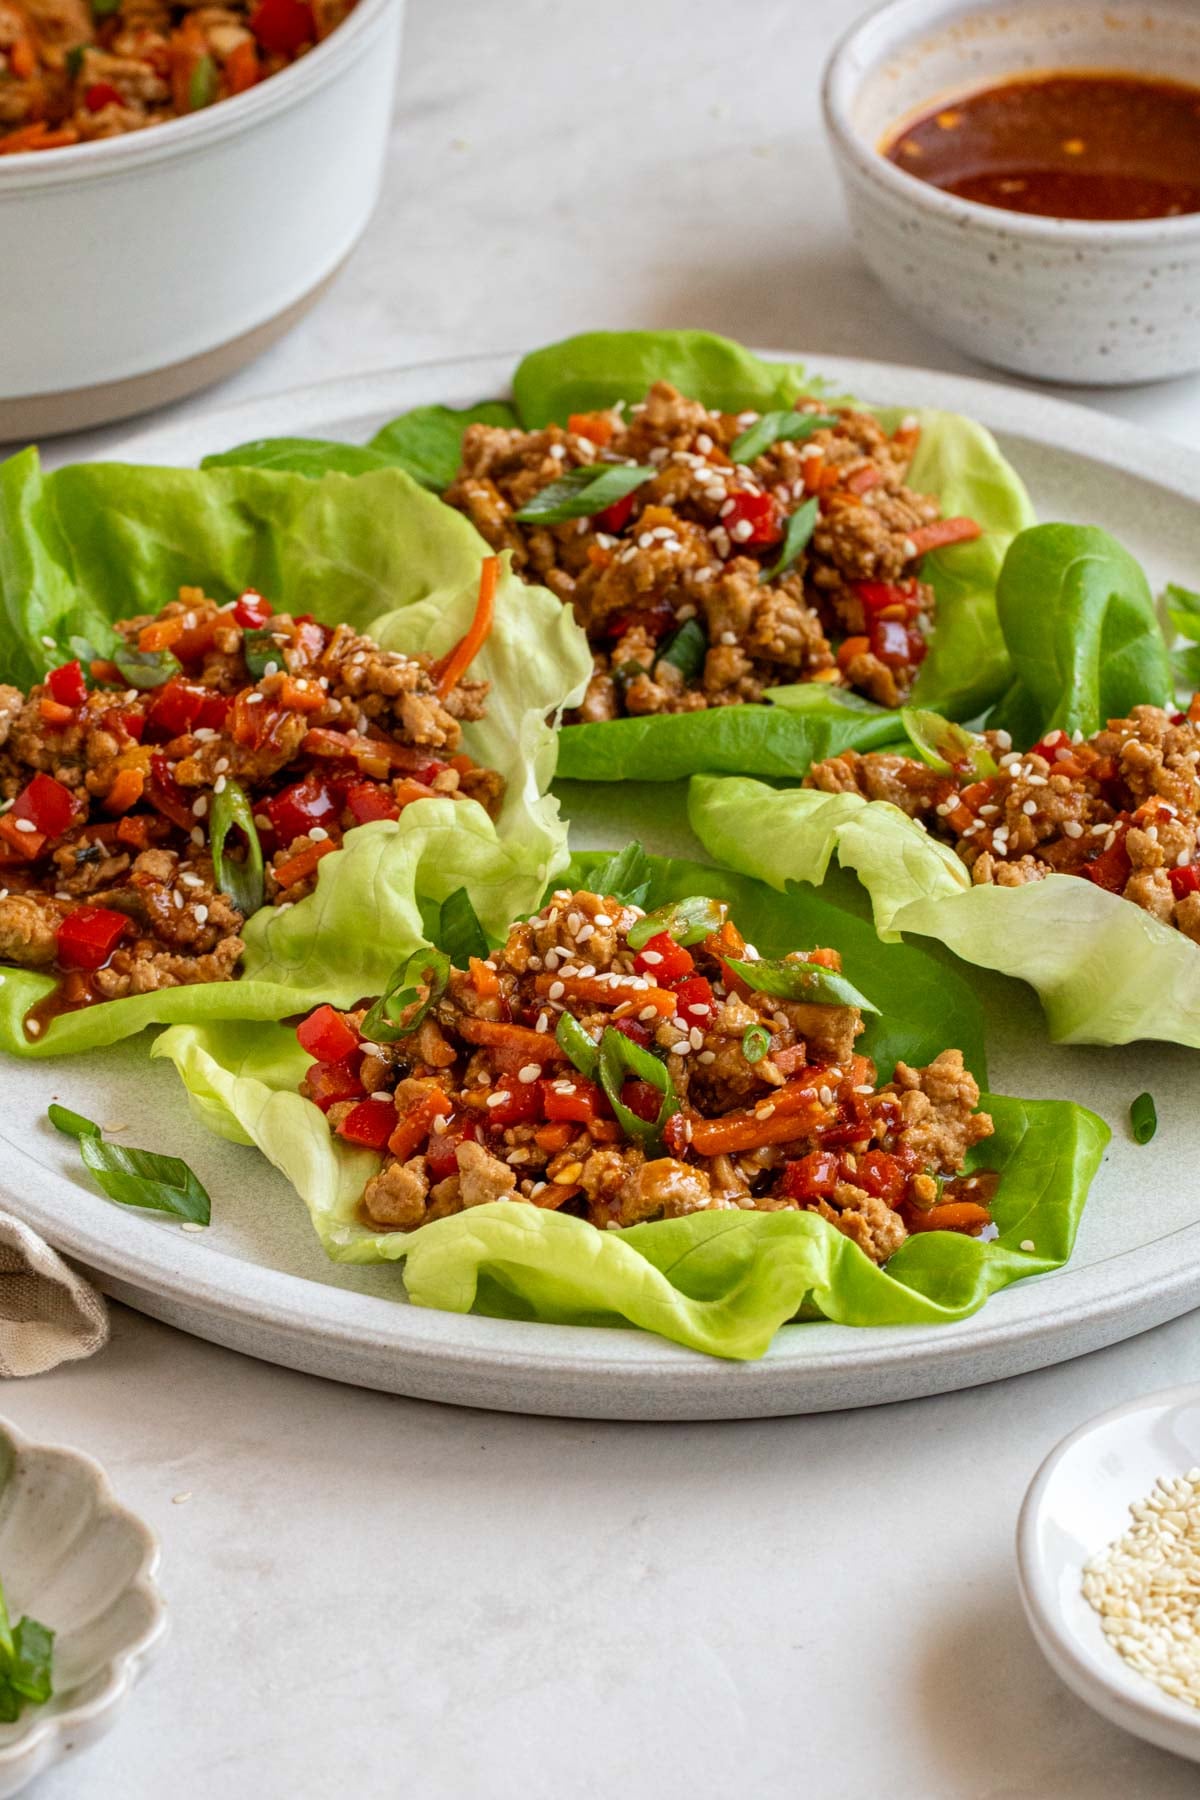
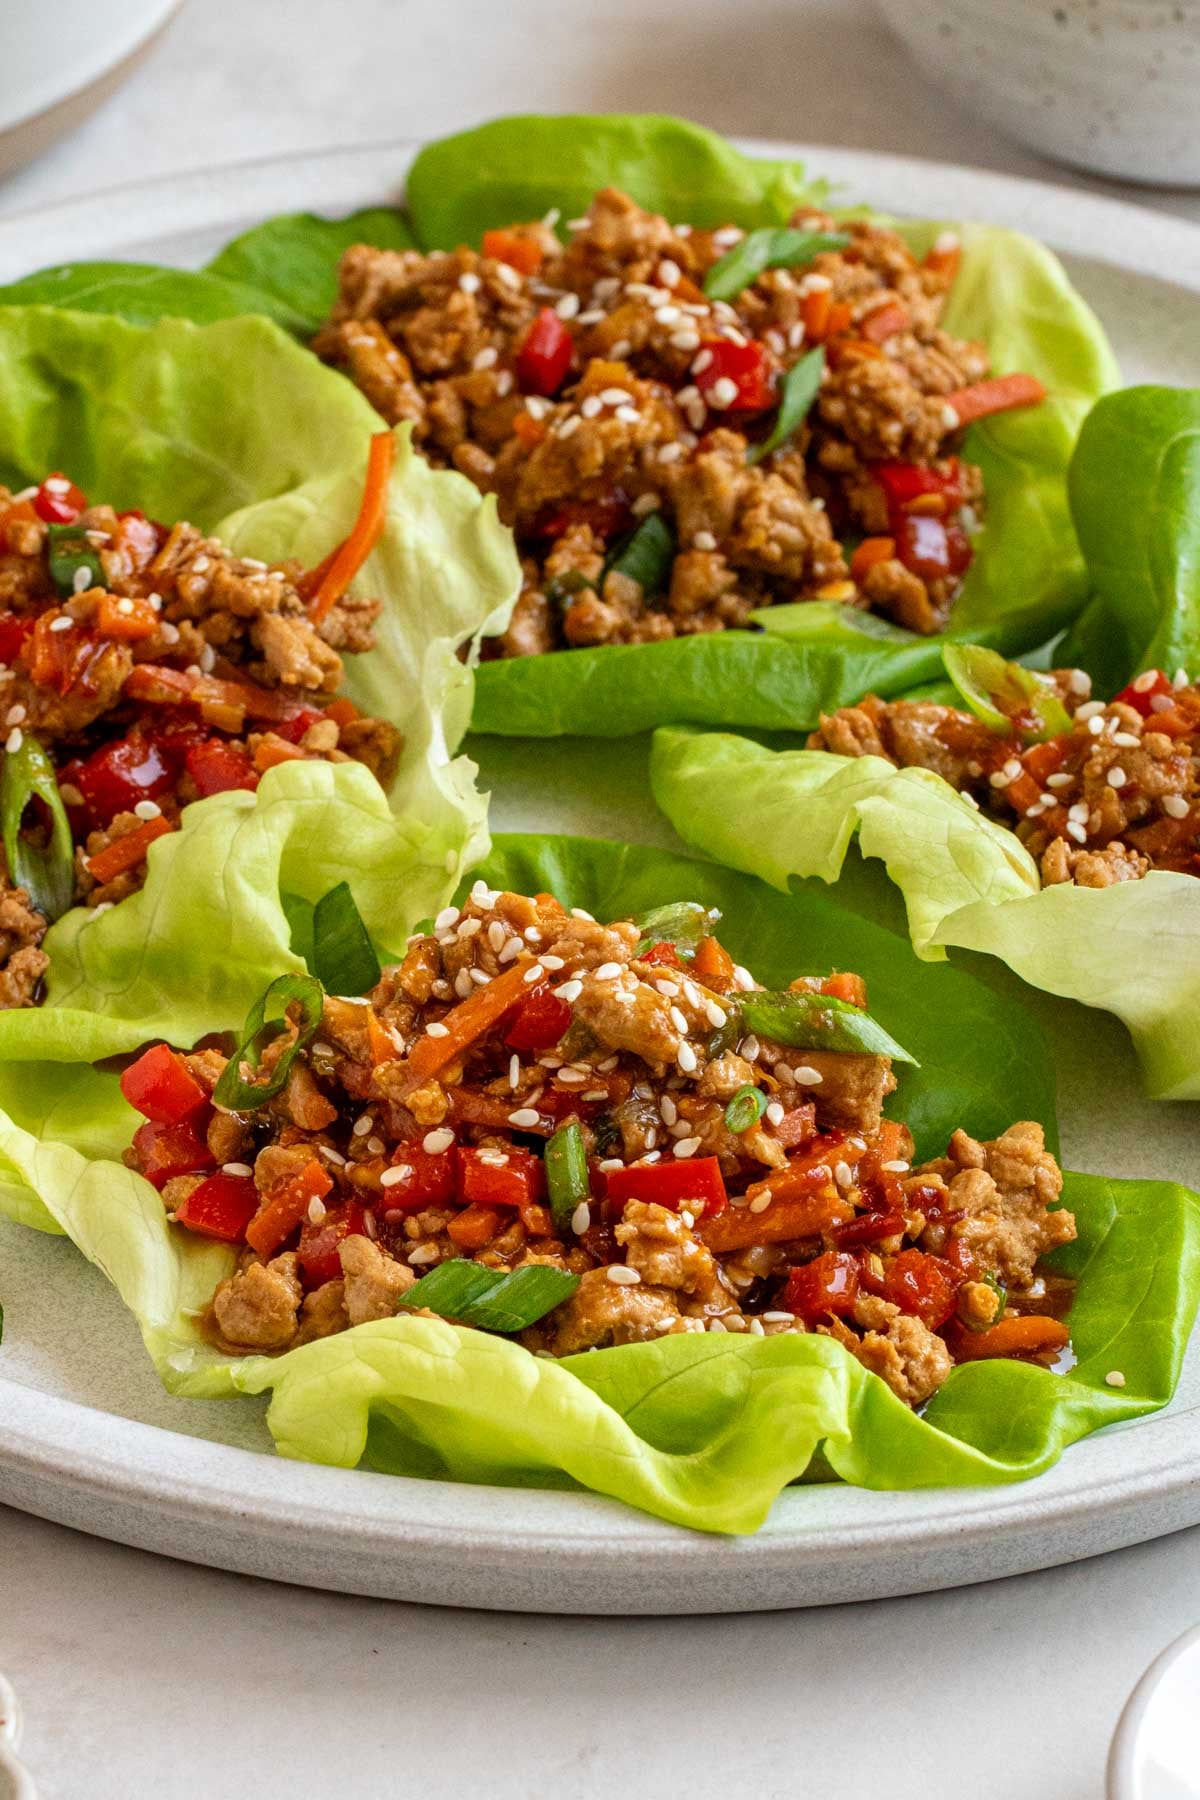
Four Asian chicken lettuce wraps on a plate with a bowl of sauce in the background and a bowl of sesame seeds on the side.

If you need a dinner that the whole family will like, give this Asian chicken lettuce wrap recipe a try. Made in one pan and covered in easy Asian-inspired sauce, these wraps are full of flavors, colors, and texture. They work well as a crowd-pleasing appetizer or a healthy, low-carb weeknight dinner.

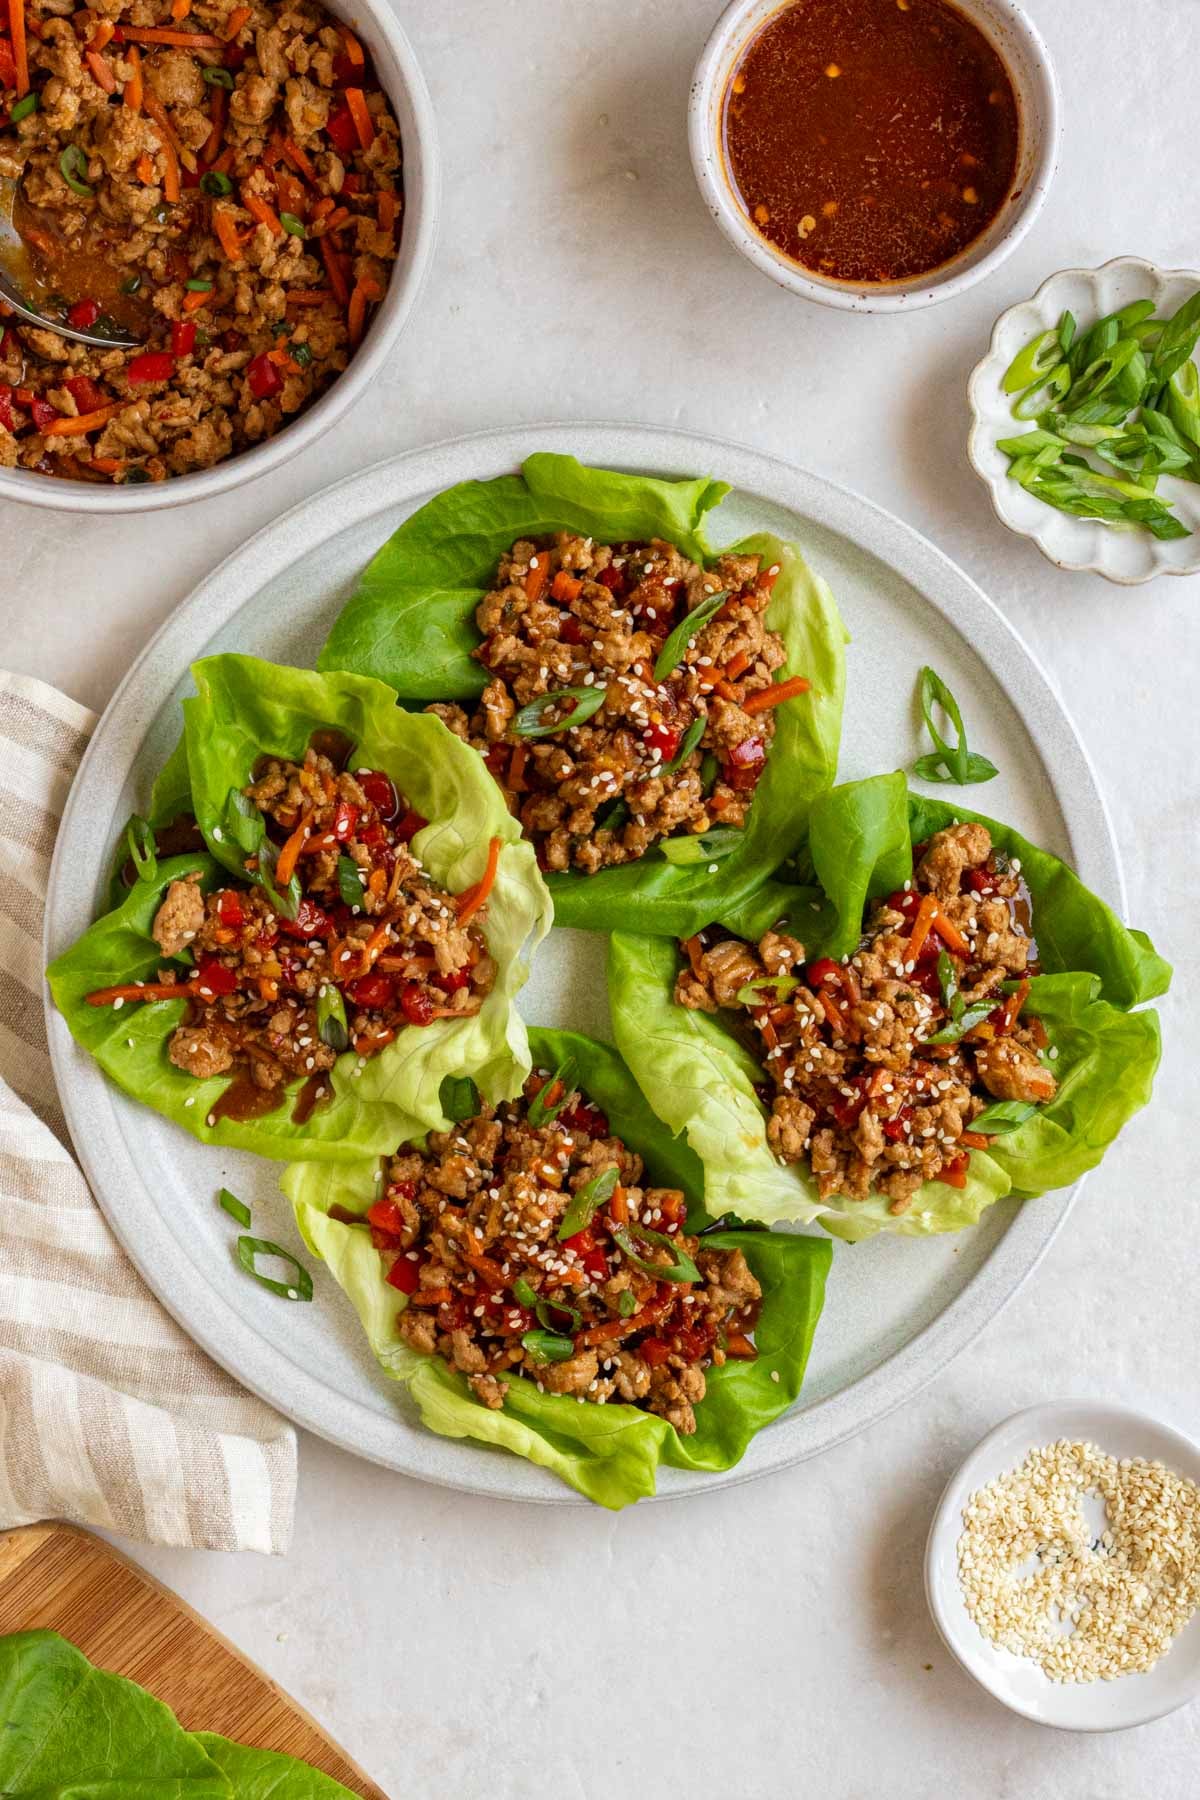
Asian chicken lettuce wraps on a plate with extra ground meat mixture, sauce, sesame seeds, and lettuce on the side.

Why You’ll Love Them

  • Quick and Easy – Ready in 30 minutes, these chicken lettuce wraps are perfect for a simple meal.
  • High in Protein – Each serving is loaded with 23 grams of protein.
  • Low Carb – Using lettuce provides a nice low-carb swap for these wraps.
  • Keep Well – The chicken mixture keeps well in the fridge for several days, making it a great meal prep idea.
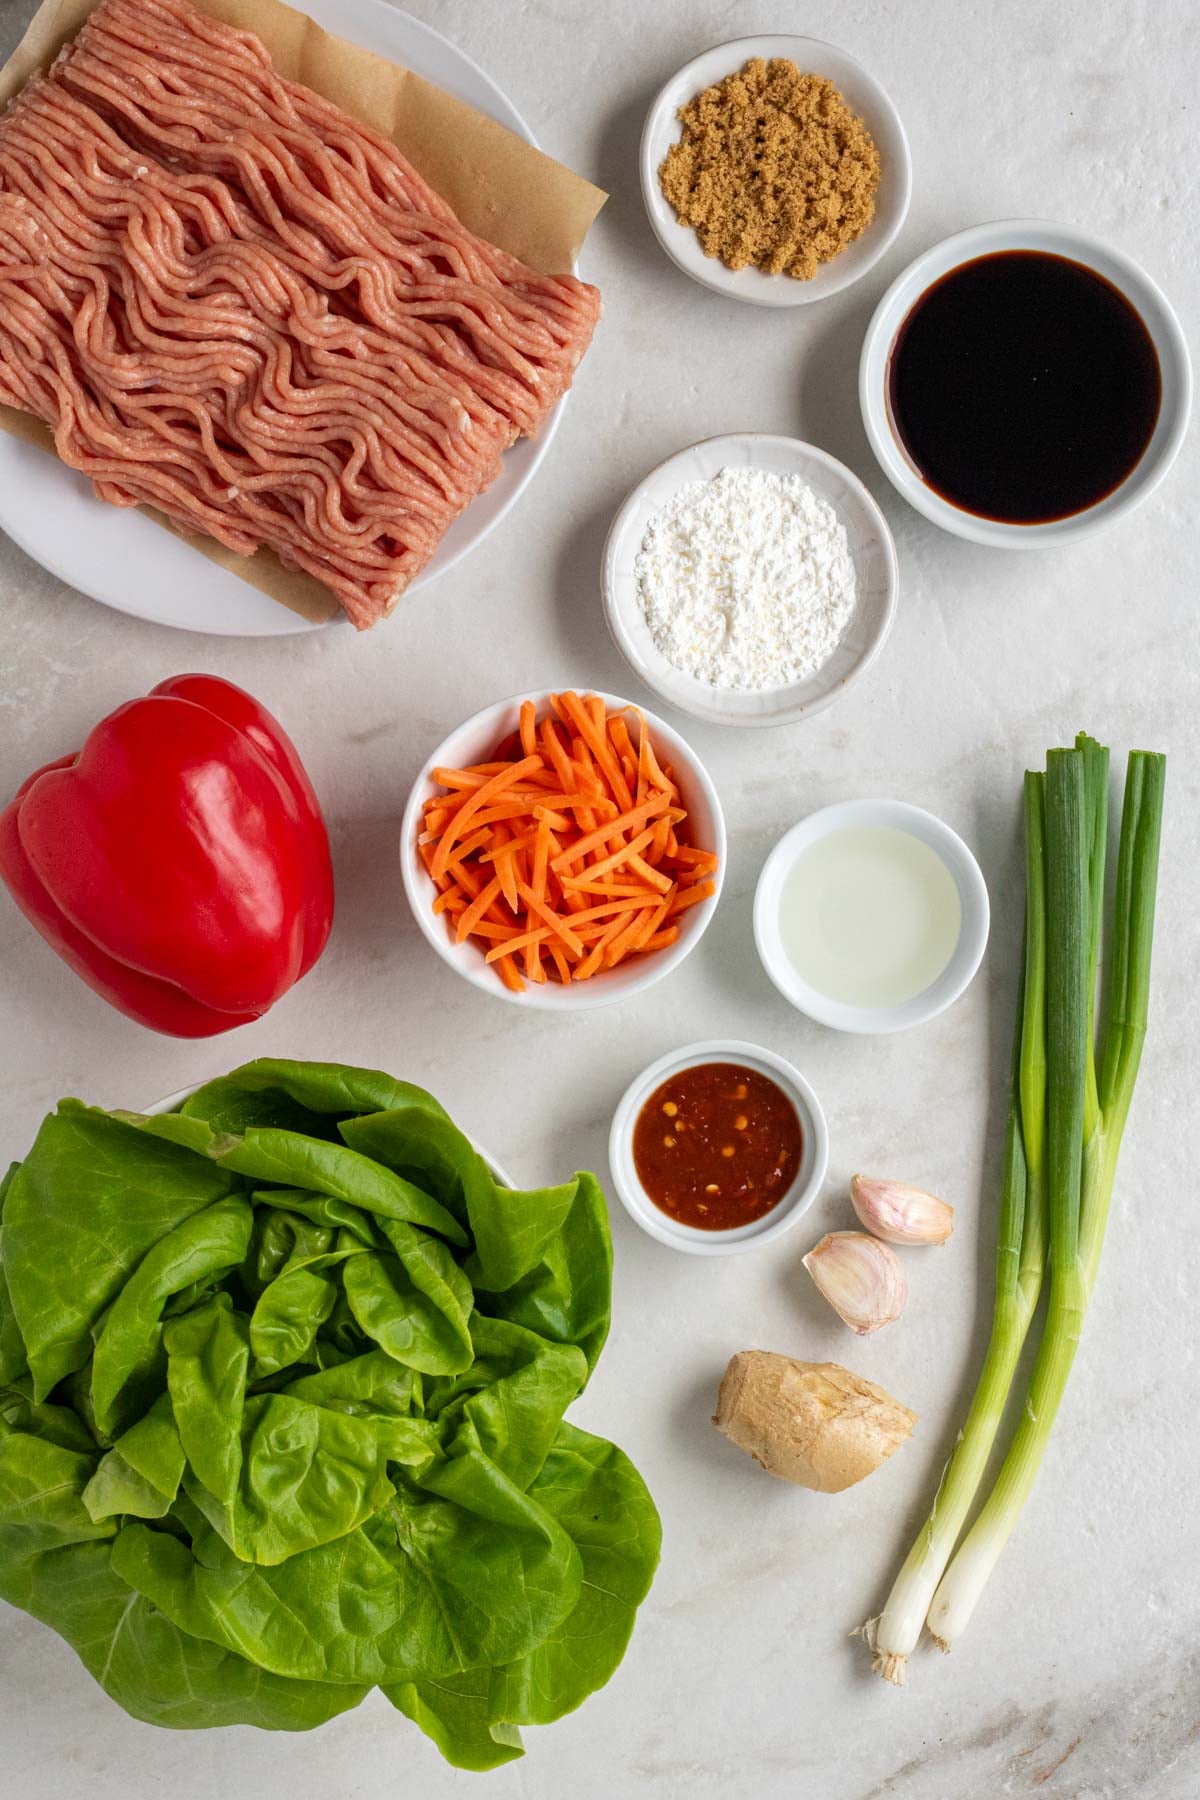
Plate of ground chicken with bowls of brown sugar, soy sauce, corn starch, rice vinegar, shredded carrots, and hot sauce on teh side with a red bell pepper, head of lettuce, green onions, garlic, and ginger root on the side on a white background.

Ingredients + Substitutions

  • Chicken – To add some protein. The recipe calls for ground chicken, but you can use ground chicken breast or another ground meat such as ground turkey or ground pork, if preferred.
  • Lettuce – To make the wraps. I used butter lettuce (or Boston lettuce), but bibb lettuce, romaine lettuce, and iceberg lettuce will also work.
  • Veggies – A mixture of green onions, carrots, and bell pepper to add some micronutrients, color, and crunch. Water chestnuts, mushrooms, and cabbage would also work well.
  • Garlic and Ginger – To flavor the chicken mixture. The recipe calls for garlic cloves and fresh ginger, but garlic powder and ginger powder would also work well. See the notes section of the recipe card for details.
  • Sesame Oil – To cook the chicken and add some healthy fats. Peanut oil, olive oil, or avocado oil would also work well.
  • Soy Sauce – To make the sauce.
  • Rice Vinegar – To add some acidity to the sauce.
  • Brown Sugar – To add a hint of sweetness to the sauce, honey will also work well. See the notes section of the recipe card for details.
  • Chili Paste – To add a bit of spice to the sauce, although optional. Sriracha sauce or red pepper flakes would also work well. See the notes section of the recipe card for details.
  • Cornstarch – To thicken the sauce.
  • Sesame Seeds – To serve, although optional.

Dietary Adaptions

To Make them Gluten-Free: Use certified gluten-free soy sauce, tamari, or coconut aminos.

To Make them Dairy-Free: No adaptations are needed; this recipe is dairy-free.

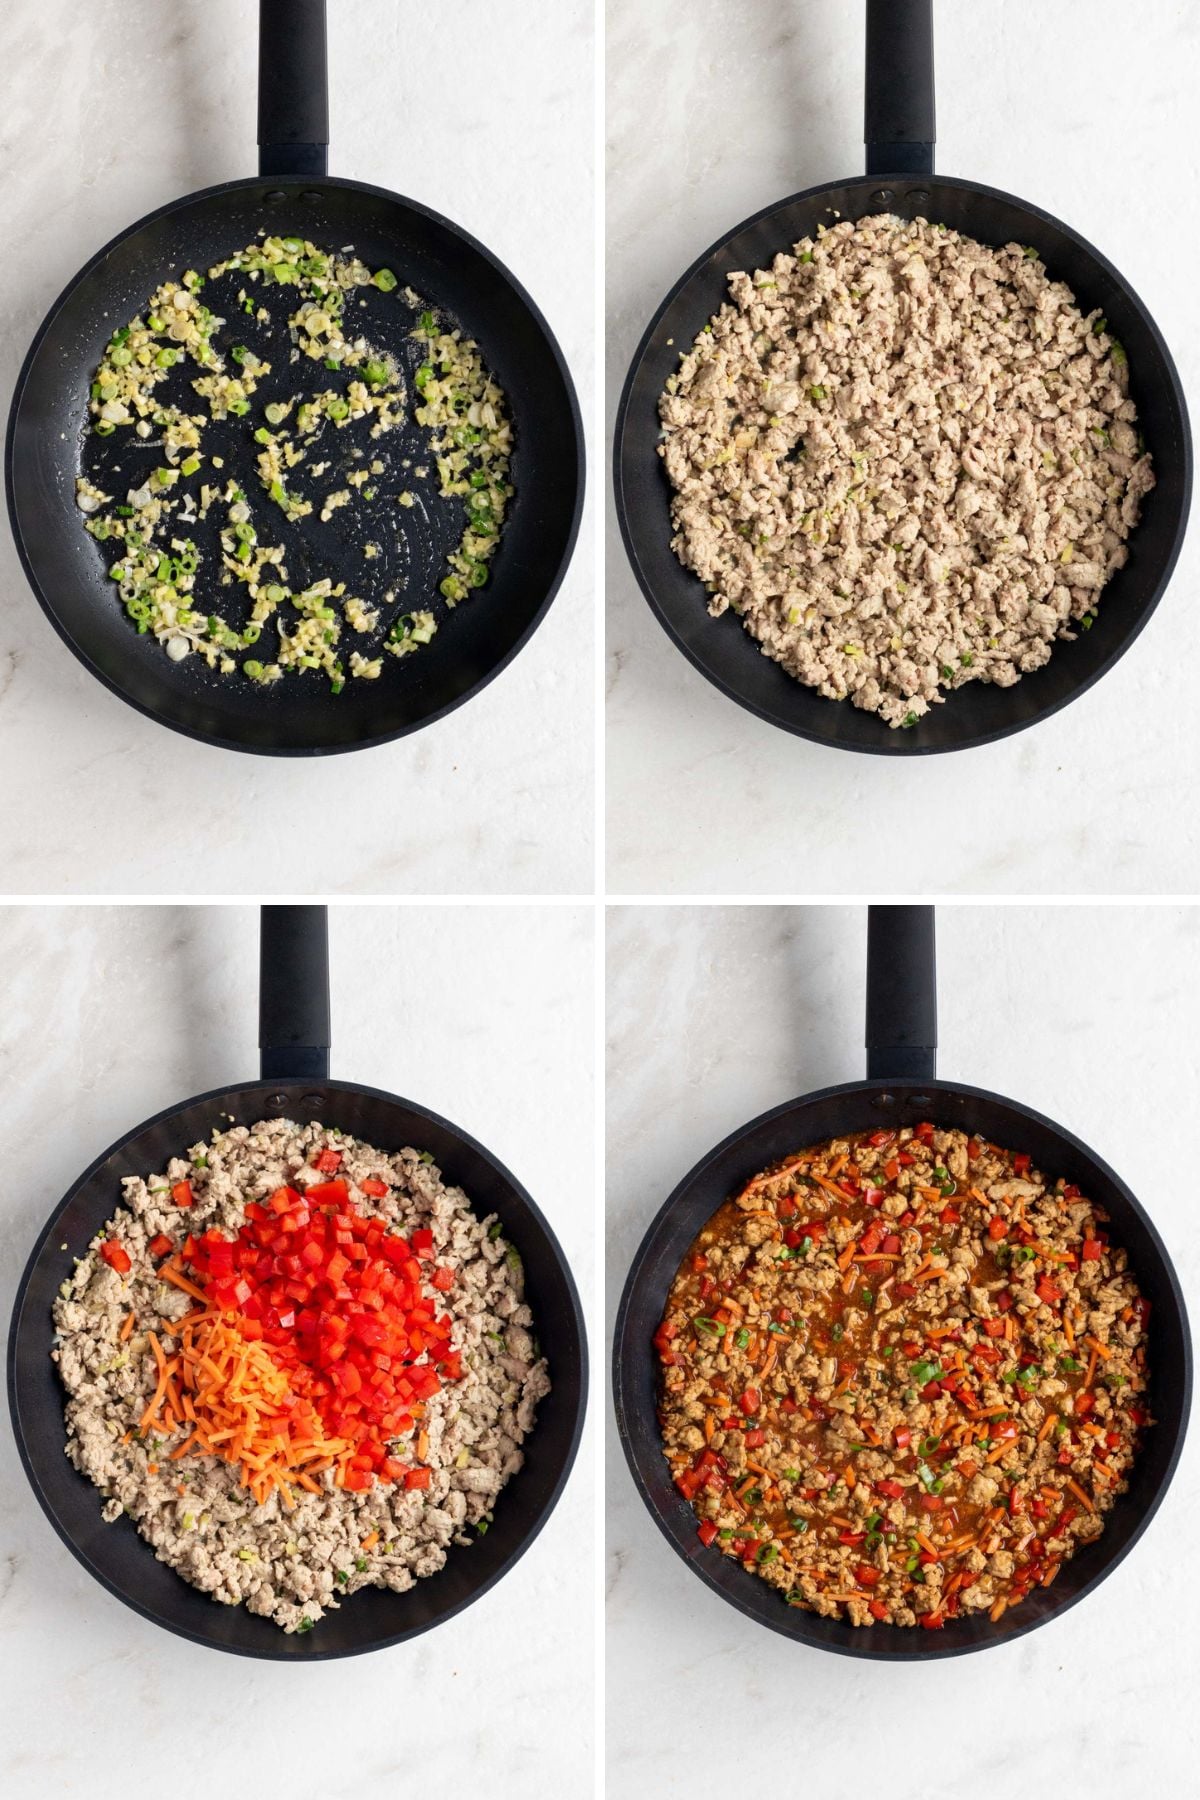
Grid of 4 images with a pan of stir-fried onion, garlic, and ginger; a pan with cooked ground chicken; a pan with cooked ground chicken, diced red pepper, and shredded carrots; and a pan of ground chicken mixture with sauce.

Red’s Nutrition Tip

These chicken lettuce wraps are a great way to eat more vegetables. While I opted to add carrots and bell peppers, because they are a particularly great source of vitamin C and one of the most hydrating foods, you can truly add any veggies you like.

Serving Suggestions

These Asian chicken lettuce wraps are high in protein with a moderate amount of fat; however, they are low in carbohydrates and fiber. While they can be enjoyed as they are, adding some complex carbohydrates can help to make them a more balanced meal. They can also be adapted to suit your personal calorie or macro goals. For example:

  • To make them higher in protein, add an additional 1/2 pound of ground chicken to the recipe.
  • To make them higher in fat, add some peanut butter or almond butter to the sauce.
  • To make them higher in carbohydrates, add some cooked white rice to the wraps.
  • To make them higher in fiber, add additional carrots or edamame to the chicken mixture.
Close up of an Asian chicken lettuce wrap on a plate.

Storage + Reheating

To Refrigerate: Once cooled, the chicken mixture and lettuce wraps can be stored in separate airtight containers in the fridge for up to 4 days.

To Freeze: Once cooled, the chicken mixture can be transferred to a freezer-safe container and stored in the fridge for up to 3 months. The lettuce wraps cannot be frozen.

To Reheat: The chicken mixture can be reheated in the microwave for 2-3 minutes.

More Lettuce Wrap Recipes:

  • Turkey Lettuce Wraps (Thai Larb Gai)


Steak Fajita Bowls

Published on June 18, 2026 by Stephanie Kay

Ready in 30 minutes, these steak fajita bowls are perfect for a delicious and healthy weeknight dinner. They are filled with fluffy rice, juicy steak, loads of veggies, and topped with guacamole and sour cream to ensure every bite is full of flavor.

Two steak fajita bowls with a grey and white striped tea towel with a silver fork and bowls of pico de gallo, guacamole, sour cream, and cilantro on the side.

Bowls are a dinner craze I will never get tired of. Not only are they incredibly easy to make, but they are so versatile, as you can essentially construct (or deconstruct) any meal or recipe you like. Just add some rice, veggies, protein, and a good sauce, and you’ve got yourself a delicious and nutritious dinner.

This Chipotle-inspired steak fajita bowl recipe is a ‘build-your-own’ style dinner, making it a guaranteed hit with the whole family. They work well any time of the year, as you can cook your steak on the grill or in a pan, mix and match teh veggies and toppings based on whatever you have on hand.

Close up of a chipotle-inspired steak fajita bowl on a white background.

Why You’ll Love Them

  • Ready in 30 Minutes – The bowls are quick and easy to make, perfect for a family-friendly weeknight dinner.
  • High in Protein – The grilled flank steak ensures each bowl contains over 30 grams of protein.
  • Keep Well – Once prepped, the steak, fajita veggies, and rice keep well in the fridge, making it a good meal prep idea.
Plate of flank steak with a bowl of spices, pico de gallo, shredded lettuce, frozen corn, white rice, garlic, avocados, red onion, and bell peppers on a white background.

Ingredients + Substitutions

  • Flank Steak – To add some protein. The recipe calls for a flank steak, but you can use any cut of steak you like; sirloin steak and skirt steak would also work well.
  • Onions and Peppers – To make the fajita veggies. I used a red onion and green, red, and yellow peppers, but any color will work.
  • Rice – To add some carbohydrates. The recipe calls for white rice; I used jasmine rice, but you could make cilantro lime rice if preferred, or use brown rice if desired. See the notes section of the recipe card for details.
  • Lettuce – To add some crunch and leafy greens. I used romaine lettuce, but any lettuce will work.
  • Corn – To add some color and fiber. The recipe calls for frozen corn, but fresh grilled corn or canned corn would also work. If preferred, you could also add some fresh tomatoes and make a corn salsa.
  • Spices – To season the veggies and add some flavor. The recipe calls for a mixture of chili powder, smoked paprika, ground cumin, and salt, but you could use store-bought fajita seasoning if you like. See the notes section of the recipe card for details.
  • Garlic – To flavor the steak marinade. The recipe calls for fresh garlic, but you can use garlic powder if preferred. See the notes section of the recipe card for details.
  • Olive Oil – To make the steak marinade and add some healthy fats. The recipe calls for olive oil, but avocado oil would also work well.
  • Lime – To flavor and tenderize the steak. The recipe calls for fresh lime juice, but you can use bottled lime juice if preferred.
  • Salt and Pepper – To season.
  • Toppings – The recipe calls for pico de gallo, guacamole, sour cream, and fresh cilantro, but you can add any toppings you like. Salsa, pickled red onion, and shredded cheese would also work well.

Dietary Adaptions

To Make them Gluten-Free: No adaptations are needed; this recipe is gluten-free.
To Make them Dairy-Free: Omit the sour cream.

Grid of 4 images with a glass bowl of marinating flank steak; a rice cooker with cooked white rice; a cast-iron skillet with fajita veggies; and a cast-iron skillet with cooked flank steak.

Red’s Nutrition Tip

Flank steak is a fantastic choice for healthy eating because it’s one of the leanest cuts of beef. Taken from the abdominal muscles of the cow, it’s a boneless steak that is high in protein and low in saturated fat.

Serving Suggestions

These fajita steak bowls are a balanced meal with protein, carbohydrates, fiber, and fat. They can be enjoyed as is or adapted to suit your personal calorie or macro needs. For example:

  • To make them higher in protein, add an additional 1/2 pound of flank steak to the recipe, along with the required marinade.
  • To make them higher in fiber, swap the white rice for brown rice and/or add some black beans to the bowls.
  • To make them lower in carbs, swap the white rice for cauliflower rice.
  • To add extra flavor, top the bowls with hot sauce, shredded cheese, and/or pickled jalapeño.
Close up of a white bowl with cooked rice, sliced flank steak, fajita veggies, corn, pico de gallo, guacamole, sour cream, and a lime wedge.

Storage + Reheating

To Refrigerate: Once cooled, the rice, steak, and fajita veggies can be stored in an airtight container in the fridge for up to 4 days. Only add the lettuce, pico de gallo, sour cream, avocado, and lime wedges when you are ready to eat.

To Freeze: Once cooled, transfer the rice, steak, and fajita veggies to an airtight container and store them in the freezer for up to 3 months. Only add the lettuce, pico de gallo, sour cream, avocado, and lime wedges when you are ready to eat.

To Reheat: You can reheat fajita steak bowls in the microwave for 2-3 minutes or until warm. If using frozen bowls, remove them from the freezer and allow them to thaw overnight in the fridge before reheating. Add the lettuce, pico de gallo, sour cream, avocado, and lime wedges when you are ready to eat.

More Steak Recipes:

  • Korean Beef Bowls
  • Sesame Beef Noodles
  • Teriyaki Beef Bowls

12 Foods High in Zinc

Published on June 16, 2026 by Stephanie Kay

Zinc is an essential mineral that plays many important roles in the body. Because the body cannot synthesize or store zinc, maintaining an adequate daily intake through your diet is vital. Here is a list of foods high in zinc you can start eating today.

Small chalkboard with the word zinc written on it surrounded by oysters, pork, shellfish, spinach, seeds, avocado, pork, mushrooms, almonds, cocoa powder, and dried chickpeas.

Table of contents

  • What is Zinc?
  • Health Benefits of Zinc
  • How much zinc do you need?
  • Can you take too much zinc?
  • Are any foods fortified with zinc?
  • List of Foods High in Zinc
  • 1. Oysters
  • 2. Crab
  • 3. Beef
  • 4. Lobster
  • 5. Hemp Seeds
  • 6. Turkey
  • 7. Pork
  • 8. Sesame Seeds
  • 9. Pumpkin Seeds
  • 10. Pine Nuts
  • 11. Cashews
  • 12. Lentils
  • Ranking of Zinc-Rich Foods
  • Do you need a zinc supplement?
  • FAQs

What is Zinc?

Zinc is an essential mineral and micronutrient. The body cannot produce zinc; therefore, it must be consumed through the diet (1). Zinc is naturally present in many foods, such as red meat, seafood, legumes, whole grains, nuts, seeds, and dairy products, added to others, and available as a dietary supplement.

The bioavailability of zinc depends heavily on the source. While zinc is naturally occurring in animal and plant foods, zinc in animal-based foods is absorbed more readily. Plant-based foods contain antinutrients, namely phytic acid, which bind to the zinc and reduce the amount your body can absorb (2). Approximately 30% to 55% of animal-based zinc is absorbed, while 5% to 35% of plant-based zinc is absorbed (3, 4).

Health Benefits of Zinc

Zinc is involved in many aspects of cellular metabolism. It plays a vital role in the immune system, helping to fight off invading bacteria and viruses, supports protein and DNA synthesis, and aids in wound healing (5, 6). Zinc also supports proper growth from pregnancy through adolescence.

Low zinc intake can affect skin health, digestion, reproduction, and the central nervous and immune systems. Signs of zinc deficiency vary by age; however, they can include, but are not limited to, diarrhea, diminished or altered sense of taste, loss of appetite, chronic fatigue, and impaired growth (6). Albeit, zinc deficiency is rare in the US and other developed nations.

How much zinc do you need?

The current Recommended Dietary Allowance (RDA) for zinc varies by age and life stage (7):

  • Birth to 6 months: 2 mg/day
  • Infants 7-12 months: 3 mg/day
  • Children 1-3 years: 3 mg/day
  • Children 4-8 years: 5 mg/day
  • Children 9–13 years: 8 mg/day
  • Boys 14-18 years: 11 mg/day
  • Girls 14-18 years: 9 mg/day
  • Men 19+ years: 11 mg/day
  • Women 19+ years: 8 mg/day
  • Pregnant Teens: 12 mg/day
  • Pregnant Women: 11 mg/day
  • Breastfeeding Teens: 13 mg/day
  • Breastfeeding Women: 12 mg/day

Can you take too much zinc?

Yes, excessive amounts of zinc, particularly from dietary supplements, can cause nausea, dizziness, headaches, gastric distress, vomiting, and loss of appetite. The tolerable upper intake level (UL) for zinc is 40 mg for adults, and it ranges from 4 to 34 mg for infants, children, and adolescents, depending on age (7).

Are any foods fortified with zinc?

Yes, certain foods are fortified with zinc, including breakfast cereal, plant-based milks, and infant formulas; however, in Canada and the United States, zinc fortification is strictly voluntary.

Infographic of foods high in zinc.

List of Foods High in Zinc

Here is a list of foods with the highest zinc content.

1. Oysters

Oysters are by far the best source of zinc. They are also a good source of protein, iron, vitamin B12, and omega-3 fats, while being low in calories. Oysters can be enjoyed raw, baked, grilled, fried, or steamed. A 3-ounce serving of Eastern oysters contains 33.42 mg of zinc (8).

2. Crab

Crab is another shellfish that is a great source of zinc. It’s also an incredibly high-protein, low-calorie food, making it great for weight loss and muscle building. Crab can be steamed, boiled, baked, or broiled, and crab meat is delicious in sushi, salads, and crab cakes. A 3-ounce serving of Alaska King crab contains 5.06 mg of zinc (9).

3. Beef

Beef is a rich source of zinc, along with other red meats such as lamb, goat, and venison. Incorporating lean cuts of beef into a balanced diet efficiently supports zinc levels and overall health. A 3-ounce serving of beef chuck roast contains 4.58 mg of zinc (10).

4. Lobster

Much like oysters and crab, lobster is another shellfish high in zinc. It’s also an exceptional source of lean protein and is rich in many essential vitamins, particularly copper, selenium, and vitamin B12. Lobster can be boiled, steamed, or poached, and works well in rolls, bisques, and risotto. A 3-ounce serving of lobster contains 3.00 mg of zinc (11).

5. Hemp Seeds

Hemp seeds are the best plant source of zinc. They are also a great source of healthy fats, and as a good source of vegetarian protein, given that they are the highest protein seed. Hemp seeds can be added to oatmeal, yogurt, salads, or blended into smoothies. A 1-ounce serving of hemp seeds contains 2.81 mg of zinc (12).

6. Turkey

Turkey is another good source of zinc. While all cuts of turkey contain zinc, cuts with darker meat, such as legs and thighs, are particularly rich in zinc. Turkey is also a lean source of protein, and a great swap for ground beef when looking for ways to cut calories. A 3-ounce serving of ground turkey contains 2.51 mg of zinc (13).

7. Pork

Along with beef, pork is another red meat that is rich in zinc. Much like turkey, the harder-working muscles with darker meat contain higher levels of zinc, particularly pork shoulder or pork butt. A 3-ounce serving of pork shoulder contains 2.30 mg of zinc (14).

8. Sesame Seeds

Along with hemp seeds, sesame seeds are another seed high in zinc. These small but mighty seeds are also a great source of healthy fats and calcium. They can be sprinkled on top of salads, stir-fries, grilled meats, or stirred into marinades or blended into tahini. A 1-ounce serving of sesame seeds contains 2.20 mg of zinc (15).

9. Pumpkin Seeds

Pumpkin seeds, also known as pepitas, are another zinc-rich seed. They are also the single best food source of magnesium and a good source of antioxidants. They are delicious raw or roasted, and can be enjoyed as a crunchy snack, sprinkled onto oatmeal, yogurt, or salad, or blended into pesto. A 1-ounce serving of pumpkin seeds contains 1.80 mg of zinc (16).

10. Pine Nuts

Pine nuts are the nut with the highest zinc content. They are also one of the highest protein nuts, making them a great source of protein for vegetarians and vegans. Pine nuts can be consumed raw or roasted, added to salads, or blended into sauces such as pesto and used in pasta or as a spread in a sandwich. A 1-ounce serving of pine nuts contains 1.62 mg of zinc (17).

11. Cashews

Along with pine nuts, cashews are another nut rich in zinc. They are also a good source of protein and healthy fats that support healthy skin. Cashews can be eaten raw or roasted as a healthy snack, added to stir-fries, or blended into creamy spreads and sauces. A 1-ounce serving of cashews contains 1.44 mg of zinc (18).

12. Lentils

Be they red, green, or brown, lentils are a good source of zinc. They are also one of the best sources of plant-based protein, one of the highest-fiber foods, and a good source of potassium. In addition to lentils, beans, and other legumes, such as chickpeas, are also rich in zinc. A 1/2-cup serving of cooked lentils contains 1.26 mg of zinc (19).

Ranking of Zinc-Rich Foods

Here is a ranking of the best sources of zinc per recommended serving size.

FoodServing SizeZinc per Serving
Oysters3 ounces33.42 mg
Crab3 ounces5.06 mg
Beef, chuck roast3 ounces4.58 mg
Lobster3 ounces3.00 mg
Hemp Seeds1 ounce2.81 mg
Turkey, ground3 ounces2.51 mg
Pork, shoulder3 ounces2.30 mg
Sesame Seeds1 ounce2.20 mg
Pumpkin Seeds1 ounce1.80 mg
Pine Nuts1 ounce1.62 mg
Cashews1 ounce1.44 mg
Lentils1/2 cup1.26 mg
Chickpeas1/2 cup1.26 mg
Chicken, leg3 ounces1.25 mg
Sardines3 ounces1.11 mg
Oats1/2 cup1.10 mg
Milk, 2%1 cup1.05 mg
Cheese, cheddar1 ounce1.04 mg
Green Peas1/2 cup0.95 mg
Kidney Beans1/2 cup0.95 mg
Tofu, extra firm3 ounces0.91 mg
Almonds1 ounce0.81 mg
Shrimp3 ounces0.80 mg
Peanuts1 ounce0.79 mg
Yogurt, 3.25%3/4 cup0.73 mg
Mushrooms1 cup0.57 mg
Corn Flakes, Fortified1 cup8 mg

All nutrition data is based on FoodData Central.

Do you need a zinc supplement?

Certain groups are more likely to experience zinc deficiency than others and can benefit from zinc supplementation. Individuals who follow vegetarian or vegan diets, individuals with gastrointestinal disorders or who have had bariatric surgery, and women who are pregnant or lactating may benefit from taking a zinc supplement (7).

Almost all multivitamin/mineral supplements contain zinc in the form of zinc gluconate, zinc sulfate, or zinc acetate. It is also available alone or combined with calcium, magnesium, or other ingredients in dietary supplements. That said, as with all supplements, it is best to consult with a health professional or registered dietitian to determine if supplemental zinc intake is right for you.

FAQs

What food contains the most zinc?

Oysters have the highest zinc content per serving.

What foods block zinc absorption?

Foods that contain phytates (phytic acid) can block zinc absorption. This includes whole grains, legumes, nuts, seeds, and vegetables. Properly preparing these foods, by soaking, boiling, sprouting, and/or fermenting, can help to reduce antinutrients and improve absorption.

How can I meet my recommended daily zinc intake?

Consuming a varied diet of whole foods high in zinc throughout the day is the best way to ensure you’re eating enough zinc. For example, consuming a breakfast with 1/2 cup of rolled oats and 1 ounce of pumpkin seeds, a lunch with 1 cup of cooked lentils, and a dinner with 3 ounces of beef can easily provide over 10 mg of zinc.

The Bottom Line

Zinc is an essential mineral that plays an important role in many body functions, including immune function, wound healing, DNA synthesis, and cell growth. Zinc is naturally occurring in many foods, namely oysters, crab, and beef, added to fortified breakfast cereal and available in supplement form.

White Bean Salad

Published on June 14, 2026 by Stephanie Kay

Ready in 15 minutes, this simple white bean salad is quick and easy to make, while still being full of fresh flavors. Plus, it’s high in fiber and full of plant-based protein.

Close up of a white scalloped bowl of white bean salad with a bowl of crumbled feta cheese and jar of salad dressing in the background.

If you’re looking for an easy summer salad, look no further than this white bean salad recipe. Made with pantry staples in a matter of minutes, this salad is inexpensive, quick to make, and keeps well in the fridge for days.

Not to mention, it’s incredibly versatile as it can be enjoyed as a main course for work lunches, a side dish to grilled meats for an easy dinner, or for a potluck or BBQ. And with no cooking required, it’s a great recipe for warm summer nights when you don’t want to turn on the oven.

Large bowl of white bean salad with a gold serving spoon on a dark green teal towel with a jar of dressing, bowl of fresh herbs, and bowl of feta cheese on a white background.

Why You’ll Love It

  • Easy to Make – The use of canned beans ensures this salad can be prepped in a matter of minutes.
  • High in Fiber – The combination of white beans and veggies ensures this salad has over 7 grams of fiber per serving.
  • Full of Protein – The plant-based protein from the beans and the vegetarian protein from the feta cheese gives it 13 grams of protein per serving.
  • Keeps Well – This salad keeps well in the fridge for days, making it a great meal prep idea.
Jar of olive oil with bowls of red wine vinegar, Dijon mustard, feta cheese, canned white beans, fresh parsley, and fresh dill with a clove of garlic, half a red onion, and two celery stalks on a white background.

Ingredients + Instructions

  • White Beans – To make the salad and add some plant-based protein and fiber. The recipe calls for cannellini beans (white kidney beans), because I think they have a nice creamy texture and nutty flavor, but you can use any canned white beans you like. Navy beans, Great Northern beans, and butter beans would all work well.
  • Celery – To add some crunch.
  • Red Onion – To add some more color and crunch. I used red onion for color, but green onions would also work.
  • Feta Cheese – To add some more protein and fats.
  • Fresh Herbs – To add some freshness. I used a mixture of fresh basil, dill, and parsley, but you can use any combination you like. Dried herbs will also work if needed; see the notes section of the recipe card for details.
  • Olive Oil – To make the salad dressing and add some healthy fats. You can use regular or extra virgin olive oil.
  • Red Wine Vinegar – To add some acidity to the dressing. White wine vinegar or lemon juice will also work well; see the notes section of the recipe card for details.
  • Garlic -To flavor the dressing. The recipe calls for a garlic clove, but garlic powder will also work. See the notes section of the recipe card for details.
  • Dijon Mustard – To emulsify the dressing.
  • Salt and Pepper – To season.

Dietary Adaptions

To Make it Gluten-Free: No adaptations are needed; this recipe is gluten-free.

To Make it Dairy-Free: Omit the feta cheese.

Glass bowl of white beans, diced celery, diced red onion, chopped herbs, and crumbled feta cheese.

Red’s Nutrition Tip

Beans are a highly underrated ingredient. Not only are they versatile, inexpensive, and practical, but they are also a nutritional powerhouse full of fiber, protein, and important nutrients, including iron, magnesium, and potassium.

Serving Suggestions

This easy white bean salad is a good source of complex carbohydrates, fiber, and healthy fats. To make it a more well-balanced meal, I suggest serving it with a source of protein. It can also be adapted to suit your personal calorie or macro needs. For example:

  • To add more protein, add some canned tuna to the salad or serve it as a side to grilled chicken, steak, or tofu.
  • To add more carbohydrates, serve it with some crusty bread.
  • To make it lower in fat, use low-fat feta cheese and/or reduce the amount of olive oil.
  • To add more micronutrients, add some additional fresh vegetables, such as cherry tomatoes, broccoli florets, bell peppers, or English cucumber.
  • To add extra flavor, add some lemon zest to the dressing.
Glass bowl of white bean and vegetable mixture with feta cheese and dressing on top.

Storage

Once dressed, this white bean salad can be stored in an airtight container in the fridge for up to 4 days.

More Bean Salads:

  • Three Bean Salad
  • Summer Bean Salad
  • Southwest Quinoa and Black Bean Salad

Asparagus Egg Bake

Published on June 11, 2026 by Stephanie Kay

This spring-inspired asparagus egg bake is easy to make and works well for a holiday brunch or make-ahead breakfast. Serve it with crusty bread and fresh fruit for a well-balanced breakfast.

Baking dish of asparagus egg bake with a slice of a silver serving spatula with sliced bread, a bowl of leafy greens, a small bowl of fresh berries, and a small bowl of crumbled feta cheese on the side.

If you’re looking for a new, simple, one-pan breakfast, give this asparagus egg bake recipe a try. Not only is it a great way to use seasonal produce, but it’s incredibly versatile, and you can add extra veggies and mix and match the cheese as you like.

Plus, it keeps well in the fridge, so you can make it ahead of time and enjoy it for everything from a quick on-the-go breakfast to a light weekend lunch or an Easter brunch.

A slice of goat cheese and asparagus egg casserole on a plate with a small green salad.

Why You’ll Love It

  • Made in One Pan – This asparagus breakfast casserole is a one-pan meal, which keeps clean up to a minimum.
  • High in Protein – The combination of eggs and goat cheese gives each serving almost 20 grams of protein.
  • Keeps Well – This egg bake keeps well in the fridge, making it a good meal prep for quick breakfasts.
Bowls of eggs, fresh herbs, and crumbled feta cheese with a bunch of fresh, raw asparagus, an onion, and a jug of milk on a white background.

Ingredients + Substitutions

  • Eggs – To add some protein and make the egg bake.
  • Asparagus – To add some fiber and veggies. The recipe calls for fresh asparagus, but you can use frozen asparagus if needed. See the notes section of the recipe card for details.
  • Onion – To flavor the egg bake. The recipe calls for a whole onion, but you can use green onions or onion powder if preferred. See the notes section of the recipe card for details.
  • Goat Cheese – To add some additional protein and healthy fats. I used a soft goat cheese, but feta cheese, cheddar cheese, or Swiss cheese would also work well.
  • Milk – To add some more protein. I used 2% milk, but any milk will work.
  • Fresh Herbs – To add some extra flavor. I used a combination of fresh parsley and dill, but basil would also work well.
  • Olive Oil – To add some healthy fats.
  • Salt and Pepper – To season.

Dietary Adaptions

To Make it Gluten-Free: No adaptations are needed; this recipe is gluten-free.
To Make it Dairy-Free: Swap the milk for plain, unsweetened almond milk.

Grid of 4 images with a prepared baking dish of whisked eggs, a baking with whisked eggs and goat cheese; a baking with whisked eggs, goat cheese, and chopped herbs; and a baking with whisked eggs, cheese, herbs, and raw asparagus.

Red’s Nutrition Tip

Asparagus is a nutritional powerhouse, offering a rich supply of prebiotics like inulin to fuel healthy gut bacteria. It’s also a good source of potassium to help balance blood pressure and is roughly 93% water, making it one of the most hydrating foods you can eat.

Serving Suggestions

This cheesy egg bake with asparagus is a high-protein, low-carb dish with lots of veggies and healthy fats. It can be enjoyed as is, made into a more balanced meal by serving it with a carbohydrate, or adapted to suit your calorie or macro needs. For example:

  • To make it higher in carbohydrates, serve it with crusty bread.
  • To make it higher in fiber, add some baby spinach to the egg mixture, and/or serve it with a side of fruit or a simple green salad.
  • To make it lower in fat, use low-fat goat cheese and/or swap some of the eggs for egg whites.
A baking dish of cooked asparagus breakfast casserole.

Storage + Reheating

To Store: Once cooled, the asparagus egg bake can be stored whole, covered with aluminum foil or plastic wrap, or leftover pieces can be transferred to an airtight container and stored in the refrigerator for up to 4 days.

To Freeze: To freeze it whole, allow the egg bake to cool completely, then cover it with aluminum foil and plastic wrap or a freezer-safe bag and store it in the freezer for up to 3 months. Individual pieces can be frozen in an airtight container.

To Reheat: To reheat whole, allow the egg bake to thaw completely or reheat directly from the fridge, uncovered, by baking in the oven at 350°F for 15-20 minutes or until heated through. Individual pieces can be reheated in an oven-proof dish in the oven at 350°F for 5-10 minutes or in a microwave-safe container in the microwave for 1-2 minutes.

More Egg Bake Recipes:

  • Zucchini Egg Bake
  • Breakfast Egg Bake
  • Sweet Potato Breakfast Casserole
  • Spinach Breakfast Casserole
  • Creamy Spinach Baked Eggs
  • Egg, Sausage, and Bread Casserole

Honey Cashew Chicken

Published on June 4, 2026 by Stephanie Kay

Filled with tender chicken, crunchy cashews, and veggies covered in a sweet and spicy sauce, this honey cashew chicken is full of flavor. Plus, it’s made in one pan and ready in 30 minutes, making it perfect for a healthy weeknight dinner.

White bowl of honey cashew chicken stir fry with chopsticks and small bowls of sliced green onion, sesame seeds, and cashews on the side.

If you’re trying to save money, but still want to enjoy the flavors of takeout, this honey cashew chicken recipe is for you. The stir fry is loaded with protein and healthy fats, and the homemade sauce creates a glossy, sweet-and-spicy glaze that brings everything together.

And the best part is, everything cooks in one pan, which makes cleanup a breeze and leaves you more time to enjoy your evening. Serve it over a bed of fluffy white rice for a healthy dinner the whole family can enjoy.

Two bowls honey cashew chicken on top of white rice with sliced green onion and roasted cashews on top with a beige and white checkered tea towel on the side on a white background.

Why You’ll Love It

  • Quick and Easy – This skillet meal is ready in 30 minutes, making it perfect for busy weeknights.
  • High in Protein – The combination of chicken and cashews gives this recipe 35 grams of protein per serving.
  • Full of Flavor – The homemade sauce of soy sauce and honey ensures every bite is full of flavor.
Plate of raw chicken thighs with bowls of cornstarch, honey, soy sauce, rice vinegar, white rice, roasted cashews, and broccoli florets with garlic cloves, green onions, and a red bell pepper on a white background.

Ingredients + Substitutions

  • Chicken Thighs – To add some protein. The recipe calls for boneless, skinless chicken thighs, but you can use boneless, skinless chicken breasts if preferred. See the notes section of the recipe card for details.
  • Cashews – To add some more protein and healthy fats. You can use raw or roasted cashews.
  • Honey – To make the sauce sticky and add some sweetness.
  • Soy Sauce – To make the sauce and add some saltiness. You can use regular or low-sodium soy sauce.
  • Chili Flakes – To add a bit of spice, although optional. You can also use sriracha or another hot sauce you like.
  • Sesame Oil – To cook the chicken and add some flavors. I used sesame oil, but peanut oil or vegetable oil would also work.
  • Rice Vinegar – To balance the acidity in the sauce.
  • Corn Starch – To thicken the sauce.
  • Vegetables – To add some fiber and micronutrients. I opted for a red bell pepper and broccoli, but you can use any vegetables you like. A frozen stir-fry vegetable mix would also work well. See the notes section of the recipe card for details.
  • Rice – To add some complex carbohydrates. I used white rice, specifically jasmine rice, but brown rice would also work well.

Dietary Adaptions

To Make it Gluten-Free: Use gluten-free soy sauce, tamari, or coconut aminos.

To Make it Dairy-Free: No adaptations are needed; this recipe is dairy-free.
Grid of 4 images with a pan of cooked cubed chicken thighs; a pan of cooked chicken with diced red onion and broccoli florets; a pan of cooked chicken, veggies, and stir fry sauce; and a pan of honey chicken with roasted cashews on top.

Red’s Nutrition Tip

Cashews are a high-protein nut that is rich in healthy fats and magnesium. That said, their high fat content makes them one of the most calorie-dense foods, so it’s important to practice portion control when consuming them.

Serving Suggestions

When served with rice, this honey cashew chicken is a balanced meal with protein, carbohydrates, fiber, and fat. That said, it can be adapted to suit your personal calorie or macro needs. For example:

  • To make it higher in protein, add an additional 1/2 pound of chicken thighs to the recipe and/or use chicken breasts.
  • To make it higher in fiber, swap the white rice for brown rice and/or add some additional high-fiber vegetables to the stir fry, such as snow peas or green beans.
  • To make it lower in carbohydrates, swap the white rice for cauliflower rice.
Large pan of honey cashew chicken with a bowl of cooked white rice, roasted cashews, and sliced green onions on the side with an empty bowl with wood chopsticks on a white background.

Storage + Reheating

To Refrigerate: Once cooled, the honey cashew chicken can be stored in an airtight container for up to 4 days.

To Freeze: Once cooled, transfer it to an airtight container and store it in the freezer for up to 3 months.

To Reheat: Once thawed, the honey cashew chicken can be reheated in the microwave for 2-3 minutes. For the best results, add a splash of water to loosen the sauce before reheating.

More Chicken Recipes

  • Gochujang Chicken Bowls
  • Sticky Chicken Meal Prep Bowls
  • Peanut Chicken Bowls
  • Hot Honey Chicken Bowls

Almond Flour vs. Coconut Flour: Which is Healthier?

Published on June 2, 2026 by Stephanie Kay

Almond flour and coconut flour are often suggested as healthier alternatives to wheat flour, but which one wins the ultimate grain-free showdown? Here is a nutrition breakdown and comparison of almond flour vs. coconut flour, so you can make the best choice for your diet and health goals.

Grid of 2 images with a close of up almond flour and a close up of coconut flour.

Table of contents

  • What’s the difference between almond flour and coconut flour?
  • Almond Flour vs. Coconut Flour: Nutrition
  • Calories
  • Protein
  • Fat
  • Carbohydrates
  • Fiber
  • Sugar
  • Vitamins & Minerals
  • Other Factors to Consider
    • Dietary Needs
    • Shelf Life
    • Cost
  • Can you substitute almond flour and coconut flour?
  • FAQs
  • So, which is healthier?

What’s the difference between almond flour and coconut flour?

Almond flour and coconut flour are popular alternatives to all-purpose flour; however, they differ in source, production method, nutrient profiles, and baking uses.

Almond flour is made from finely ground almonds. It is made by blanching whole, raw almonds in boiling water to remove their skin and then grinding them into a fine powder. Almond flour is naturally gluten-free and offers a subtle nutty flavor and tender, moist, but dense texture.

Coconut flour is made by grinding the leftover coconut pulp, also known as coconut “meat”, from coconut milk production. Once the liquid has been extracted from a coconut to make milk, the white fleshy bit remaining is dried at a low temperature and then ground into a fine powder. Coconut flour is naturally gluten-free and offers a sweet, floral, and tropical flavor, with a dense and slightly crumbly texture.

Type of FlourAlmond FlourCoconut Flour
SourceAlmondsCoconut
Production MethodMade by grinding blanched almonds into a fine powderMade by grinding dried, defatted coconut meat
TasteNutty, slightly sweetSweet, floral, tropical
Baking TextureTender, moist, and denseDense, soft, and crumbly
Gluten ContentGluten FreeGluten Free
Infographic on almond flour vs coconut flour.

Almond Flour vs. Coconut Flour: Nutrition

Here is a nutrition comparison of calorie, macronutrient, and micronutrient content of 100 grams of almond flour vs. coconut flour (1, 2).

Nutrition per 100 gramsAlmond FlourCoconut Flour
Calories622 calories438 calories
Protein26.2 grams16.1 grams
Fat50.2 grams15.3 grams
Carbohydrates16.2 grams58.9 grams
Fiber9.3 grams34.2 grams
Sugar4.0 grams14.3 grams

Calories

Almond flour contains more calories than coconut flour. A 100-gram serving of almond flour contains 622 calories, while a 100-gram serving of coconut flour contains 438 calories.

Protein

Almond flour contains more protein than coconut flour. A 100-gram serving of almond flour contains 26.2 grams of protein, while a 100-gram serving of coconut flour contains 16.1 grams of protein.

Almonds are one of the highest-protein nuts, second only to peanuts; therefore, almond flour is an excellent source of vegetarian protein and plant-based protein. Although coconut contains the word ‘nut,’ it is actually a fruit and, therefore, contains far less protein than almonds.

Fat

Almond flour contains a lot more fat than coconut flour, which contributes to its higher calorie content. A 100-gram serving of almond flour contains 50.2 grams of fat, while a 100-gram serving of coconut flour contains 15.3 grams of fat.

Both almond flour and coconut flour are good sources of healthy fats. Almonds are high in unsaturated fats in the form of monounsaturated fats, while coconuts are high in saturated fat in the form of medium-chain Triglycerides (MCTs), primarily lauric acid. MCTs differ from long-chain saturated fats found in animal products as they are rapidly digested and converted into energy, bypassing the usual fat digestion process, and have been shown to offer several health benefits, including improved muscle strength and function, improved cognitive performance, and increased fat oxidation (3).

That said, the high fat content of almond flour is also what makes it high in calories, as fats are the highest-calorie macronutrient, providing 9 calories per gram, compared to the 4 calories per gram from protein and carbohydrates (4).

Carbohydrates

Coconut flour contains far more carbohydrates than almond flour. A 100-gram serving of almond flour contains 16.2 grams of carbohydrates, while a 100-gram serving of coconut flour contains 58.9 grams of carbohydrates.

Given that coconuts are a fruit, they are primarily a source of complex carbohydrates, compared to almonds, which are a nut, and primarily a source of fat and protein.

Fiber

Coconut flour contains more fiber than almond flour. A 100-gram serving of almond flour contains 9.3 grams of fiber, while a 100-gram serving of coconut flour contains 34.2 grams of fiber.

Although both almonds and coconuts are high-fiber foods, coconut flour has more fiber than almond flour primarily due to how it is made. The leftover coconut “meat” used to make coconut flour has been defatted, which concentrates its structural plant cell walls, resulting in a higher fiber flour, namely in the form of insoluble fiber. None of the natural oils and fats are extracted from the almonds before they are ground into flour.

Sugar

Coconut flour contains more sugar than almond flour. A 100-gram serving of almond flour contains 4.0 grams of sugar, while a 100-gram serving of coconut flour contains 14.3 grams of sugar.

It’s important to note that the sugar in almond flour and coconut flour is naturally occurring; neither flour contains added sugars.

Vitamins & Minerals

Both almond flour and coconut flour are good sources of micronutrients. Almond flour contains more vitamin E, calcium, and phosphorus, while coconut flour contains more iron, potassium, copper, and zinc, and they contain a similar amount of magnesium.

Other Factors to Consider

Here are some other factors to consider when comparing almond and coconut flour.

Dietary Needs

Both almond flour and coconut flour are grain-free, gluten-free flours, making them good options for individuals with celiac disease or gluten allergies.

The low-carb content of almond flour also makes it a good option for individuals following a low-carb diet, or a grain-free diet such as the paleo diet or keto diet, while coconut flour is a good option for individuals with tree nut allergies.

Shelf Life

Almond flour has a shorter shelf life than coconut flour because it still contains all of its natural oils and fat, which increases its rate of spoilage. Opened almond flour can last for 2-4 months in an airtight container in the pantry or up to 6 months in the refrigerator. Opened coconut flour can last 6-8 months in an airtight container in the pantry or up to 12 months in the refrigerator.

Cost

Coconut flour is significantly cheaper than almond flour. Since coconut flour is a byproduct of coconut milk, it has lower production costs than almond flour, which requires growing, harvesting, and processing a resource-intensive crop.

On average, almond flour is 1.5 to 2 times more expensive than coconut flour. Almond flour ranges from $6.00 to $12.00 per pound, while coconut flour ranges from $3.00 and $6.00 per pound across major US retailers.

Can you substitute almond flour and coconut flour?

Unfortunately, you cannot swap almond flour and coconut flour in a 1:1 ratio in a recipe. Each flavor behaves differently as they have vastly different chemical properties, oil contents, and liquid absorption rates.

Coconut flour absorbs far more liquid than almond flour, up to four times more, and requires extra eggs to prevent crumbling in baked goods. In general, you can substitute coconut flour for almond flour, and vice versa, with a few simple recipe adjustments. For example:

If a baking recipe calls for almond flour and you want to use coconut flour, use 1/4 cup of coconut flour for every 1 cup of almond flour, add 1 egg for every 1/4 cup of coconut flour used, and add more liquid if the batter looks too thick.

If a baking recipe calls for coconut flour and you want to use almond flour, use 3 to 4 cups of almond flour for every 1 cup of coconut flour, reduce the number of eggs in the recipe by at least half, and reduce the liquid by roughly 1/3.

FAQs

Is almond flour or coconut flour better for weight loss?

Neither almond flour nor coconut flour is inherently better for weight loss. While coconut flour is generally lower in calories and higher in fiber, both flours can support weight loss when consumed as part of a healthy diet that creates a calorie deficit.

Can you substitute coconut flour or almond flour for wheat flour?

Yes, however, the exact method will vary by recipe, as you may need to combine almond flour and coconut flour with other flours, baking powder, and/or additional binding agents to achieve the desired results.

What’s the difference between almond flour and almond meal?

While similar, almond flour and almond meal are not the same. Almond flour is made from finely ground blanched almonds with the skins removed, while almond meal is made from ground whole, unpeeled almonds with the skin left on.

What are the best almond flour and coconut flour brands?

Bob’s Red Mill® is generally considered the best brand for both almond and coconut flour.

So, which is healthier?

In the coconut flour vs. almond flour debate, neither comes out on top. Both almond flour and coconut flour are healthy flours and minimally processed foods that offer many health benefits.

While almond more is more calorie-dense than coconut flour, it is lower in carbs, higher in protein, and full of healthy fats. Albeit, coconut flour is a better source of fiber, vitamins, and minerals.

The Bottom Line

Both almond flour and coconut flour are healthy alternative flours. Almond flour is made of finely ground blanched almonds, and coconut flour is made from defatted, dried coconut meat. Almond flour is a good source of protein and healthy fats, while coconut flour is lower in calories and a good source of fiber. Both are good sources of vitamins and minerals and can be included in a healthy and balanced diet.

Meal Prep Tofu Burrito Bowls

Published on May 28, 2026 by Stephanie Kay

Filled with rice, crumbled tofu “meat”, and veggies, these meal prep tofu burrito bowls are a delicious and nutritious vegetarian meal. Top them with avocado and salsa for a tasty lunch or dinner.

Four meal prep tofu burrito bowls in glass containers on a white background.

I’ve said it before, and I’ll say it again: tofu is such an underrated ingredient. Not only is it a great source of vegetarian protein for meatless meals, but it’s inexpensive and versatile. Tofu works well baked, grilled, or fried, and can be used in stir-fries, tacos, sandwiches, and even pasta sauces.

Tofu also makes a great substitute for ground meat in many dishes, as it can easily be crumbled and seasoned to resemble the texture of ground beef or turkey, as I’ve done in these make-ahead tofu burrito bowls. In fact, the crumbled tofu “meat” is the perfect way to make meatless burrito bowls without skimping on flavor and with minimal effort.

Close up of a vegan burrito bowl with tofu with tortilla chips on the side.

Why You’ll Love Them

  • Vegetarian – These tofu burrito bowls are a meatless meal that everyone can enjoy.
  • High in Protein – The combination of crumbled tofu and beans ensures these bowls have 23 grams of plant-based protein per serving.
  • Keep Well – The bowls keep well in the fridge for days, making them a great meal prep idea.
Plate with a block of tofu, fresh cilantro, bowl of soy sauce, bowl of nutritional yeast, bowl of spices, bowl of black beans, bowl of frozen corn, bowl of whit rice, with a lime, red onion, and red bell pepper on a white background.

Ingredients + Substitutions

  • Tofu – To add some vegetarian protein and make the crumbled tofu “meat”.
  • White Rice – To add some complex carbohydrates. The recipe calls for white rice, but brown rice will also work. See the notes section of the recipe card for details.
  • Black Beans – To add some more protein and fiber.
  • Frozen Corn – To add some more fiber and color.
  • Fresh Veggies – The recipe calls for a red onion and red bell pepper, but you can use any color you like.
  • Spices – A combination of chili powder, smoked paprika, ground cumin, and garlic powder to season the tofu. If preferred, you can use fajita seasoning. See the notes section of the recipe card for details.
  • Soy Sauce – To add a salty flavor to crumbled tofu.
  • Nutritional Yeast – To add an umami flavor to the crumbled tofu.
  • Olive Oil – To add some healthy fats.
  • Salt and Pepper – To season.
  • Toppings – I used sliced avocado, salsa, sour cream, fresh cilantro, and lime wedges, but you can use any toppings you like. Guacamole, pico de gallo, Greek yogurt, and shredded cheese would also work well.

Dietary Adaptions

To Make them Gluten-Free: Use certified gluten-free soy sauce, tamari, or coconut aminos.

To Make them Dairy-Free: No adaptations are needed; this recipe is dairy-free, as long as you don’t add sour cream or yogurt as a topping.

Glass bowl with crumbled tofu and spices on top.
Glass bowl of seasoned crumbled tofu.

Red’s Nutrition Tip

Not only is tofu a good source of protein, but it’s also a good source of iron, specifically non-heme iron. By pairing it with black beans, another good source of non-heme iron, you can easily increase the overall iron content of this dish.

Large baking sheet with parchment paper on top with cooked crumbled tofu meat.

Serving Suggestions

These meal prep tofu burrito bowls are a balanced meal with protein, carbohydrates, fiber, and fat. They can be enjoyed on their own or adapted to suit your calorie or macro needs. For example:

  • To make them vegan, swap the sour cream for vegan sour cream.
  • To add more protein, add an additional 1/2 pound of tofu along with the necessary seasoning.
  • To make them lower in carbohydrates, swap the white rice for cauliflower rice.
  • To add more fiber, swap the white rice for brown rice and/or add some shredded lettuce or kale to the bowls.
  • To add more flavor, swap the plain rice for cilantro lime rice.
  • To add more heat, add some hot sauce to the tofu crumble mixture.
Glass meal prep contains of tofu burrito bowls organized in a vertical line.

Storage + Reheating

To Refrigerate: Once cooked, allow the tofu burrito bowls to cool completely, then cover them with a lid and store them in the fridge for up to 4 days. Only add the avocado, salsa, sour cream, and lime wedges when you are ready to eat.

To Freeze: Once the bowls have cooled completely, cover them with a lid and store them in the freezer for up to 3 months. Only add the avocado, salsa, sour cream, and lime wedges when you are ready to eat.

To Reheat: You can reheat meal prep tofu burrito bowls in the microwave for 2-3 minutes or until warm. If using frozen bowls, remove them from the freezer and allow them to thaw overnight in the fridge before reheating. Add the avocado, salsa, sour cream, and lime wedges when you are ready to eat.

More Tofu Recipes:

  • Spicy Peanut Tofu Meal Prep Bowls
  • Tofu Noodle Stir Fry
  • Red Lentil Tofu Curry
  • Sheet Pan Tofu and Veggies

Mediterranean Orzo Salad

Published on May 20, 2026 by Stephanie Kay

Packed with crisp veggies and tossed in a zesty Greek dressing, this Mediterranean orzo salad is as nutritious as it is flavorful. It’s versatile enough to be a side or a main, and since the flavors deepen overnight, it’s the ultimate make-ahead meal prep.

Large white bowl of mediterranean orzo salad with a silver serving spoon on a beige and white checkered tea towel with bowls of parsley, feta cheese, and olives in the background.

Although orzo looks like rice, it’s actually a form of pasta, and it works incredibly well in a salad. Not only is it great at absorbing flavor, but this tiny pasta offers a great texture, and its small size ensures you get a little bit of everything in every bite.

I opted to go the Greek flavor route with this Mediterranean orzo salad recipe, filling it with sun-dried tomatoes, cucumber, feta cheese, olives, and fresh herbs. It works well as a light lunch or a healthy side dish for a summer picnic or BBQ.

Overhead image of a white bowl filled Mediterranean orzo pasta salad with a silver spoon and a wood salt and pepper shaker, bowl of feta cheese, bowl of kalamata olive, wedge of lemon, wood bowl of fresh parsley, and bowl of dried oregano on a white background.

Why You’ll Love Them

  • Quick and Easy – Ready in 30 minutes, this orzo salad is super simple to prepare.
  • Full of Flavor – The combination of chopped veggies, feta, and herbs fills the salad with Mediterranean flavors.
  • Keeps Well – This Mediterranean orzo salad keeps well in the fridge, making it a great meal prep idea.
Jar of olive oil, jar of dried oregano, garlic clove, bowl of feta cheese, lemon, bowl of mustard, bowl of sun-dried tomatoes, bowl of orzo, fresh parsley, cucumber, red onion, bowl of kalamata olives, and bowl of artichoke hearts on a white background.

Ingredients + Substitutions

  • Orzo – To add some complex carbohydrates and make the pasta salad. I used this rice-shaped pasta, as I think it works best, but other small pasta shapes will also work.
  • Red Onion – To add some color and flavor. I used red onion, but white onion or green onion will also work.
  • Sun-Dried Tomatoes – To add more color and flavor. The recipe calls for sun-dried tomatoes, as I think they provide the best flavor and texture, but grape or cherry tomatoes will also work well. See the notes section of the recipe card for details.
  • Cucumber – To add some green veggies. I used an English cucumber, but Persian cucumbers would also work well.
  • Artichoke Hearts – To add some fiber. You can use canned or jarred artichoke hearts, or omit them completely if you’re not a fan.
  • Kalamata Olives – To add some saltiness. The recipe calls for kalamata olives, but any briny olives will do.
  • Feta Cheese – To add some vegetarian protein and fats.
  • Parsley – The recipe calls for fresh parsley, but you could use other fresh herbs such as basil or dill.
  • Olive Oil – To make the Greek dressing and add some healthy fats. You can use regular or extra virgin olive oil.
  • Lemon Juice – To balance the acidity of the dressing. I used fresh lemon juice, but bottled lemon juice or red wine vinegar will also work well. See the notes section of the recipe card for details.
  • Garlic – To flavor the dressing. The recipe calls for a garlic clove, but garlic powder will also work. See the notes section of the recipe card for details.
  • Oregano – To flavor the dressing. The recipe calls for dried oregano, but fresh oregano will also work. See the notes section of the recipe card for details.
  • Dijon Mustard – To emulsify dressing, although optional.
  • Salt and Pepper – To season.

Dietary Adaptions

To Make it Gluten-Free: Use certified gluten-free orzo.

To Make it Dairy-Free: Omit the feta cheese.

Grid of 4 images of a bowl of cooked orzo; a bowl of cooked orzo with diced cucumber, red onion, artichoke hearts, parsley, olives, and sun-dried tomatoes; bowl with cooked orzo with veggies and crumbled feta cheese on top; and a bowl of orzo pasta salad.

Red’s Nutrition Tip

While this salad is high in fat, it’s low in saturated fat and full of healthy fats, specifically monounsaturated and polyunsaturated fats. These are known as “good” fats because they have been shown to reduce cardiovascular disease risk markers, including low-density lipoprotein (LDL), also known as “bad” cholesterol (1, 2).

Serving Suggesting

This orzo Greek salad is a good source of complex carbohydrates and healthy fats. It works well as a main dish or side dish and can be adapted to suit your personal calorie or macro needs. For examples:

  • To make it a more balanced meal, serve it with a source of protein and fiber.
  • To add more fiber, add a can of garbanzo beans (chickpeas) and/or chopped spinach to the salad.
  • To increase the protein content of the meal, serve it with a source of plant or animal protein, such as grilled chicken, steak, salmon, or tofu.
Close up of a large white bowl filled with Greek orzo pasta salad with a spoon.

Storage

To Refrigerate: Once dressed, this Greek orzo salad can be stored in an airtight container in the fridge for up to 4 days.

To Make Ahead: If making this orzo salad ahead of time, prepare the salad and Greek dressing and store them in separate airtight containers. When you are ready to eat, cover the salad with dressing and toss to combine.

More Salad Recipes:

  • Three Bean Salad
  • Make-Ahead Lentil Salad
  • Summer Bean Salad
  • Mediterranean Couscous Salad
  • Italian Bow Tie Pasta Salad
  • Creamy Chicken Pasta Salad

10 Added Sugar-Free Swaps

Published on May 19, 2026 by Stephanie Kay

It’s no secret that excess sugar is less than ideal for our health; however, many people still struggle to limit their intake. It’s sweet and tasty, and the thought of cutting it out cold turkey can feel completely overwhelming. So, here are some simple sugar-free swaps you can make today to reduce your consumption of added sugars while still satisfying your sweet tooth.

Sugar cubes and white sugar on a wood background with the words sugar free written into it.

Table of contents

  • “No Added Sugar” vs. “Sugar-Free”
  • Types of Sugar-Free Sweeteners in Food
  • Easy No Added Sugar Swaps
  • 1. Swap cereal for oatmeal.
  • 2. Swap soda for sparkling water.
  • 3. Swap flavored milk for plain milk.
  • 4. Swap granola bars for trail mix.
  • 5. Swap canned fruit for fresh fruit.
  • 6. Swap flavored yogurt for plain yogurt.
  • 7. Swap peanut butter for natural peanut butter.
  • 8. Swap salad dressing for homemade dressing.
  • 9. Swap flavored coffee for plain coffee.
  • 10. Swap jam for fruit spread.

To be clear, sugar can be included in a healthy diet. Not only is sugar naturally occurring in many nutritious whole foods, but even added sugars can be incorporated into a balanced diet in moderate amounts.

The Dietary Guidelines for Americans recommend that added sugars make up no more than 10% of total calorie intake, and ideally no more than 5% (1). On average, this equates to no more than 25 grams of added sugar per day for adult females and 36 grams of added sugar per day for adult males.

Unfortunately, many processed foods contain added sugar, and even versions marketed as “healthy” contain hidden sugars that can add up over time. Fortunately, reducing your sugar intake can be made easy if you know what to look for, and it offers many health benefits. Limiting excess sugar in the diet can help maintain stable blood sugar levels, support energy, and manage weight (2, 3).

“No Added Sugar” vs. “Sugar-Free”

Reading food labels is the best way to determine if a product contains sugars. The Nutrition Facts label will tell you how much Total Sugar and Added Sugar the item contains. Total Sugars accounts for the natural sugars and added sugars, while Added Sugars accounts for the sugars added during processing.

In addition to the Nutrition Facts label, food manufacturers may add nutrient content claims to the front-of-package label to make their products appear more appealing to boost sales. Fortunately, these claims must adhere to strict regulatory criteria to ensure accuracy. Common claims for sugar include (4, 5):

  • No Added Sugar: No sugar or ingredient containing sugar was added during processing or packaging, but the product may still contain natural sugars.
  • Sugar Free: Contains less than 0.5 grams of sugar, both natural and added, per serving.
  • Reduced/Less Sugar: Contains at least 25% less sugar than the regular version of the product.

Types of Sugar-Free Sweeteners in Food

To support sugar-free label claims and still make foods taste sweet without white sugar or table sugar, manufacturers often use sugar-free sweeteners in processed foods. These code words for sugar include artificial sweeteners, sugar substitutes, and non-nutritive sweeteners, which offer a sweet taste without sugar and zero or very low calories. Examples of sugar-free sweeteners include:

  • Sugar Alcohols: Erythritol, Lactitol, Maltitol, Mannitol, Sorbitol, Xylitol, etc.
  • Non-Nutritive Sweeteners: Acesulfame Potassium (Ace-K), Monk Fruit Extract, Saccharin, Stevia, Sucralose, etc.

The FDA and Health Canada have approved these sweeteners for use in food and drinks, and they are considered safe for the general public, including individuals with diabetes. You can determine if a product contains a sugar-free sweetener by reading the ingredients label.

Infographic of easy added sugar-free swaps.

Easy No Added Sugar Swaps

Here is a list of simple swaps you can make today to reduce your added sugar intake.

1. Swap cereal for oatmeal.

Cereal is a convenient grab-and-go breakfast, but it’s also one of the biggest sources of added sugars. While it may be obvious that Fruit Loops and Lucky Charms are high in sugar, many cereals marketed as “healthier” choices contain just as much sugar as the brightly colored versions. Fortunately, swapping breakfast cereal for oatmeal is relatively easy, and you can flavor it with toppings of your choice, such as cinnamon and fresh berries.

A 1-cup serving of Honey Nut Cheerios® has 12 grams of added sugar, while a 1/2-cup serving of rolled oats has 0 grams of added sugar (6, 7). By swapping cereal for oatmeal, you can reduce added sugar intake by 12 grams.

2. Swap soda for sparkling water.

Sodas and other sugar-sweetened beverages are the biggest contributors of added sugar in the standard American diet and weight gain (8). Regular soda is typically sweetened with high-fructose corn syrup, offering a large number of calories and little nutritional benefits. In addition to diet soda, which is sweetened with non-nutritive sweeteners such as aspartame, acesulfame potassium (Ace-K), and sucralose (Splenda), sparkling water is a refreshing beverage that provides the same satisfying “fizz” that soda drinkers enjoy.

A 12-ounce serving of Coca-Cola® has 39 grams of added sugar, while a 12-ounce serving of sparkling water has 0 grams of added sugar (9, 10). By swapping soda for sparkling water, you can reduce added sugar intake by 39 grams.

3. Swap flavored milk for plain milk.

Be it regular milk, oat milk, or almond milk, sweetened milks contain a lot of added sugar. While cow’s milk contains naturally occurring sugar in the form of lactose, chocolate milk, strawberry milk, and many non-dairy milks contain added sugar. In fact, most plain oat milk contains added sugar, oils, salt, gums, and flavor to improve the texture and flavor.

A 1-cup serving of 2% chocolate milk has 11 grams of added sugar, while a 1-cup serving of 2% milk has 0 grams of added sugar (11, 12). By swapping chocolate milk for plain milk, you can reduce added sugar intake by 11 grams.

4. Swap granola bars for trail mix.

Granola bars come in various types and forms, from chewy and crunchy to fruit-filled and nut-based, most of which contain added sugars. Given that granola bars are often made of nuts, seeds, and dried fruit, swapping them for trail mix is a simple way to get the same energy, fiber, and healthy fats without the refined sugars. Not to mention, it’s a good low-carb swap for individuals reducing carbohydrate intake or managing diabetes.

A 1-bar serving of Nature Valley® Trail Mix Bar has 5 grams of added sugar, while a 1/4-cup serving of trail mix has 0 grams of added sugar (13, 14). By swapping granola bars for trail mix, you can reduce added sugar intake by 5 grams.

5. Swap canned fruit for fresh fruit.

Fruit is a source of natural sugar, fiber, and micronutrients; however, canned fruit often contains added sugars in the form of syrup to add sweetness and maintain texture and color. By choosing fresh fruit over canned, you can reduce your sugar intake and increase your vitamin C intake at the same time.

A 1/2-cup serving of Del Monte® Fruit Salad has 14 grams of added sugar, while a 1/2-cup serving of fresh fruit salad has 0 grams of added sugar (15, 16). By swapping canned fruit for fresh fruit, you can reduce added sugar intake by 14 grams.

6. Swap flavored yogurt for plain yogurt.

All forms of yogurt are good sources of protein and probiotics, but some sweetened yogurts can carry as much sugar as chocolate bars or baked goods. Opting for regular yogurt or plain Greek yogurt is a lower-sugar and higher-protein option, and you can add extra flavor with honey or maple syrup, while controlling the level of sweetness.

A 3/4-cup serving of Dannon® Strawberry Fruit on the Bottom Yogurt has 12 grams of added sugar, while a 3/4-cup serving of plain, whole milk yogurt has 0 grams of added sugar (17, 18). By swapping flavored yogurt for plain yogurt, you can reduce added sugar intake by 12 grams.

7. Swap peanut butter for natural peanut butter.

Be it peanut butter or almond butter, many conventional nut butters contain added sugar in the form of cane sugar or corn syrup to enhance flavor and texture. Not to mention, flavored spreads such as Nutella® contain even more. Fortunately, it’s easy to find natural nut butters made solely of nuts and salt.

A 2-tablespoon serving of Jif® Peanut Butter has 2 grams of added sugar, while a 2-tablespoon serving of natural peanut butter has 0 grams of added sugar (19, 20). By swapping conventional peanut butter for natural peanut butter, you can reduce added sugar intake by 2 grams.

8. Swap salad dressing for homemade dressing.

Surprisingly, store-bought salad dressings commonly contain added sugars to enhance flavor, particularly in “light” and “low-fat” versions. While making homemade salad dressings takes a little extra time, it’s very easy to do and keeps well in the fridge for weeks.

A 2-tablespoon serving of Kraft® Catalina Dressing has 8 grams of added sugar, while a 2-tablespoon serving of homemade salad dressing can contain 0 grams of added sugar (21). By swapping store-bought salad dressing for homemade salad dressing, you can reduce added sugar intake by 8 grams.

9. Swap flavored coffee for plain coffee.

From lattes to iced coffee, there are so many styles and flavors to choose from. Although there is no harm in adding milk to coffee or lattes – it’s actually a great source of protein and micronutrients – flavored coffees like vanilla lattes and iced mochas often contain liquid syrups and whipped cream. Much like coffee, warm and iced tea can also be a source of added sugar, so it’s best to opt for unsweetened tea whenever possible.

A 12-ounce serving of a Starbucks® Vanilla Café Latte has 15 grams of added sugar, while a 12-ounce serving of a Starbucks® Café Latte has 0 grams of added sugar(22). By swapping flavored coffee for regular coffee, you can reduce added sugar intake by 15 grams.

10. Swap jam for fruit spread.

Be it store-bought or homemade, jams and jellies contain added sugars. Fortunately, they can easily be swapped for fruit spreads or chia seed jams that are free of added sugar and contain more fiber. Alternatively, many brands offer jams free of added sugar, often sweetened with Splenda®, stevia, or fruit juice.

A 1-tablespoon serving of Smucker’s® Strawberry Jam has 9 grams of added sugar, while a 2-tablespoon serving of GoodGood® Strawberry Spread has 0 grams of added sugar (23, 24). By swapping jam for fruit spread, you can reduce added sugar intake by 9 grams.

The Bottom Line

Opting for foods with “no added sugar” ensures that sugar was not added during processing or packaging and can help to limit overall intake of added sugars. Limiting sugar intake can help to manage diabetes, support weight loss, and improve overall health.

Chicken and Leek Risotto

Published on May 14, 2026 by Stephanie Kay

This chicken and leek risotto features crispy chicken thighs and creamy leek risotto to create a delicious and heart-warming meal. While it tastes like a restaurant meal, it’s incredibly simple to make.

Large beige enabled cast-iron pan with chicken and leek risotto on a beige and striped tea towel with a gold serving spoon and a small wood bowl of freshly grated parmesan cheese and small white bowl of fresh parsley in the background.

Risotto is one of those dishes that people think is really difficult, but it’s actually a surprisingly meditative one-pan meal to prepare. With a little time and love, you can turn humble rice into a rich and creamy risotto without any cream at all.

In fact, the creamy texture of risotto comes from the constant friction of the rice as it cooks, which breaks down the naturally present starches. This creates a neutral backdrop that highlights any flavor you want to add, and this chicken and leek risotto recipe is a perfect example of that.

Large pot of leek risotto with chicken thighs on top with a gold serving spoon on a beige tea towel with parmesan cheese and parsley on the side on a white background.

Why You’ll Love It

  • Balanced Meal – This is a well-balanced meal with protein, carbohydrates, and healthy fats.
  • Easy to Make – While it does take some time, the chicken and leek risotto is made with minimal ingredients and is easy to make.
  • Seasonal – This dish is a great way to use spring leeks and eat with the seasons.
Plate of raw chicken thighs, shallot, garlic cloves, bowl of butter, bowl of arborio rice, parmesan cheese, glass jug of chicken stock, leeks, and a lemon on a white background.

Ingredients + Substitutions

  • Chicken Thighs – To add some protein. The recipe calls for bone-in, skin-on chicken thighs, but you can use boneless, skinless chicken breasts or boneless, skinless chicken thighs if preferred. See the notes section of the recipe card for details.
  • Arborio Rice – To add some carbohydrates and make the risotto. The recipe calls for arborio rice, but you can use any risotto rice, such as carnaroli rice or vialone rice.
  • Leeks – To flavor the leek risotto.
  • Shallot and Garlic – To further flavor the risotto. The recipe calls for a whole shallot and garlic cloves, but you can use a small onion, onion powder, or garlic powder if needed. See the notes section of the recipe card for details.
  • Broth – To cook the rice and add flavor. The recipe calls for chicken broth, but vegetable broth will also work.
  • Lemon Juice – To balance the acidity in the risotto; however, you can use white wine if preferred. See the notes section of the recipe card for details.
  • Olive Oil and Butter – To add some healthy fats and ensure the risotto is creamy. I opted for a mixture of olive oil and butter, but you can use one of the other if preferred.
  • Parmesan – To make the risotto rich and creamy, and add some more protein.
  • Salt and Pepper – To season.

Dietary Adaptions

To Make it Gluten-Free: Use certified gluten-free chicken broth.

To Make it Dairy-Free: Swap the butter for additional olive oil and omit the parmesan cheese.

Grid of 4 images with a pot of seared chicken thighs; a pot of sautéed shallots and leeks; a pot of sautéed shallots, leeks, garlic, rice, and chicken broth; and a pot of leek risotto with freshly grated parmesan cheese and butter on top.

Red’s Nutrition Tip

Leeks are a great source of prebiotics, a form of non-digestible plant fibers that help to stimulate the growth or activity of beneficial bacteria in the body. They are also a great source of antioxidants, making them a great addition to any meal.

Serving Suggestions

This leek and chicken risotto is a balanced meal with protein, carbohydrates, and fat. It can be enjoyed on its own or adapted to suit your personal calorie or macro needs. For example:

  • To make it higher in protein, add an additional 1/2 pound of chicken thighs to the recipe.
  • To make it lower in fat, use boneless, skinless chicken thighs or chicken breasts.
  • To make it higher in fiber, add some frozen peas to the risotto and/or serve it with a side of steamed broccoli.
White speckled bowl filled with a serving leek risotto with a chicken thigh on top with a gold fork on a white background.

Storage + Reheating

To Refrigerate: Allow the risotto and chicken to cool completely, then transfer them to an airtight container and store them in the fridge for up to 4 days.

To Freeze: Once cooled, transfer the risotto and chicken to an airtight container and store them in the freezer for up to 3 months.

To Reheat: Once thawed, the risotto can be reheated in a pot with 1–2 tablespoons of broth or water per cup of risotto over medium-low heat, stirring constantly, until warm and creamy. Once thawed, the chicken thighs can be reheated in the oven at 350°F in a baking dish for 10-15 minutes or in the microwave for 2-3 minutes.

More Risotto Recipes:

  • Butternut Squash Risotto
  • Lemon Asparagus Risotto
  • Beef and Mushroom Risotto

Mediterranean Grilled Halloumi Wraps

Published on May 7, 2026 by Stephanie Kay

Ready in 15 minutes, these Mediterranean grilled halloumi wraps are perfect for a simple lunch or dinner. They are full of veggies, protein, and delicious flavors.

Mediterranean grilled halloumi wrap with tomatoes, cucumber, red onion, fresh herbs, and garlic sauce on a white plate on a white background.

If you’ve never grilled halloumi cheese, I can’t wait for you to give it a try. This salty and squeaky Cyprus cheese is famous for its high melting point, as it can be grilled or fried without melting, resulting in a crispy exterior and gooey interior.

It’s also a great source of vegetarian protein, making it a great alternative for meat in burgers, tacos, pitas, and wraps, or on top of salads. So, if you’re bored with the same old lunch, give these Mediterranean grilled halloumi wraps a try!

An open Mediterranean halloumi wrap with garlic sauce drizzled on top with extra garlic sauce, parsley, tomato cucumber salad, pitas, lemon wedges, and olives on the side.

Why You’ll Love Them

  • Quick and Easy – Ready in 15 minutes, these halloumi wraps are perfect for a quick lunch or dinner.
  • Vegetarian – The halloumi cheese offers these pitas 24 grams of protein per serving.
  • Versatile – You can customize the toppings based on whatever you have on hand.
Pitas on a wood plate, a bowl of garlic sauce, ripe tomatoes, plate of sliced halloumi cheese, cucumber, red onion, garlic cloves, bowl of hummus, lemon, and bowl of fresh herbs on a white background.

Ingredients + Substitutions

  • Halloumi – To add some protein. Halloumi cheese is one of the highest protein cheeses and is great for grilling as it has an exceptionally high melting point.
  • Wraps – To add some complex carbohydrates. I used pitas, but flour tortillas, flatbread, or plain bread would also work well.
  • Hummus – To add some plant-based protein and fiber. I used garlic hummus, but any flavor of hummus would work well.
  • Vegetables – To add some texture and micronutrients. I used a combination of lettuce, tomatoes, cucumber, and red onion, but spinach, bell peppers, and zucchini would also work well.
  • Fresh Herbs – To add some freshness. I opted for fresh parsley, mint, and dill, but basil and cilantro would also work well.
  • Lemon – To dress the veggies. I used fresh lemon juice, but bottled lemon juice or red wine vinegar will work just as well.
  • Garlic – To add some flavor. The recipe calls for garlic cloves, but garlic powder would also work. See the notes section of the recipe card for details.
  • Olive Oil – To add some healthy fats.
  • Salt and Pepper – To season.

Dietary Adaptions

To Make them Gluten-Free: Use gluten-free wraps.

To Make them Dairy-Free: This recipe cannot be made dairy-free.
White bowl of cucumber tomato salad on a white background.

Red’s Nutrition Tip

In addition to being a good source of protein and healthy fats, halloumi cheese is a great source of calcium and sodium. If you’re trying to reduce your sodium intake, you can opt for a low-sodium version.

Slices of grilled halloumi cheese in a grill pan.

Serving Suggestions

These grilled halloumi wraps are a balanced meal with protein, carbohydrates, fiber, and fats. They can be enjoyed on their own or adapted to suit your personal dietary needs. For example:

  • To add more protein, add an extra slice of halloumi or add a dollop of tzatziki or Greek yogurt on top.
  • To make them low-carb, make a low-carb swap by swapping the pita for a lettuce wrap.
  • To add more flavor, add a spice blend to the halloumi before grilling, such as Za’atar seasoning, shawarma seasoning, or a sprinkle of dried oregano.
Close up of a Greek-inspired grilled halloumi wrap on a white plate.
Storage + Reheating

To Refrigerate: Once cooled, the grilled halloumi can be stored in an airtight container in the fridge for up to 5 days. The garlic sauce can be stored in a separate airtight container for up to one week.
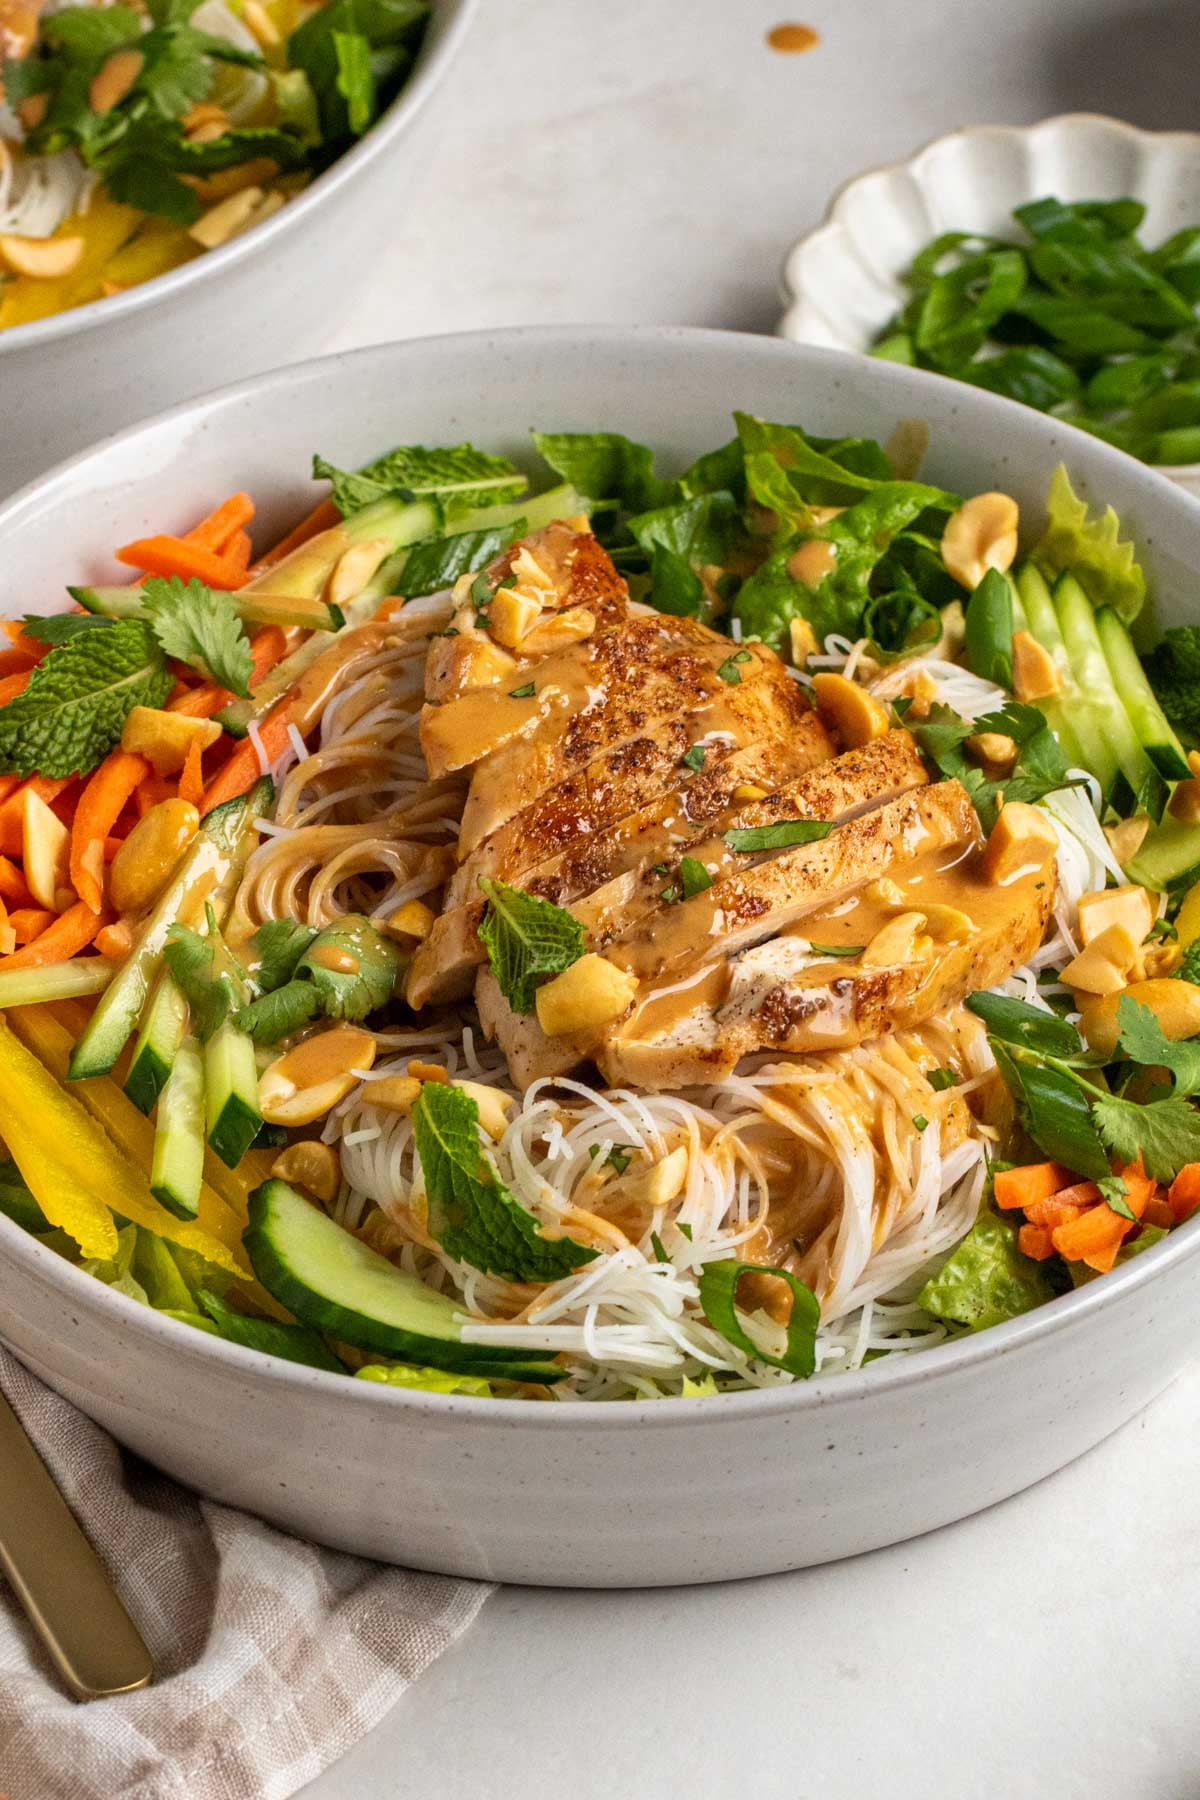
To Freeze: Freezing is not recommended.

To Reheat: The grilled halloumi can be reheated in the microwave for 30 seconds to 1 minute.

More Halloumi Recipes:

  • Sheet Pan Halloumi Bowls
  • Grilled Halloumi Salad
  • Grilled Halloumi and Vegetable Skewers
  • Previous
  • 1
  • 2
  • 3
  • 4
  • …
  • 59
  • Next
Stephanie Kay Nutrition

Hey, I’m Stephanie

– AKA RED –

I’m a nutritionist on a mission to change the way you look at food and teach you how to make real food work for real life in a realistic way.

Get to Know Me

Want A 7-Day Meal Plan?

Download my free 7-day meal plan, complete with a grocery list, for a week’s worth of easy healthy recipes that make real food work for real life.

    • facebook
    • instagram
    • pinterest

    Shop My Cookbooks

    My eCookbooks are filled with quick and easy real food recipes to help make eating well a breeze so you can crush your goals.

    Learn More

    Recipes

    • Dinner
    • Breakfast
    • Meal Prep
    • Snacks

    Nutrition

    • FAQs
    • Tips
    • This vs. That
    • Weight Loss

    Connect

    • Instagram
    • Youtube
    • About
    • Cookbooks

    About Stephanie

    I’m a nutritionist on a mission to change the way you look at food and teach you how to make real food work for real life in a realistic way.

    Learn More

    Site Credits
    2023 © Stephanie Kay Nutrition | Privacy Policy
    To Top