Stephanie Kay Nutrition

Stephanie Kay Nutrition

Real Food for Real Life

  • recipes
    • all recipes
    • Breakfast
    • Lunch
    • Dinner
    • Soups & Stews
    • Salads
    • Sides
    • Snacks
  • nutrition
    • All Articles
    • Tips
    • FAQs
    • This vs. That
    • How To/Guides
    • Weight Loss
  • resources
    • 10 Days of Nutrition
    • 7-Day Meal Plan
    • Balanced Meal Guide
    • 5-Ingredient Cookbook
    • Lunch Box Cookbook
  • About
    • About Steph
    • Contact
  • Dinner
  • Breakfast
  • Meal Prep
  • Nutrition Tips
  • facebook
  • instagram
  • pinterest
  • youtube

Sesame Tofu Bowls

Published on April 10, 2022 by Stephanie Kay

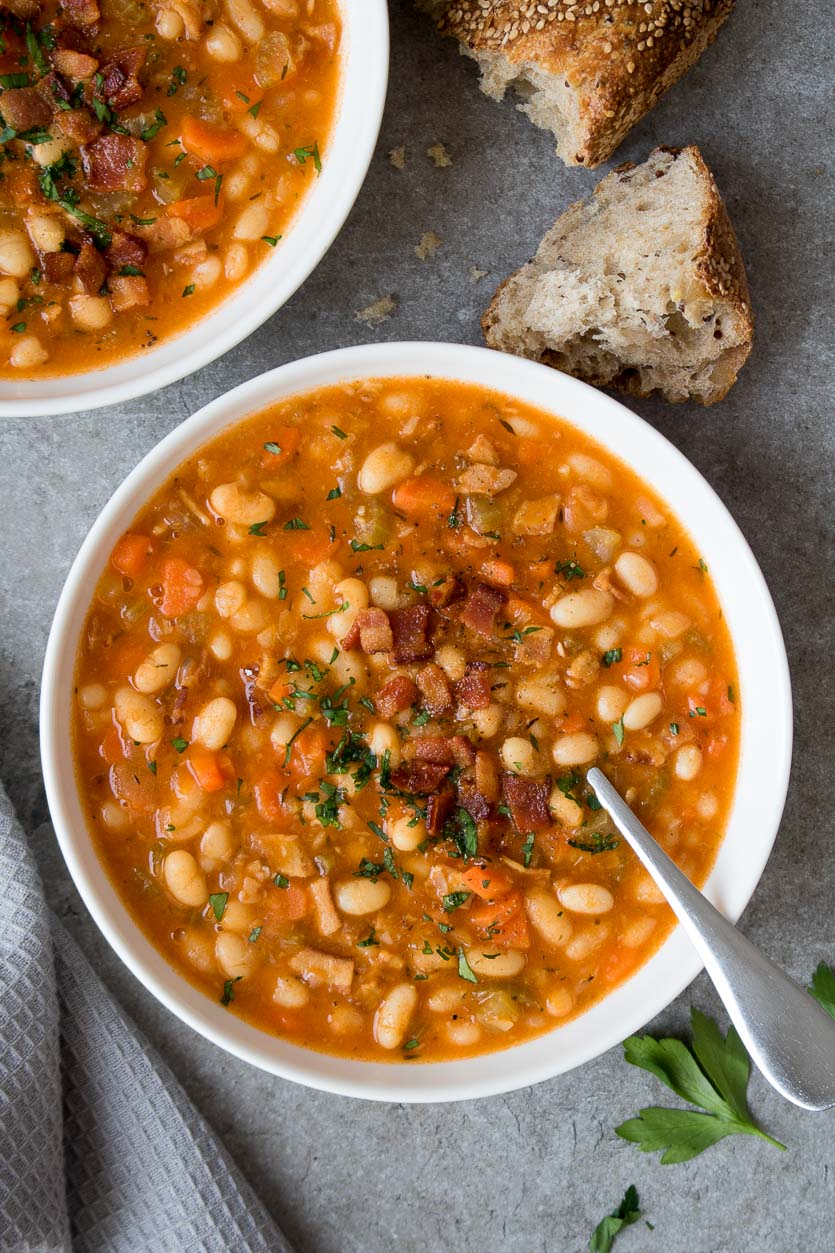
If you claim to not like tofu, you may want to think again. Crispy on the outside, fluffy on the inside, and covered in a sweet and salty sesame garlic sauce, this tofu recipe is absolutely delicious. Layered on a bed of rice, with a side of veggies, and topped with crunchy green onions, these sesame tofu bowls are a hearty gluten-free, vegetarian, and vegan meal.

Sesame Tofu Bowls

I’ve been cooking with tofu a lot lately and I’ve been absolutely loving how versatile of an ingredient it is. From savory to sweet, grilled to fried to scrambled, and soft to crispy, there are so many different ways to cook tofu. Not to mention, compared to other protein sources, it’s relatively inexpensive and can easily be used for breakfast, lunch, or dinner making it a great kitchen staple.

How to Make Crispy Sesame Tofu:

While tofu may be intimidating to work with if you’ve never cooked it before, it’s actually very easy to prepare.

  1. Use extra-firm tofu. For the best results, use extra-firm tofu and remove as much excess water as possible. The more liquid you can remove from your block of tofu the crispier it will be.
  2. Add a little cornstarch. Tossing the tofu in cornstarch before cooking helps to add extra crispiness to the tofu pieces and more texture to every bite.
  3. Pan-fry it. While you can certainly cook the tofu in the oven, I think pan-frying the tofu in sesame oil creates the best texture and adds flavor at the same time.
  4. Cover it in sesame sauce. A simple combination of sesame oil, garlic, ginger, vinegar, and honey, creates a sweet, savory, and slightly sticky sesame sauce to coat the tofu.
  5. Serve it over rice with veggies of your choice. While you can certainly enjoy the sesame tofu on its own, it pairs perfectly with rice and you can add your favorite vegetable for a boost of fiber; cabbage, carrots, and broccoli work particularly well.

Sesame Tofu

Pan-Fried Sesame Garlic Tofu

These sesame tofu bowls work equally well for lunch or dinner, or as a vegetarian meal prep idea. Once cooked and assembled, these bowls will store well in the fridge for up to 5 days. While I added some shredded cabbage and carrots to my bowls, you can add any raw or cooked vegetables that you enjoy.

More Healthy Tofu Recipes:

  • Tofu and Broccoli Bowls
  • Tofu Coconut Curry
  • Sheet Pan Tofu and Veggies
  • Peanut Tofu Noodles

Lemon Garlic Chicken Thighs

Published on April 7, 2022 by Stephanie Kay

Made with fresh lemon, garlic, oregano, thyme, and boneless chicken thighs, this lemon garlic chicken thighs recipe is bursting with flavor. Not only is the chicken moist and juicy but it’s quick and easy to cook making it perfect for a healthy weeknight meal.

Garlic Lemon Chicken Thighs

Ingredients for Lemon Garlic Chicken Thighs

Chicken Thighs: The star of this lemon garlic show. While the recipe calls for boneless and skinless chicken thighs, you are welcome to use bone-in and skin-on chicken thighs if you prefer, however, you’ll need to adjust the cooking time as they will take longer to cook.

Lemon: A combination of fresh lemon juice and lemon zest provides the perfect lemony taste. I don’t recommend using lemon concentrate as it simply won’t provide the same balance of flavor.

Garlic: A generous amount of pungent garlic helps to balance the acidic and citrusy lemon taste. Although you can use garlic powder, fresh garlic will provide the best results.

Chicken Broth: A little chicken broth helps to create the lemon garlic sauce. You can use chicken stock if needed, and feel free to add a splash of white wine if you want to take the flavors to the next level!

Thyme and Oregano: The addition of fresh thyme and oregano adds some fragrance to the sauce.

Salt and Black Pepper: A dash of the essentials to help balance out the seasoning and a sprinkle of fresh parsley to serve.

How to Cook Juicy Chicken Thighs

These lemon garlic chicken thighs are juicy and bursting with flavor thanks to a two-part cooking process and a simple sauce.

  1. Start by searing the chicken. By searing the chicken in a cast-iron skillet, or a heavy bottom pan, you can lock in the juices of the chicken thighs to help ensure they are tender and juicy.
  2. Prepare the sauce. The combination of lemon juice, garlic, herbs, and chicken broth creates a simple sauce that not only adds loads of flavor but helps to add moisture to the chicken thighs at the same time.
  3. Roast the chicken in the sauce. By finishing the chicken thighs in the oven with the lemon garlic sauce you can ensure they are cooked to perfection and capture all of the chicken juices for additional moisture and flavor.

I made this recipe with boneless chicken thighs, but you could certainly make it with bone-in and skin-on chicken thighs, chicken drumsticks or thighs, or even chicken breasts if you prefer.

If using bone-in and skin-on chicken thighs, increase the cooking time in the pan to roughly 8-10 minutes per side, and then transfer to the oven to roast for 15-20 minutes or until the juices run clear.

If using chicken drumsticks or chicken thighs, increase the cooking time in the pan to roughly 8-10 minutes per side, and then transfer the drumsticks to the oven to bake for 15-20 minutes or the bone-in chicken thighs for 20-25 minutes.

If you use chicken breasts, cook them in the pan for 5-6 minutes per side until golden but not completely cooked through before transferring them to bake in the oven for 15-20 minutes or until they reach an internal temperature of 165°F.

What to Serve with Chicken Thighs

Chicken thighs are a great source of protein, therefore, serving them with a source of carbohydrates and fiber will help to create a well-balanced meal. I think these lemon garlic chicken thighs would taste great along with the following combinations of complex carbohydrates and vegetables:

  • Pasta + Spinach
  • Potatoes + Asparagus
  • Rice + Green Beans

If you’d prefer to keep the dish low carb, skip the addition of pasta, potatoes, or rice, and simply pair the chicken with a side of vegetables or a salad.

More Chicken Thigh Recipes:

  • Cilantro Lime Chicken Thighs
  • Honey Mustard Chicken Thighs
  • Lemon Pepper Chicken Thighs

Lemon Poppy Seed Muffins

Published on April 3, 2022 by Stephanie Kay

Made with fresh lemon juice, lemon zest, and yogurt, these healthy lemon poppy seed muffins are light, fluffy, and bursting with zesty citrus flavor. With an optional lemon glaze, these lemon muffins can easily be enjoyed as a simple breakfast or sweet treat and are a healthy option the whole family will enjoy.

Lemon Poppy Seed Muffins

What You’ll Need for Lemon Poppy Seed Muffins

While traditional lemon muffins are made without yogurt, I opted to add yogurt to this recipe in an effort to add a small boost of protein and a bit of moisture at the same time. Here’s what you’ll need to make them:

  • Flour: All-purpose flour will give you the best results. If you want to make them gluten-free, it’s best to use 1-to-1 gluten-free flour, I wouldn’t recommend using almond or coconut flour in this recipe.
  • Lemon: Be sure to use fresh lemon juice and fresh lemon zest, lemon concentrate won’t provide the same lemon flavor.
  • Yogurt: It’s best to use plain yogurt for these lemon poppy seed muffins because Greek is a little too thick. If you must use Greek yogurt, you’ll need to add a bit of extra milk to loosen the batter and, while I used unsweetened in my recipe, you could certainly use vanilla yogurt for an extra punch of flavor. You can also use sour cream if you don’t have any yogurt on hand.
  • Eggs: This recipe calls for 2 whole eggs, if you want to make the muffins egg-free, you can replace the eggs with a flax egg or chia egg instead.
  • Butter: A little bit of butter paired with the yogurt gives these muffins the perfect level of moisture.
  • Sugar: While you could use honey or a sugar alternative, I find white sugar works the best in these muffins and the nutrition differences between sweeteners are in fact minimal, so don’t worry about that. Plus, for an extra touch of sweetness, you can add a simple glaze to these lemon muffins.
  • Poppy Seeds: While these are technically optional, you can’t make lemon poppy seed muffins without poppy seeds!

To Make them Gluten-Free: Replace the all-purpose flour with 1-to-1 gluten-free flour.

To Make them Dairy-Free: Replace the yogurt with coconut yogurt and use olive oil instead of butter.

To Reduce the Sugar Content: Omit the glaze completely as the muffins are incredibly tasty without it.

How to Make Lemon Poppy Seed Muffins with Yogurt

These muffins are incredibly easy to make and come down to 5 primary steps:

  1. Combine the dry ingredients. Add the dry ingredients; flour, baking powder, baking soda, salt, and poppy seeds, to a mixing bowl and stir to combine.
  2. Combine the wet ingredients. Add the wet ingredients (and sugar) to a large bowl and stir until well combined. Adding sugar to the wet ingredients helps to inhibit the gluten-forming proteins and provides a better texture to create fluffy and tender muffins.
  3. Mix the batter. Add the dry ingredients to the wet ingredients and mix until well combined and then divide the batter evenly across a muffin tin.
  4. Bake the muffins. Transfer the muffins to the oven and bake until light and fluffy.
  5. Add the lemon drizzle. Once baked, allow the muffins to cool completely before adding the lemon sugar drizzle!

If desired, you could also add some fresh or frozen blueberries to make them extra seasonal and add a bit of fiber at the same time.

How to Make them Bakery-Style Muffins

This recipe makes 12 large muffins or 24 mini muffins depending on what size you want them to be. If you want to make these bakery-style muffins, use large muffin liners, and fill each muffin cup with an additional 25% of batter to create a total of 9 muffins instead of 12, and increase the baking time by 3-5 minutes or until a toothpick comes out clean.

Healthy Lemon Poppy Seed Muffins

Are poppy seed muffins good for you?

Absolutely! Poppy seeds are primarily a source of fat, as well as some fiber and protein; one tablespoon of poppy seeds contains 3.7 grams of fat, 1.6 grams of protein, 2.5 grams of carbohydrate, and 1.7 grams of fiber(1). Poppy seeds are also a good source of B vitamins, manganese, calcium, magnesium, and iron. Including poppy seeds in muffins can help to increase the content of healthy fats, dietary fiber, and essential micronutrients.

How long do lemon poppy seed muffins last?

Once baked, these lemon poppy seed muffins store well in an airtight container or bag in the pantry or fridge for up to 5 days or in the freezer for up to 3 months.

How to reheat frozen poppy seed muffins?

If frozen, allow the muffins to thaw at room temperature before eating, or heat them in the microwave for about 30-45 seconds until warm and fluffy, or reheat them directly from frozen for 1-2 minutes.

More Healthy Muffin Recipes:

  • Apple Carrot Muffins
  • Mixed Berry Muffins
  • Banana Blueberry Muffins

Blackened Fish Tacos

Published on March 27, 2022 by Stephanie Kay

If you’re a fan of fish tacos, trust me, you need to try this recipe. Made with flaky white fish pan-fried in blackening seasoning, layered with crunchy slaw, and topped with zesty cilantro avocado crema, this blackened fish tacos recipe is packed full of flavors and textures, while being quick and easy to prepare.

Blackened Fish Tacos

What is blackened fish made of?

Blackened fish is made of blackening spice using the blackening cooking method. Blackening spice is a Cajun seasoning made of a combination of spices and herbs with a spicy taste, while blackening is a cooking method, popular in Cajun cuisine, that involves dipping fish in butter, before coating it in blackening seasoning and cooking it in a very hot cast-iron skillet.

Traditional blackening spice is a combination of salt, garlic powder, onion powder, oregano, thyme, peppercorns, and a bit of chili pepper, however, there are many different interpretations of blackening seasoning today, including variations with smoked paprika, ground cumin, and cayenne pepper. Regardless of the exact mixture, blackening seasoning is a punchy but not too spicy seasoning that works well on just about everything from steak to tofu to chicken to seafood and is a great way to increase the flavor in fish tacos without hitting the deep fryer.

Blackening seasoning is one of my go-to spice mixtures when I want to create a lot of flavor without much effort. I suggest mixing a large batch of the seasoning and storing it in a jar for quick, easy, and flavorful weekday meals.

What type of fish is best for fish tacos?

While any firm white fish that can hold up over heat will work well in tacos, each fish will provide its own unique flavor and texture.

  • Cod: One of the most popular types of fish for tacos, especially deep-fried, cod is the traditional choice for Baja California-style fish tacos.
  • Haddock: Another popular fish for deep-frying, haddock is a lean fish that flakes nicely after cooking, which makes it great for blackened fish tacos.
  • Snapper: This lean and moist fish has a firm texture, which is great for grilling and pan-frying.
  • Mahi Mahi: With a fairly firm texture, although not quite steak-like, this fish is great for tacos and has a slightly sweet, mildly pronounced flavor.
  • Halibut: A great option for grilling or pan-frying as it has a steak-like quality.
  • Tilapia: While tilapia is not as firm as other white fish, it is an inexpensive fish that also works well in blackened fish tacos.

In addition to the above, any white fish local to your area will arguably work well, not to mention, that you can also make fish tacos with salmon or shrimp.

You can also use fresh or frozen fish for tacos, however, if you’re using frozen fish, ensure that it’s completely thawed before adding the seasoning and blackening it in the pan. If the fish is still frozen it will not cook well or yield the best texture or flavor results.

Regardless of what fish you choose, this blackened fish tacos recipe is a well-balanced meal that is complete with protein, fiber, healthy fats, and full of vibrant colors and flavors.

How to Make Blackened Fish Tacos

Blackened fish tacos are incredibly quick and easy to make and only require a few simple steps:

  • Combine the spices to create the blackening seasoning.
  • Gently pat the fish dry, sprinkle with blackening spice, and rub into the fish until well coated.
  • Heat a cast-iron skillet or heavy bottom pan with oil and cook the fish untiled blackened and flaky.
  • Add the blackened fish to wheat or corn tortillas and top with toppings of your choice.
  • Serve and enjoy!

Honestly, even the most beginner of cooks can easily prepare blackened fish and create a delicious and healthy taco dish that is impressive enough to feed a crowd!

Blackened Fish Taco

Toppings for Blackened Fish Tacos:

As with any taco recipe, there are so many toppings you can add, however, some of my personal favorite toppings for fish tacos include:

  • Avocado crema (a mixture of avocado, sour cream, garlic, and cilantro)
  • Guacamole
  • Cabbage slaw
  • Shredded cabbage
  • Fresh cilantro
  • Pickled red onion
  • Cotija cheese
  • Sliced jalapenos
  • Mango salsa
  • Tomato salsa
  • Pico de Gallo
  • Diced tomatoes
  • Baja Sauce (a mixture of peppers, parmesan cheese, spices, and mayonnaise)

In addition to tacos, blackened fish works well as a main course, on a bed of rice, or topped on a salad. Not to mention, the fish can be made ahead of time and stored in an airtight container in the fridge, so it also makes a great meal prep idea.

Is blackened fish high in sodium?

The sodium level of blackened fish depends on the salt content of the blackening seasoning. Fortunately, when you make homemade blackening season, this is highly adaptable, and you can adjust the salt content to meet your personal needs. This recipe contains 208.1mg of sodium per 2-ounce portion of fish and 231.8mg of sodium per taco.

More Healthy Blackened Fish Recipes:

  • Grilled Cajun Shrimp Tacos
  • Blackened Shrimp
  • Blackened Salmon with Avocado Salsa

How To Add Protein to Oatmeal

Published on March 24, 2022 by Stephanie Kay

Oatmeal is a healthy breakfast staple but without sufficient protein, it can leave you hungry within a couple of hours. By increasing the protein content of your oatmeal you can help to increase satiety, increase feelings of fullness, and reduce cravings (1). From milk to yogurt to protein powder, here are some nutritious and delicious ways to add protein to oatmeal to create a hearty morning breakfast.

How to Add Protein to Oatmeal

9 Ways to Add Protein to Oatmeal

Boost the protein content of your oats with these 9 ways to add protein to oatmeal.

1. Make it with milk.

The simplest way to add protein to your oatmeal is to make it with milk instead of water. At 8.5 grams of protein per cup, dairy milk is a quick and easy way to boost the protein content of your oatmeal while adding a touch of sweetness and a creamy texture at the same time (2). Although almond milk or other milk alternatives will also work, they won’t add nearly as much protein and nutrition as dairy milk will. If you’re looking for a plant-based alternative, soy milk is the next best option as it provides 6 grams of protein per 1-cup serving (3).

2. Top it with a dollop of yogurt.

If you’ve never added yogurt to your oatmeal, I highly recommend giving it a try. Whether you add it on top of warm oatmeal or make overnight protein oats, it adds a big boost of protein and extra-creamy texture and tangy flavor to every bite. A 3/4 cup serving of plain yogurt contains 6 grams of protein, and you can also use Greek yogurt or skyr, which contain 17 and 18 grams of protein per 3/4 cup serving, respectively (4, 5, 6). Not to mention, you can play around with flavors and fruit, like this strawberry yogurt oatmeal, to make it an extra tasty and high-fiber breakfast.

3. Add egg whites.

You’ve probably not considered adding egg whites to your oatmeal but egg white oatmeal is a combination that works. The whites are where most of the protein is found in a single egg, although gram per gram the yolk contains more protein, and are low in fat and relatively low in calories (7, 8). Not only does adding egg whites to your oatmeal add a boost of protein but it makes them extra fluffy and filling too.

4. Add some cottage cheese.

While cheese might not be the first thing that comes to mind when you think of oatmeal, cottage cheese is a great source of protein that can easily be added to your oats. Cottage cheese contains 14 grams of protein per 1/2 cup serving and can be added to a warm bowl of oatmeal or cold overnight oats, much like yogurt (9). If you’re not a fan of the chunky texture of cottage cheese, just purée it in the blender to give it a smooth texture before adding it to your oats.

Infographic with 9 ways to add protein to oatmeal; milk, Greek yogurt, egg whites, nuts, seeds, cottage cheese, protein powder, as well as making savory oatmeal or using a combination of these ideas.

5. Add a sprinkle of seeds or nuts.

Although nuts or seeds are predominantly sources of fat, certain nuts contain higher levels of protein and a sprinkle on top of your oatmeal can help to add a little boost of protein and healthy fat at the same time. Hemp seeds, pumpkin seeds, chia seeds, peanuts, almonds, and pistachios rank as some of the highest protein seeds and nuts and can add a punch of protein and a bit of crunch to every bite (10).

6. Add a drizzle of nut butter.

Along with whole nuts and seeds, nut butters are an easy way to add protein to your oatmeal. Peanut butter tops the list as the highest protein nut butter, at 8 grams per 2-tablespoon serving, followed by almond butter, pistachio butter, cashew butter, and pecan butter (11). However, it is best to be mindful of your portion size when adding nuts butters to oatmeal, as they are considered low-volume foods, and their calorie content can add up rather quickly if you’re not paying attention.

7. Make savory oatmeal.

In addition to adding egg whites, you can increase the protein of oatmeal by making savory oatmeal instead of sweet oats. While many may think it strange, oats are in fact a whole grain that is not inherently savory or sweet – it’s all about what you do with them. Although adding fruits and sugar is one of the more popular ways to prepare rolled oats and steel-cut oats, they can also be taken the savory route with the addition of eggs, cheese, and veggies. Topping a bowl of milky oatmeal with a poached egg, sautéed mushroom, greens, and a sprinkle of cheese can easily create a bowl of oatmeal with over 20 grams of protein.

8. Stir in some protein powder.

Although protein powder should always be considered a supplement to a healthy diet and not a replacement for one, at an average of at least 15 grams of protein per 1-scoop serving, protein powder is a convenient way to boost the protein content of your oatmeal (12). In fact, protein powder can be used in many ways including warm oatmeal and overnight oats, but with so many varieties to choose from, it’s best to learn how to pick the best protein powder for your nutritional needs and dietary style. Be it whey or vegan, chocolate, vanilla, or strawberry, protein powder can increase the protein content, sweetness, and flavor of oatmeal.

9. Add a combination of the above.

If really want to increase the protein content of your oatmeal be sure to use a combination of the above ideas. By cooking your oatmeal with milk, adding a dollop of Greek yogurt on top, and a drizzle of peanut butter, you can easily add over 30 grams of protein per bowl and create a protein-packed breakfast that will keep you full all morning long.

High Protein Oatmeal Recipes:

If you’re looking for ideas or inspiration, here are a few high-protein oatmeal recipes you can try:

  • Egg White Oatmeal
  • Strawberry Oatmeal
  • Savory Oatmeal Bowl
  • Protein Overnight Oats
  • Lemon Blueberry Overnight Oats

The Bottom Line

From milk to yogurt to egg whites, there are plenty of ingredients and ways to add protein to oatmeal. A high-protein breakfast has been shown to increase satiety levels, increase feelings of fullness, help to reduce cravings, as well as support muscle building, tissue repair, and the maintenance of lean muscle mass. For the best results, be sure to use a combination of these protein-boosting tips to help create a protein-packed bowl of oatmeal that will keep you fuelled and full for the day ahead.

Shrimp Fettuccine Alfredo

Published on March 17, 2022 by Stephanie Kay

When you think of fettuccine alfredo you may think of a rich dish filled with heavy cream, but an authentic fettuccine alfredo is made with only three ingredients and contains no cream at all! This shrimp fettuccine alfredo is a take on the classic Italian dish, complete with a little boost of protein, and is ready in less than 20 minutes making it a great healthy weeknight dinner.

Fettuccine Alfredo with Shrimp

What is the origin of Alfredo?

Fettuccine alfredo is most definitely a comfort food; long ribbons of pasta are covered in a velvety sauce, however, the authentic recipe is much simpler than people may think. While many consider fettuccine alfredo an American dish, alfredo originated in Italy and, rumor has it, was created by Alfredo Di Lelio. Traditionally known as Fettuccine all’Alfredo, the original dish contains no cream, as the traditional Roman recipe is made with only pasta, butter, and cheese. While American versions of fettuccine alfredo commonly use cream to thicken the sauce, the creamy texture of a traditional alfredo sauce actually comes from the emulsion of starchy pasta water and Parmigiano-Reggiano cheese, a simple cooking technique that creates a silky texture and creamy sauce.

How to Make Shrimp Alfredo Pasta

While making homemade alfredo may seem intimidating, it’s much easier than you may think. If you can cook pasta, melt butter and cheese, and toss things together, you can easily make this classic dish! Here’s what you’ll need to do:

  • Cook the pasta. In a large pot of boiling, well-salted water, cook the fettuccini noodles to al dente or as per the package directions.
  • Cook the shrimp. While the noodles are cooking, cook the shrimp. In a large pan, warm a bit of olive oil and cook the shrimp for 1-2 minutes per side until pink. Be careful to not overcook them as they will cook a bit more once you return them to the pasta.
  • Prepare the alfredo sauce. Once you’ve cooked the shrimp, prepare the alfredo sauce. Add a few spoonfuls of the pasta cooking water to the pan and bring it to a simmer. Then add knobs of butter, allowing it to melt completely before adding more, and whisk it as it melts to incorporate it with the pasta water. Once you’ve added all the butter, add the freshly grated parmesan cheese, in batches, until you’ve reached a smooth and creamy texture. Taste and adjust seasoning with salt and pepper as needed.
  • Toss the pasta in the sauce. Once the pasta is cooked, drain it to remove excess water, then transfer it to the pan with the alfredo sauce and gently toss it to combine.
  • Add the shrimp. Once the pasta and sauce are well combined, return the cooked shrimp to the pan, gently tossing to coat them in the sauce.
  • Serve and enjoy! For optimal flavor and texture, the shrimp alfredo pasta is best served immediately. Feel free to add an extra sprinkle of parmesan cheese, black pepper, and/or garnish of fresh parsley if you like.

What to do with leftovers?

Should there be any, leftover shrimp fettuccini alfredo can be stored in an airtight container in the fridge for up to 3 days.

Can you freeze shrimp fettuccine alfredo?

Yes, shrimp fettuccine alfredo can be frozen in an airtight container for up to 3 months.

Can you reheat shrimp fettuccine alfredo?

Yup. To reheat leftover shrimp alfredo, add the pasta to a large pan on low-medium heat and add splashes of water, stirring consistently, to loosen up the sauce as it cooks until the pasta is warm and the alfredo sauce has a creamy texture.

Alfredo with Shrimp

What proteins go with Alfredo?

While this shrimp alfredo recipe uses shrimp, for obvious reasons, alfredo pasta pairs well with many different protein sources. Here are my top protein recommendations to pair with alfredo:

  • Steak
  • Pork chops
  • Pork tenderloin
  • Bacon
  • Salmon
  • Lobster
  • Clams
  • Mussels
  • Scallops
  • White fish

While truly any of the above protein sources will pair nicely, I think the freshness and lightness of this no-cream alfredo sauce pairs particularly well with fish or shellfish.

What is the best side dish for pasta?

Pasta is a source of complex carbohydrates which, typically, contains a source of fat in the form of oil, butter, or cheese, and often contains protein in the form of meat or fish, therefore, pairing pasta with a side dish of vegetables can help to create a more well-balanced meal by increasing the fiber and micronutrient content. Some high-fiber side dishes would include:

  • Green salad
  • Roasted broccoli
  • Grilled asparagus
  • Steamed green beans

If you’ve yet to try making an authentic homemade fettuccine alfredo, I definitely suggest you give it a go! Not only is it delicious but once you’ve mastered the basics you can take your own twist on the dish, much like I did with high-protein shrimp fettuccine alfredo.

More Pasta Recipes:

  • Scallop Pasta with Garlic and Tomatoes
  • Ricotta Spinach Pasta
  • Tomato, Spinach and Bacon Pasta

Serving Size vs. Portion Size: What’s the Difference?

Published on March 17, 2022 by Stephanie Kay

The terms serving size and portion size are often used interchangeably; however, they are not the same thing, and understanding the difference between them can help to bring some clarity to your food choices. Here’s a breakdown of the definition of serving size and portion size, the differences between them, as well as an explanation of how to determine portion sizes and how to convert serving sizes to portion sizes.

A serving size bowl of pasta and a portion size bowl of pasta

Table of contents

  • What’s the difference between serving size and portion size?
  • How to Determine a Portion Size
  • Converting Serving Sizes into Portion Sizes

What’s the difference between serving size and portion size?

A serving size is the amount of food listed on a packaged food’s nutrition facts label, while a portion size is how much food you choose to eat at one time.

Serving sizes are standardized measurements; listed in common household measurements such as cups or tablespoons, followed by the metric amount in grams, and are used to quantify nutrition data for comparative purposes (1, 2). The serving size tells you the quantity of food used to calculate the numbers in the nutrition facts table, and is not necessarily the suggested quantity of food you should eat.

By checking the serving size on a label, you can understand how many servings a package of food contains, how much food is required to consume the listed calories and nutrients, and compare nutrition information on different products.

A portion size is how much an individual chooses to eat at one time, which may be more or less than a serving size. Although some health organizations, including the FDA, have changed serving sizes to more closely reflect the amount of food people typically eat, it does not always match.

For instance, if the serving size on a package of ice cream is a 1/2 cup but an individual chooses to eat 1 cup of ice cream, although they are eating one portion of ice cream, they are in fact consuming 2 servings.

Remember, the serving size on a label is not a recommendation for how much you should eat; it is a standardized measurement to be used for data and comparative purposes.

Infographic explaining the differences between serving sizes and portion sizes.

How to Determine a Portion Size

There are many different ways to determine exactly how much you should eat, from calorie counting to macro counting; however, a simple and effective way to estimate portion sizes is to use your hand (3). Using your hand as a tool can help you estimate portion sizes for different foods and manage your total calorie intake to help ensure you aren’t eating too little or too much. Your hand is a great portion control tool because it is proportionate to your body, its size never changes, it’s always with you, and there is no weighing or measuring required. The hand portion method can be used for different foods as follows:

  • 1 portion of protein = 1 palm
  • 1 portion of carbohydrates = 1 fist
  • 1 portion of fruits and vegetables = 1 fist
  • 1 portion of fat = 1 thumb
Serving sizes vs portion sizes with your hand.

Estimating Portion Sizes with Your Hand

Converting Serving Sizes into Portion Sizes

Once you’ve determined your portion size, you can use the information from the serving size on the nutrient facts label to determine the nutritional value of your portion size. By doing a little math, you can determine exactly how many calories and how much fat, carbohydrate, fiber, and protein you are consuming in your chosen portion.

Infographic of serving sizes vs portion sizes on a nutrition facts label.

For example, if the serving size of a cracker brand is 4 crackers according to the nutrition facts labels and includes 70 calories, 3 grams of fat, 10 grams of carbohydrate, 1 gram of fiber, and 1 gram of protein, but an individual chooses to eat 12 crackers, which is 3 times the serving size, the nutrition information of the portion size can be determined by multiplying by 3. Therefore, the nutritional value of their portion size would be 210 calories, 9 grams of fat, 30 grams of carbohydrate, 3 grams of fiber, and 3 grams of protein.

Nutrition Data 1 serving (4 crackers)1 portion (12 crackers)
Calories70 calories210 calories
Fat3.0 grams9.0 grams
Carbohydrate10.0 grams30.0 grams
Fiber1.0 grams3.0 grams
Protein1.0 grams3.0 grams

All nutrition data from USDA multigrain crackers.

The Bottom Line

Serving sizes and portion sizes are not the same. A serving size is a standardized measurement found on a product’s nutrition facts label, while a portion size is the amount of food an individual chooses to eat. Serving sizes are not designed as recommended portion sizes but rather for comparative purposes or to determine the nutrition information of the portion size consumed.

Morning Glory Baked Oatmeal

Published on March 13, 2022 by Stephanie Kay

If you love a morning glory muffin, you’re going to love this morning glory baked oatmeal. Filled with apples, carrots, raisins, coconut, walnuts, cinnamon, and ginger, this baked oatmeal recipe is a hearty and heart-warming breakfast packed full of flavor.

Morning Glory Baked Oatmeal

Baked oatmeal continues to be one of my favorite make-ahead breakfast options. Not only are there endless flavors to choose from but it’s easy to make, stores well in the fridge for days, and can be enjoyed hot or cold making it perfect for a quick weekday breakfast.

How to Make Morning Glory Baked Oatmeal

This morning glory baked oatmeal was inspired by one of my favorite muffin flavors, the morning glory muffin. Made with a little bit of everything, this baked oatmeal is packed full of flavors, while being a well-balanced breakfast that is packed full of nutrients in a single dish. Here’s what you’ll need to do:

  • Combine the dry ingredients. In a bowl, combine the rolled oats, raisins, shredded coconut, walnuts, sugar, spices, baking powder, and a pinch of salt.
  • Combine the wet ingredients. In a separate bowl, add the milk, juice, egg, butter, and vanilla extract and stir to combine. Then add the shredded carrot and apple and stir again to combine.
  • Mix the dry and wet ingredients. Add the milk mixture to the oat mixture and stir until well incorporated, then transfer the mixture to a prepared baking dish.
  • Baked until golden brown. Transfer the baking dish to the oven and cook until the oats are set and golden brown.
  • Serve, add toppings, and enjoy! The baked oatmeal can be served immediately as is or with additional toppings such as maple syrup, honey, or yogurt. It can also be made ahead of time, cooled, and stored in an airtight container for up to 5 days.

While the traditional morning glory recipe calls for walnuts, you can use pecans, almonds, or another nut if you prefer. Not to mention, you can also add a pinch of nutmeg and, if you’re using a fresh orange, feel free to add a bit of orange zest for an extra boost of flavor.

How to Make them Gluten-Free: Use certified gluten-free oats.

How to Make them Dairy-Free: Swap the milk for almond milk and use coconut oil instead of butter.

How to Make them Egg-Free: Omit the egg and use a flax egg instead: mix 1 tablespoon of ground flaxseed meal with 3 tablespoons of water, let sit for 10 minutes to thicken, and then add to the oat mixture.

How to Make them Sugar-Free: You won’t be able to make this recipe completely sugar-free as the raisins, shredded coconut, carrots, apples, milk, and pineapple juice all contain natural sugars, however, you can omit or reduce the brown sugar to reduce the content of added sugars if you like.

How to Serve Baked Oatmeal

Once baked, baked oatmeal can be served warm or cold, on its own, or topped with a bit of milk or yogurt for additional protein. I personally enjoy this morning glory oatmeal cold with a generous dollop of Greek yogurt, a drizzle of maple syrup, and a sprinkle of cinnamon. It feels like you’re having a healthy carrot cake for breakfast!

Morning Glory Oatmeal Bake

Is baked oats the same as oatmeal?

Baked oats and oatmeal are very similar in nature; however, their preparation method and texture are very different. While there are many different recipes and versions of baked oats, they are essentially a cake-like version of a bowl of oatmeal, while still being good for you.

Is baked oatmeal healthy?

Absolutely! Oats are some of the healthiest whole grains on earth and baked oatmeal is simply another way to prepare a traditional bowl of oatmeal or porridge. Instead of cooking the oats in a pot on the stovetop, with the help of some leaving agents like baking powder and salt, they are simply baked in the oven. The process of baking oats in the oven does not diminish their nutritional value.

Can you make baked oats with steel-cut oats?

While you can make baked oats with steel-cut oats, it is not recommended. Not only do steel-cut oats take longer to cook but they do not provide the same texture as rolled oats or old-fashioned oats. I do not recommend using steel-cut oats in a baked oatmeal recipe.

Can you reheat baked oats the next day?

Yes, baked oats can easily be reheated the next day in the oven or microwave. To reheat them in the oven, warm the oven to 350°F, place the oats in an oven-proof dish, cover with foil, and reheat for 20 minutes. To reheats them in the microwave, place the baked oats in a microwave-safe dish and warm for 1 minute on high or with additional 30-second increments until warm.

More Baked Oatmeal Recipes:

  • Pumpkin Baked Oatmeal
  • Apple Pie Baked Oatmeal
  • Mixed Berry Baked Oatmeal
  • Banana Bread Baked Oatmeal
  • Almond Croissant Baked Oats

Is Beef Jerky Healthy?

Published on March 10, 2022 by Stephanie Kay

Beef jerky is said to be a high-protein, low-carb, and moderate-calorie snack but is beef jerky actually healthy? Here is a review of beef jerky; what it is, how it’s made, the nutrition facts and health benefits of beef jerky, and things to consider when buying beef jerky.

A pile of beef jerky on a wood surface.

What is Beef Jerky?

Beef jerky is made from lean beef meat that has been cut into strips and dried to create a shelf-stable form of meat. The word jerky is actually derived from the word “charqui” (ch’arki), which describes dried meat strips, jerky may be produced using a combination of curing, smoking, and drying procedures. (1)

Traditionally, jerky was made from the sun, wind, and smoke of fire as a method to preserve meat without refrigeration. Today, most jerky products are made from a combination of curing, smoking, and drying procedures, and are often flavored with a mixture of seasonings.

Beef Jerky Nutrition and Benefits

Beef jerky is predominantly a source of protein with a moderate amount of fat and very little carbohydrate, sugar, and fiber.  On average, one ounce (28 grams) of beef jerky contains (2):

  • Calories: 116
  • Fat: 7.3 grams
  • Protein: 9.4 grams
  • Carbohydrates: 3.2 grams
  • Sugar: 2.6 grams
  • Fiber: 0.5 grams

In addition to being a high-protein and low-carb food, beef jerky is also rich in many vitamins and minerals. Per one-ounce (28 grams) serving, beef jerky contains (2):

  • Zinc: 21% of the Daily Value (DV)
  • Vitamin B12: 12 % of the DV
  • Phosphorus: 9% of the DV
  • Folate: 9% of the DV
  • Iron: 8% of the DV
  • Copper: 7% of the DV
  • Choline: 6% of the DV
  • Selenium: 5% of the DV
  • Potassium: 4% of the DV
  • Thiamine: 4% of the DV
  • Magnesium: 3% of the DV
  • Riboflavin: 3% of the DV
  • Niacin: 3% of the DV

The exact macronutrient and micronutrient composition of beef jerky will vary based on the cut of meat and seasonings used.

Infographic with beef jerky nutrition facts per 1 ounce serving; 116 calories, 9.4 grams of protein, 7.3 grams of fat, 3.2 grams of carbohydrates, 2.6 grams of sugar, and 0.5 grams of fiber.

Benefits of Beef Jerky

High in Protein

Made with lean cuts of meat, beef jerky is high in protein while being low in carbohydrates and moderate in fat. A mere one-ounce serving of jerky contains 9 grams of protein, while it only contains 3 grams of carbohydrates and 2.5 grams of sugar.

Low in Sugar

Compared to many other portable snacks, beef jerky is very low in sugar. Although some brands do contain added sugar, on average, a one-ounce serving of jerky contains a mere 2 grams of sugar, which is far less than the average granola bar, flavored yogurt, or trail mix.

Rich in Micronutrients

In addition to being high in protein, beef jerky is also a dense source of micronutrients, especially zinc, vitamin B12, phosphorus, folate, and iron.

Convenient

One of the biggest benefits of beef jerky is its convenience. Given its dehydrated and, therefore, shelf-stable, beef jerky is a convenient and portable no-cook protein source and makes a great snack for travel, hiking, camping, or other instances when refrigeration is not an option.

Other Things to Consider

Sodium Content

Because it’s cured, jerky is high in sodium. Although brands will vary, on average, a one-ounce serving of jerky contains 506 milligrams of sodium, or roughly 22% of the recommended daily amount, which is 2,300 mg per day. (3)(4) Whenever possible, look for brands and flavors with lower sodium content.

Processing

Beef jerky is considered a processed form of red meat and some studies have found a correlation between the consumption of red meat and processed meat and higher risks of heart disease and cancer. (5)(6)(7)(8)(9) However, the studies on processed meat consumption are all observational in nature and, therefore, simply show that people who eat processed meat are more likely to get these diseases, they can not prove that processed meat caused them. In general, the evidence that links both processed and unprocessed meat to disease is weak and low certainty.

Other Ingredients

It’s also important to consider the ingredients used to make beef jerky. Although brands will vary widely, some may also contain unnecessary additives or common food allergens, such as soy or gluten, which may be of concern to some individuals.

Is Beef Jerky Good For Weight Loss?

Beef jerky can certainly be consumed as part of an effective weight-loss strategy. Protein helps to boost satiety hormones and reduce hunger hormones and increase the body’s thermic effect of food, which have all been shown to be beneficial for weight loss. (10)(11)(12) When total calories are controlled for and when consumed in a calorie deficit, beef jerky is a high-protein snack that can help to support a goal of weight loss.

Is Beef Jerky a Healthy Snack?

Beef jerky is most definitely a healthy snack. Portable, high in protein, and low in sugar, beef jerky is a nutritious and very convenient healthy snack and is a great option whether you are at home, at the office, or on the go.

How to Pick a Healthy Beef Jerky

Here are a few tips to consider when buying beef jerky:

  1. Read the Ingredients: Be sure to read the ingredients and look for options with real food ingredients such as beef, salt, and spices.
  2. Look for a High Protein Content: Look for options with the highest protein content per serving, and lower fat and carbohydrate content.
  3. Aim for a Lower Fat Content: Although not essential, opting for jerky made from leaner cuts of beef can help to keep total fat content, and therefore calorie content down, making it a more optimal choice when looking to support a goal of weight loss.
  4. Keep it Low Sodium: While salt is an essential ingredient in jerky production, consumed in excess it is less than ideal. Look for options with less than 500mg of sodium per one-ounce serving.
  5. Look for Less Sugar: While small amounts of sugar can add texture and taste, it’s best to limit it overall. Look for options with less than 3 grams of sugar per one-ounce serving.

Although it may not work perfectly every time, simply make the best choice with the options that are available.

Alternatives to Beef Jerky

In addition to beef, jerky can be made out of a wide variety of proteins. While the most popular options include beef, pork, and turkey, jerky can also be made from bison, elk, venison, and fish such as salmon and tuna. All of the options are highly nutritious choices and great alternatives to a classic beef jerky if you’re looking for a variety of jerky options.

The Bottom Line

Beef jerky is a high-protein and nutrient-rich snack that can most certainly be included in a healthy diet. Although beef jerky can be made at home, it is a portable and convenient snack that you can also find in grocery and convenience stores. When buying beef jerky, be sure to read the ingredients list and nutrition label and look for options made of whole foods that are higher in protein and lower in sodium.

Chicken Tortilla Casserole

Published on March 6, 2022 by Stephanie Kay

Filled with chicken, black beans, sweet potatoes, and layers of corn tortillas topped with cheese, this chicken tortilla casserole is a well-balanced and flavor-packed meal. Make this enchilada-inspired casserole on a busy weeknight and you’ll have plenty of leftovers for healthy meals for days to come!

Chicken Tortilla Casserole

How to Make Chicken Tortilla Casserole

This chicken tortilla casserole recipe is a cross between a chicken enchilada casserole and lasagne baked into a single dish. Here’s how to make it:

Prepare the chicken. Chicken is the primary source of protein in this casserole. Although the recipe calls for shredded chicken breasts because I find them quick to cook, using rotisserie chicken, leftover roast chicken, chicken thighs, or chicken legs would work just as well and add an extra depth of flavor to the dish.

Prep the veggies. Peel and dice the sweet potatoes and then add them to a baking sheet until partially cooked, chop and good the vegetables, and strain and rinse the black beans.

Make the sauce. This casserole is bound together by a vegetable-filled tomato sauce, which helps to increase the fiber and micronutrient content of the dish.

Layer the casserole. Once the chicken is shredded, sweet potatoes are cooked, black beans are strained and the sauce is ready, you can begin building the casserole. Fill a prepared baking dish with alternating layers of tortillas, sweet potatoes, black beans and sauce, and tortillas, chicken, and sauce until all of the ingredients have been used and the casserole dish is full.

Bake the casserole. Once prepared, the casserole can be transferred to the oven to bake.

Sprinkle with cheese. When the casserole is almost ready, remove it from the oven and cover the top with shredded Monterey Jack cheese or Harvati cheese. If you can find either of those, a sharp cheddar cheese would also work well.

Bake again. Return the casserole to the oven and bake until the cheese is melted and the top is golden brown.

Slice and serve! When the casserole is ready, slice and serve as is or with toppings of your choice.

What can I substitute for corn tortillas?

For the best results, I recommend using white corn tortillas, as they tend to be softer than yellow corn tortillas, which gives the casserole more structure and a better texture to hold it together. If you don’t have access to corn tortillas, flour tortillas will also work well.

Tortilla Chicken Casserole

What to serve with chicken tortilla casserole?

This easy, cheesy, chicken tortilla casserole satisfies like comfort food while being a healthy and well-balanced meal complete with protein, fiber, and healthy fats. The casserole can be served on its own, hot or cold, with a side dish and/or toppings. Topping and side dish suggestions include:

  • Sour cream
  • Salsa
  • Avocado
  • Guacamole
  • Fresh cilantro
  • Tortilla chips
  • Mexican rice
  • Green salad

Storage and Reheating

In the fridge. Once cooled, the casserole can be stored in the refrigerator in the original baking dish, covered with plastic wrap or aluminum foil, or in a separate airtight container for up to 5 days.

In the freezer. The casserole can be stored in an airtight container, whole or in individual portions, in the freezer for up to 3 months. If you prefer to freeze the casserole in the baking dish, ensure that it is tightly covered with aluminum foil and plastic wrap and then placed in a freezer-safe bag.

To reheat. For the best results, thaw and/or allow the casserole to come to room temperature and then transfer it to the oven at 350°F for 15-20 minutes or until warmed through. If you prefer to reheat it in the microwave, warm individual portions for 1-2 minutes or in 30-second increments until heated through.

More Healthy Casserole Recipes:

  • Chicken Burrito Casserole
  • Chicken Enchilada Casserole
  • Greek Chicken Casserole
  • Stuffed Pepper Casserole
  • Butternut Squash Casserole
  • Spaghetti Squash Casserole
  • Chicken Broccoli Rice Casserole

Pear Grilled Cheese

Published on February 27, 2022 by Stephanie Kay

Take your grilled cheese game to the next level with this brie and pear grilled cheese! Layered with crisp pear slices, creamy brie cheese, sweet honey, and zesty arugula, this simple sandwich is the perfect combination of flavors.

Brie and Pear Grilled Cheese

Are grilled cheese good for you?

First things first, grilled cheese is good for you. While grilled cheese has a bad reputation for being an unhealthy dish, the reality is, that grilled cheese is a recipe and by adapting the ingredients you use you can easily create a healthy and well-balanced meal. Although a classic American-style grilled cheese is made with refined white bread and processed cheese slices, by opting for higher-quality bread, such as sourdough, sprouted grain bread, or whole grain bread, and including real cheese you can quickly increase the overall nutritional value of any grilled cheese sandwich. Not to mention, by including vegetables and additional protein sources you can create a more macronutrient-balanced meal.

How to Make a Healthy Grilled Cheese

Making a healthy grilled cheese doesn’t need to be complicated, it’s all about reading labels and using real ingredients. Here’s what you need to make a healthy grilled cheese:

Good-Quality Bread: Opting for a higher-quality bread, such as sourdough, sprouted grain bread, or whole grain bread, can help to increase the fiber content and micronutrient content of a grilled cheese sandwich.

Real Cheese: Including a source of real cheese, made simply of milk, enzymes, cultures, and salt, will help to ensure you’re using a higher quality product with fewer additives and higher nutrient content.

Healthy Fat: Be sure to use healthy fat such as real butter or olive oil for the best flavor, texture, and nutritional value.

Veggies or Fruit: Including vegetables or fruit in a grilled cheese can help to increase the fiber and micronutrient content of the meal.

Additional Protein: While cheese does contain moderate amounts of protein, as do certain styles of bread, including an additional source of protein, such as sliced turkey or chicken, can help to increase the protein content of a grilled cheese sandwich.

What You’ll Need for a Brie and Pear Grilled Cheese

This healthy pear grilled cheese is super easy to make, here’s what you’ll need:

  • Bread
  • Butter
  • Brie cheese slices
  • Ripe pear slices
  • Arugula
  • Honey

I opted to use a multigrain bread for this grilled cheese simply because it’s what I had on hand, however, sourdough, French bread, and brioche would all work particularly well. For the best results, ensure that you use a ripe pear to add a natural touch of sweetness while adding a source of fiber at the same time.

How to Make it

Making pear grilled cheese is as easy as making classic grilled cheese, you just add slightly different ingredients! Here’s what you’ll do:

  1. Prep the bread. Spread each slice of bread with butter on one side.
  2. Layer with cheese and fillings. Flip the slices of bread over, layer one slice of bread with brie cheese slices, pear slices, and arugula, spread the other slice with honey, and close to create a sandwich.
  3. Grill it up! Place the sandwich in a pan or skillet on medium heat and cook to melt the cheese and until each side of the sandwich is golden brown.

Healthy Grilled Cheese with Pear

What cheese goes best with pears?

Pears go well with many different kinds of cheese. While I opted to use brie cheese in this healthy grilled cheese sandwich, pears also pair well with camembert, gorgonzola, goat cheese, cheddar, and gouda.

What can I add to my grilled cheese to make it better?

Whether you’re looking to boost the flavor content or the nutritional content of your grilled cheese, there are plenty of different things that you can add to grilled cheese. Here are some of my favorites:

  • Mustard
  • Mayonnaise
  • Jam or chutney
  • Hot sauce
  • Pesto
  • Pickles
  • Caramelized onions
  • Olives
  • Fresh herbs
  • Fruits
  • Vegetables
  • Fried egg
  • Deli meat
  • Bacon
  • Smoked salmon

Whether you choose to amp up your grilled cheese sandwich or follow my exact recipe for this pear grilled cheese, when you choose your ingredients with intention, grilled cheese can be a delicious and nutritious addition to any healthy diet.

More Grilled Cheese Recipes:

  • Goat Cheese Grilled Cheese

Bean and Bacon Soup

Published on February 6, 2022 by Stephanie Kay

A classic comfort dish, this bean and bacon soup is a healthy and heart-warming meal! Filled with all of the flavors of grandma’s home cooking, this fiber, and protein-packed soup works equally well as a main course or as a starter for lunch or dinner.

Bean and Bacon Soup Recipe

If you’re a fan of Campbell’s bean and bacon soup, you’re going to love this recipe! This homemade version is filled with all of the flavors without any funky added ingredients.

Is bean with bacon soup good for you?

Contrary to popular belief, homemade bean and bacon soup is healthy. Made with white beans, vegetables, chicken broth, and strips of bacon, bean soup with bacon is both a high-fiber and high-protein meal.

In fact, bacon is far more nutritious than people think. Bacon is a source of protein, B vitamins, selenium, phosphorus, and various other mineral and micronutrients (1). While bacon is higher in fat and, therefore, calories than other cuts of pork or meat, consumed in moderate amounts it can most certainly be included in a healthy and well-balanced diet.

By reading labels and choosing your ingredients with care, you can create a hearty soup that tastes just as good as it is good for you.

Best Beans to Use

For the best results, be sure to use dry beans for bacon and bean soup. Although you can certainly use canned beans if you’re in a pinch, dry beans provide a better texture and flavor to bean and bacon soup, not to mention, that they are much cheaper per serving. This recipe calls specifically for navy beans, however, you could easily use cannellini beans, great northern beans, or pinto beans if you prefer.

Best Bacon to Use

All styles of bacon, thick or thin, American or Canadian, classic or Maple, work well in the soup and give it the perfect balance of salty and savory in every bite. If you’re concerned about sodium content simply read the label and opt for low-sodium bacon.

Best Broth to Use

Homemade broth will always be the best tasting and, arguably, most nutritious option, however, there are many healthy broth brands available at grocery stores. I suggest using chicken broth or chicken stock for this recipe, as it provides the deepest flavor, however, a vegetable broth will also work if necessary. I do not recommend using water as it will leave the soup lacking flavor. If you’re concerned about sodium content, read the label and opt for a low-sodium chicken broth.

Bean Soup with Bacon

Storage and Reheating

If you want to make this bean and bacon soup ahead of time, or have leftovers, allow the soup to cool completely and then transfer it to an airtight container and store it in the fridge for up to 4 days or in the freezer for 3 months. To make grad-and-go meals easier, freeze the soup in individual portion containers as opposed to one large container.

To reheat from the fridge, transfer the soup to a pot on the stovetop on medium heat and cook for 5 minutes or until warm.

To reheat from the freezer, remove the container from the freezer, allow the soup to thaw completely, and then transfer it to a pot on the stovetop on medium heat and cook for 5 minutes or until warm.

The soup can also be reheated in the microwave; add the thawed soup to a microwave-safe container and reheat for 1 minute, with additional 30-second increments as needed, until warm.

Colder weather calls for hearty soups and that’s exactly what this bean and bacon soup is. With its thick and creamy texture, the soup has that stick-to-your-ribs kind of feeling and is an incredibly satisfying, satiating, and nourishing meal on a cold day.

More Bean Soup Recipes:

  • Spicy Black Bean Soup
  • Italian Sausage Soup
  • Butternut Squash, Kale, and White Bean Soup
  • Roasted Tomato and Bean Soup

Tempeh vs. Tofu: Which is Healthier?

Published on February 3, 2022 by Stephanie Kay

Tempeh and tofu are both sources of plant-based protein made from soy, and although similar in nature, their method of production and nutritional values differ. So, what’s the difference between tempeh and tofu? And which one is healthier? Here is everything that you need to know about tempeh vs. tofu: what they are, how they are made, their health benefits, and nutrition facts.

Close up image of tempeh vs. tofu.

Table of contents

  • What is tempeh?
  • What is tofu?
  • Tempeh vs. Tofu Nutrition
  • Calories
  • Protein
  • Fat
  • Carbohydrates
  • Fiber
  • Sugar
  • Vitamins & Minerals
  • Other Factors to Consider:
    • Taste
    • Texture
    • Cooking Method
    • Cost
  • So, tempeh vs. tofu: which one is healthier?

What is tempeh?

Tempeh is a cake-like product made by cooking and fermenting soybeans. To make tempeh, soybeans are soaked and boiled before being fermented with a piece of tempeh or genus Rhizopus. During fermentation, mold covers the beans and binds them together into a solid block, which is cut into smaller pieces (1, 2). This traditional Indonesian food has a nutty taste and dense texture. Although typically made from soybeans, tempeh can be made from just about any bean, grain, or seed.

Tempeh is a good source of fiber and plant-based protein and, thanks to the fermentation of the soybeans, is also a source of probiotic bacteria; however, unlike other fermented foods, tempeh cannot be eaten raw. It must be cooked before consumption, which may deactivate some of the beneficial bacteria.

What is tofu?

Tofu, also known as bean curd, is made by coagulating soy milk into solid white blocks in a process similar to cheese making. First, dried soybeans are soaked in water, crushed, and boiled to create soy “milk”, salt coagulants are then added to separate the curds from the whey, which is poured into molds to allow the whey to run off, resulting in soft cakes known as tofu (3).

Tofu can be made into extra-soft, soft, firm, or extra-firm cakes depending on the method of preparation. Similar to tempeh, tofu is a source of plant-based protein and fiber.

Tempeh vs. Tofu Nutrition

Both tempeh and tofu are relatively low in calories, sources of protein and fiber, and do not contain any sugar. Here is a comparison of a 100-gram serving of tempeh vs. tofu (4, 5).

NUTRITION PER 100 grams TEMPEHTOFU
Calories167 calories94 calories
Protein19.0 grams9.4 grams
Fat5.4 grams5.3 grams
Carbohydrate11.9 grams2.4 grams
Fiber8.3 grams2.4 grams
Sugar 0.0 grams0.0 grams

Calories

A 100-gram serving of tempeh contains 167 calories, while a 100-gram serving of tofu contains 94 calories, making tofu the lower-calorie option.

Protein

While both tempeh and tofu contain protein, tempeh contains more protein per serving. A 100-gram serving of tempeh contains 19.0 grams of protein, while a 100-gram serving of tofu contains 9.4 grams of protein.

Fat

Tempeh and tofu contain similar amounts of fat. A 100-gram serving of tempeh contains 5.4 grams of fat, while a 100-gram serving of tofu contains 5.3 grams of fat.

Carbohydrates

A 100-gram serving of tempeh contains 11.9 grams of carbohydrates, while a 100-gram serving of tofu contains 2.4 grams of carbohydrates, making tofu the lower-carb option. However, in both cases, fiber is the predominant form of carbohydrate.

Fiber

Both tempeh and tofu are good sources of fiber.  A 100-gram serving of tempeh contains 8.3 grams of fiber, while a 100-gram serving of tofu contains 2.4 grams of fiber, making tempeh the higher-fiber option.

Sugar

Neither tempeh nor tofu is a significant source of sugar; a 100-gram serving of tempeh and tofu both contain 0 grams of sugar.

Vitamins & Minerals

Given that tempeh and tofu are both made from soybeans, they have similar micronutrient profiles containing iron, calcium, riboflavin, niacin, magnesium, potassium, phosphorus, and manganese.  

Per 100-gram serving, tempeh contains 9% of the Daily Value (DV) of calcium, 15% of the DV of iron, 9% of the DV of potassium, and 21% of the DV of phosphorus; while firm tofu contains 43% of the DV of calcium, 15% of the DV of iron, 5% of the DV of potassium, and 15% of the DV of phosphorus (6, 7).

However, it is important to note that most store-bought brands of tofu are made with calcium and magnesium (8).

Infographic comparing tempeh vs tofu calories, protein, carbs, fat, texture, and flavor.

Other Factors to Consider:

Here are some other factors to consider in the tempeh vs. tofu debate.

Taste

Compared to tofu, tempeh has a much stronger taste. Tofu has a neutral taste and tends to absorb the flavors from the marinades and sauces it’s cooked in, while tempeh has an earthy, mushroomy, and nutty taste. Because tempeh is fermented, it has a lot of umami flavor, which also provides a savory, meat-like taste.

Texture

Tempeh is firm and grainy with a slightly chunky texture, while tofu has a smoother texture and is available in varying levels of firmness: soft, medium, firm, extra firm, and super firm.

Cooking Method

Both tempeh and tofu can be cooked in a wide variety of ways. Many recipes call for tempeh to be steamed first, which helps to kill the bacterial culture and add moisture, and then it can be fried, grilled, roasted, or baked. Tofu is incredibly versatile because it is available in so many different levels of firmness; softer versions can be added to smoothies, made into sauces, or used in desserts, while firmer versions can be fried, grilled, roasted, or baked. Both tofu and tempeh can be marinated before cooking for enhanced flavor.

Cost

Although brands will vary, gram per gram, tofu tends to be less expensive than tempeh.  Tofu averages between $0.50 and $1.00 per 100 grams, while tempeh averages between $2.00 to $3.00 per 100 grams.

So, tempeh vs. tofu: which one is healthier?

Tofu and tempeh are both good sources of vegetarian protein and fiber. Compared gram per gram, tempeh is higher in calories, protein, and fiber, while tofu is lower in calories and carbohydrates, and neither contains sugar. Nutritionally speaking, both tempeh and tofu are healthy options and are a good way to add vegetarian protein to any meal.

The Bottom Line

Tempeh and tofu are both products made from soybeans. Tempeh is made from cooked and fermented soybeans pressed into a cake, while tofu is made by curdling soy milk in a process similar to cheese making. Both tempeh and tofu are good sources of vegetarian protein, fiber, and micronutrients, and can be included in a healthy diet.

Tofu Coconut Curry

Published on January 30, 2022 by Stephanie Kay

Ready in less than 30 minutes, this vegan tofu coconut curry recipe makes a great weeknight meal! Not only is this Thai-inspired dish packed full of flavor, but the inclusion of tofu helps to add a nice boost of vegetarian protein to this delicious plant-based meal.

Thai Tofu Curry with Coconut Milk

What is tofu curry made of?

Tofu curry is a dish made of coconut milk, curry paste, tofu, and vegetables served over rice for a quick and easy weeknight meal. Tofu curry is a very versatile dish as you can use various types and colors of curry pastes, forms of tofu, full-fat or lite coconut milk, and any fresh or frozen vegetables that you enjoy or have on hand.

Ingredients for Tofu Coconut Curry

This quick and easy Thai-inspired tofu curry is made with simple store-bought ingredients to help cut down on prep time and get dinner on the table in a pinch. Here’s what you’ll need:

  • Tofu: Tofu is the primary vegetarian protein source in this tofu coconut curry. For the best texture, ensure that you press the tofu well before cooking to remove as much excess water as possible, which allows for a crispier exterior when cooked.
  • Curry Paste: Although you can certainly make your own curry paste from scratch, using a pre-made Thai curry paste can help to cut down on time without skimping on flavor. For this recipe, I used a red curry paste, however, you could certainly use a yellow or green curry paste if you prefer.
  • Coconut Milk: A can of coconut milk gives the broth its rich, luxurious, and creamy texture. The recipe calls for regular coconut milk, however, you can use lite coconut milk if you want to reduce the fat or calorie content of the recipe.
  • Onion, Garlic, and Ginger: Some aromatics for fragrance, freshness, and flavor.
  • Fish Sauce: A splash of fish sauce provides a savory umami flavor and balances out the spiciness in the curry paste.
  • Vegetables: The recipe calls for carrots, bell peppers, and snap peas, however, you could easily swap the vegetables for almost any fresh or frozen vegetables you have on hand. Broccoli, green beans, baby spinach, sweet potatoes, and zucchini would all work very well.
  • Rice: Serve the curry with a side of white rice for a complete and well-balanced meal. Jasmine rice is suggested, however, basmati rice or any long-grain white or brown rice will work.

Once cooked, this tofu coconut curry keeps well and makes wonderful leftovers; simply allow the curry to cool completely and then store it in an airtight container in the fridge for up to 5 days or in the freezer for up to 3 months.

Best Tofu to Use in Curry

For the best results, be sure to use firm or extra-firm tofu in your curry, as anything softer will not hold its shape and crumble as the curry cooks.

Best Thai Curry Paste to Use

Store-bought curry paste might not be as fresh or fragrant as homemade curry paste but it’s just as good for you. There are many Thai curry paste brands on the market, Thai kitchen being my personal favorite, which is made with whole food ingredients including garlic, lemongrass, kaffir lime peel, chilies, and spices. The difference between red, yellow, and green curry paste is found in the ingredients and the level of spice.

  • Yellow Curry Paste: The mildest of the three, yellow curry paste receives its characteristic yellow hue from turmeric.
  • Green Curry Paste: Considered the most popular curry in Thai cuisines, green curry paste receives its green color from the inclusion of green chilies, fresh coriander, kaffir lime, and fresh Thai basil.
  • Red Curry Paste: Red curry paste is typically spicier than yellow curry paste but milder than green curry paste. The bright red color and heat come from the addition of several types of red chilies.

While this recipe calls for red curry paste, you can use a different color if you prefer.

Note: If you are vegetarian or vegan, be sure to check the label and read the ingredients as some brands of curry paste contain shrimp paste.

Tofu Coconut Curry Recipe

Can you freeze tofu coconut curry?

Yes, tofu curry is freezer-friendly and can be stored in an airtight container in the freezer for up to 3 months. Not only can you store dinner leftovers for a later date, but tofu curry also makes a great meal prep idea for healthy lunches or make-ahead dinners.

How to Reheat Tofu Coconut Curry

Whether you’re reheating leftovers from the fridge or meal prep from the freezer, tofu curry can easily be reheated on the stovetop or in the microwave.

To reheat from the fridge, transfer the curry to a pot on low-medium heat and reheat for 5-7 minutes or until warm.

To reheat from the freezer, allow the curry to thaw completely and then transfer the curry to a pot on low-medium heat and reheat for 5-7 minutes or until warm. If reheating from frozen, transfer the frozen curry to a pot on low heat and warm for 20-30 minutes until thawed and warmed through.

To reheat in the microwave, place the thawed curry in a microwave-proof dish and warm for 1-2 minutes with additional 30-second increments as needed.

More Curry Recipes:

  • Thai Veggie Curry in a Hurry
  • Thai Red Prawn Curry
  • Thai Cod Green Curry
  • Red Lentil Tofu Curry
  • Peanut Tofu Noodles

Lentil Shepherd’s Pie

Published on January 23, 2022 by Stephanie Kay

Filled with mushrooms, lentils, carrots, and green peas and covered with fluffy mashed potatoes, this vegetarian lentil shepherd’s pie is a hearty plant-based meal. Not only does it feed a crowd, but it keeps incredibly well in the fridge or freezer, so you’ll have healthy leftovers for days to come.

Lentil Shepherd's Pie

I think we can all agree that shepherd’s pie is the ultimate comfort food. On a cold fall or winter’s day, there is nothing quite like a stick-to-your-ribs meal like shepherd’s pie. While I love a traditional shepherd’s pie made with ground beef or ground lamb and, to be clear, there is nothing unhealthy about it, using lentils in shepherd’s pie is simply a good way to create a vegetarian shepherd’s pie and a fun way to mix up a traditional dish!

What is the difference between cottage pie and shepherd’s pie?

Shepherd’s pie and cottage pie are savory British casserole dishes made from ground meat and mashed potato topping but the difference between the two is found in the meat. While the names are often used interchangeably, a shepherd’s pie is made with ground lamb, while traditional cottage pie is made from ground beef.

Can you add lentils to shepherd’s pie?

Yes! While a traditional shepherd’s pie is made with ground lamb, if you want to make a vegetarian version, you can use lentils. Lentils are a great source of plant-based protein and a great alternative for ground meat in a shepherd’s pie recipe as their texture resembles that of ground meat once cooked. You can replace 1 pound of ground beef or ground lamb with 1 cup of dry lentils or 2.5 cups of cooked lentils in a shepherd’s pie recipe.

What lentils are best for shepherd’s pie?

Green or brown lentils are best for shepherd’s pie. Green and brown lentils have the best texture and flavor for shepherd’s pie; their mild flavor allows them to absorb the flavors they are cooked in, and their texture more closely resembles ground meat once cooked. Yellow or red lentils have a stronger flavor and are too soft once cooked and will not work well as a replacement for ground meat in a shepherd’s pie recipe.

Ingredients for Lentil Shepherd’s Pie

Here’s what you’ll need to make a shepherd’s pie recipe with lentils.

Lentils: Be sure to use brown lentils or green lentils as they provide the best meat-like texture and flavor.

Potatoes: While you can use any white potato, I recommend using Russet potatoes are their flavor pairs nicely, they have a great fluffy texture once mashed, and they are the more traditional potatoes used in shepherd’s pie. You could also use sweet potatoes instead of white potatoes for the topping. Although they’re not necessarily healthier in any way, sweet potatoes add a touch of sweetness to the dish, which would contrast nicely with the earthy lentil and mushroom flavors.

Mushrooms: Some chopped mushrooms help to enhance the meaty texture and flavor of the dish, feel free to use any type of mushroom or combination of mushrooms you like.

Carrots and Peas: You can use fresh or frozen peas and carrots.

Thyme, Onion, and Garlic: Some aromatics to enhance the flavor of the dish. Although I used dried thyme you could use fresh thyme and a little rosemary would work nicely too.

Vegetable Broth: Cooking the lentils in broth instead of water helps to add an extra depth of flavor. Depending on dietary preferences, beef broth, chicken broth, and mushroom broth would all also work well.

Worcestershire Sauce: A traditional ingredient to enhance the savory and umami flavor. Note, if you follow a vegan diet Worcestershire sauce contains anchovies so you can replace it with vegan Worcestershire sauce, soy sauce, or tamari.

Tomato Paste and Flour: Some essentials to help thicken the gravy and lentil mixture.

How to Make Shepherd’s Pie with Lentils

Making shepherd’s pie with lentils is very similar to making shepherd’s pie with meat, you simply need to ensure the lentils are well seasoned and cooked before layering them into the casserole. Here’s an overview of the steps:

  • Cook the potatoes. Peel and cook the potatoes until they are tender and can easily be pierced with a fork.
  • Cook the veggies. While the potatoes are cooking you can start on the vegetable filling of onion, carrots, mushrooms, garlic, and thyme.
  • Make the lentil filling. Once the veggies are ready, add the flour, tomato paste, Worcestershire sauce, and lentils and cook them with the broth until the lentil are just tender and the broth is thickened.
  • Mash the potato topping. Once the potatoes are cooked and fork tender, mash them with butter, broth, and milk until fluffy and creamy.
  • Layer the shepherd’s pie. In a large casserole dish, layer the bottom with the lentil and mushroom filling and evenly spread the mashed potato mixture over the top.
  • Bake until golden and bubbling. Once prepared, transfer the shepherd’s pie to the oven to bake until the mashed potato top is golden brown, and the lentil filling is just bubbling out the sides. If you want it extra crispy and golden on top, turn on the broiler for 1-2 minutes before removing it from the oven.

Once baked, the lentil shepherd’s pie can be served immediately on its own or with a side of vegetables or a light green salad.

Vegetarian Lentil Shepherd's Pie

How many calories in lentil shepherd’s pie?

The number of calories in a lentil shepherd’s pie depends on the exact recipe made and the portion sizes consumed. This recipe makes a total of 6 servings and contains 463 calories per serving.

Can you freeze lentil shepherd’s pie?

Yes. Lentil shepherd’s pie can be frozen in an airtight container for up to 3 months. You can freeze this recipe directly after it’s been assembled in the casserole dish and bake it when you’re ready to serve or freeze it once it’s baked.

To freeze after assembly, cover the casserole dish tightly with aluminum foil and plastic wrap or a Ziploc bag and transfer it to the freezer for up to 3 months.

To freeze after baking, allow the shepherd’s pie to cool completely, then cover it tightly with aluminum foil and transfer it to the freezer for up to 3 months.

If you have a casserole dish with an airtight lid, that would also be a great option and storage solution to freeze the shepherd’s pie.

Can you reheat lentil shepherd’s pie?

Absolutely! You can reheat leftover lentil shepherd’s pie in the oven or microwave much like you would reheat a meat shepherd’s pie.

To reheat in the oven, preheat the oven to 350°F, place your shepherd’s pie in an oven-proof casserole dish covered with foil, and heat a single portion for 10 minutes or an entire pie for 30-40 minutes until warmed through. To reheat an entire shepherd’s pie from frozen, follow the same instructions but extend the cooking time to 60-90 minutes to ensure the entire shepherd’s pie is completely warmed through.

To reheat in the microwave, place your shepherd’s pie in a microwave-safe dish and warm single portions on high for 2-3 minutes, with additional 30-second increments as needed, until warmed through.

Swaps and Alternatives

Short on time? Swap the dry lentils for canned lentils. Use three 15-ounce cans of lentils instead of 1 cup of dry lentils, and reduce the broth to 1 cup.

Want to make it low-carb? Top the shepherd’s pie with mashed cauliflower instead of mashed potatoes.

Want to make it gluten-free? Use a 1-to-1 gluten-free flour instead of all-purpose flour.

Want to make it dairy-free? Swap the butter and milk in the mashed potatoes for olive oil and unsweetened almond milk.

Want to make it vegan? Use vegan Worcestershire sauce or omit the Worcestershire sauce completely and use soy sauce or tamari instead, and trade the butter and milk in the mashed potatoes for olive oil and unsweetened almond milk.

Honestly, this shepherd’s pie with lentils is absolutely delicious and will convert even the most skeptical eaters. Whether you make it for a family meal, dinner party, Thanksgiving, or Christmas, this recipe is sure to please meat eaters, vegans, and vegetarians alike.

More Vegetarian Lentil Recipes:

  • Mushroom Lentil Loaf
  • Lentil Tacos
  • Lentil Bolognese
  • Vegetarian Lentil Chili
  • Roasted Vegetable and Lentil Soup
  • Previous
  • 1
  • …
  • 26
  • 27
  • 28
  • 29
  • 30
  • …
  • 59
  • Next
Stephanie Kay Nutrition

Hey, I’m Stephanie

– AKA RED –

I’m a nutritionist on a mission to change the way you look at food and teach you how to make real food work for real life in a realistic way.

Get to Know Me

Want A 7-Day Meal Plan?

Download my free 7-day meal plan, complete with a grocery list, for a week’s worth of easy healthy recipes that make real food work for real life.

    • facebook
    • instagram
    • pinterest

    Shop My Cookbooks

    My eCookbooks are filled with quick and easy real food recipes to help make eating well a breeze so you can crush your goals.

    Learn More

    Recipes

    • Dinner
    • Breakfast
    • Meal Prep
    • Snacks

    Nutrition

    • FAQs
    • Tips
    • This vs. That
    • Weight Loss

    Connect

    • Instagram
    • Youtube
    • About
    • Cookbooks

    About Stephanie

    I’m a nutritionist on a mission to change the way you look at food and teach you how to make real food work for real life in a realistic way.

    Learn More

    Site Credits
    2023 © Stephanie Kay Nutrition | Privacy Policy
    To Top